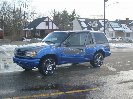
Sub Install 2016 XLT with Premium Radio - 9 Speaker
Bought this vehicle a month or so ago and replaced all front/ rear door speakers with Pioneers so now decided to do a stand alone sub with built in amplifier. Above this post is my older post with the link to that sub at Amazon. I used a Boss 8 gauge wiring kit which is a pretty good deal, the fuse itself used at the battery is worth as much as the kit if bought alone. The sub spec sheet recommends a 10 gauge power wire so this one worked fine. Bought a Line Out Converter you will see in the pics and some misc connectors.
Wiring Kit -
http://www.amazon.com/Audio-Amplifier-Installation-Performance-Interconnect/dp/B000FKP7TY
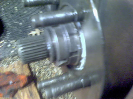
Power - ran thru the firewall just to the left of the steering linkage , easy to get thru , ran a pilot hole , then drilled a bigger hole which accommodated a 3/8" rubber grommet and 8 gauge wire , siliconed that in place after, not seen in this pic- ran wire under drivers side door moldings - cable tied wire in place with black cable sleeve over it in engine compartment
Radio pulled out from dash - blue tap connectors used to bridge Line Out Converter to front speaker wires and subs remote on/off wire to switched 12v DC. Side moldings pull out from dash, be gentle and take your time , rest of the radio/screen molding pulls/pops up and off as well, quick disconnect for wiring harness. I use a plastic molding tool kit (about $10) to remove trim and molding so it doesn't damage the plastic like screwdrivers might. Then bolts secure the radio to dash which you can remove.
Connections at radio - I ran wire down into the dash, thru the center console area , out the rear of it and under the rug to the box marked X which comes off , then over to seat belt hole cut in carpet and up to the speaker. Grounded at seat bolt lug.
Speaker installed between 2nd and 3rd row - 3rd row seats are not impacted by speaker - it fits in crevice , they can extend up over the speaker - the 2nd row seats when in place hold the speaker in place - nice tight fit - after this pic I cleaned up the wiring and put a black sleeve over it all- the carpet on the subwoofer exactly matches the black carpet of the vehicle
The bass control I placed inside the storage area of the center console, it is hidden as once set up I don't need much access to it. Still you can lift the lid reach in and change the bass up or down it if you want. The bass control at the radio also will raise or lower the bass on the sub. You can adjust the gain etc. at the sub as well. The sub turns on and off with the radio. I found the color of the switched DC voltage was light blue with a small purple stripe on it which you can't see clearly in the picture above.
When I get rid of the vehicle if need be I can cut the wires and tape them, take the sub out. I don't use the 3rd row seat area for anything but storage, the sub would get in the way of anyone sitting in those seats though as it would be at their feet.
Really happy with how this has worked out. Took about 4 hours to install the sub start to finish, my son helped out. Now with the Pioneer fronts and this rear sub the system sounds great, very full , rich with lots of bass.