XLTmodifire
Well-Known Member
- Joined
- February 15, 2010
- Messages
- 146
- Reaction score
- 1
- City, State
- Nor*Cal
- Year, Model & Trim Level
- 99' XLT (B4 Autumn Brown)
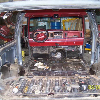
I started on replacing my filthy seat belts, and wanted to give a "how-to". Difficulty scale from 1-10: 2. This is a VERY easy and simple project that makes a huge difference to you and your passenger as you put the seat belts on for each drive you take.
Here are two of the belts side by side. This is also after I cleaned the originals, and prior to cleaning the replacements:

Here are the front belts. First you want to remove the floor bolt:

Then remove the plastic trim piece by giving a little tug:

Next, unsnap the plastic cover, and remove the bolt from the upper half:

Then you will want to remove that plastic cover:

Now unbolt the mechanism:

You will also find a small black screw on the top of it as well:

Now, snake the two upper pieces sideways through the hole of the plastic interior piece:

That is it! Bolt the new one in the exact opposite order, and you are good to go.
Here are two of the belts side by side. This is also after I cleaned the originals, and prior to cleaning the replacements:
Here are the front belts. First you want to remove the floor bolt:
Then remove the plastic trim piece by giving a little tug:
Next, unsnap the plastic cover, and remove the bolt from the upper half:
Then you will want to remove that plastic cover:
Now unbolt the mechanism:
You will also find a small black screw on the top of it as well:
Now, snake the two upper pieces sideways through the hole of the plastic interior piece:
That is it! Bolt the new one in the exact opposite order, and you are good to go.