LD50 1st gen Rusty rocker panel bodywork - rockerpanel replacement | Ford Explorer Forums - Serious Explorations

  • Register Today It's free!

LD50 1st gen Rusty rocker panel bodywork - rockerpanel replacement

Hello fellow explorer enthusiasts!

Got some questions asked while doing my driver`s side rocker panel repair so I decided to write-up the other side. Hope I can help anyone out..

FIRST:

-Disconnect your battery, do not do any welding with your battery connected. Yes you might get away with it, but some components in your electrical system can be damaged by welding voltages. (plus you avoid any battery drain) Some people also disconnect their ECU and Alternator, I have never done this myself and have done quite a bit of welding on the Ex (You make the call)
-Take your doors off, they need to be well out of the way.
-Remove the trim from the lower areas of your door openings and pull the door seals out of the way
-Get some poly (plastic sheet) or your interior will get dirty. Tuck it in your trim where ya can, tape it in, whatever you decide is best.
-Throw a tarp at least over your front window to avoid getting sparks burns on it!

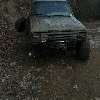
If you got your mojo goin` and you are following along, about an hour has passed and you should now see something like this in your garage:

doors off plastic on.JPG


Join the Elite Explorers for $20 each year.
Elite Explorer members see no advertisements, no banner ads, no double underlined links,.
Add an avatar, upload photo attachments, and more!
.


watching...


The Rust Damage

Grab a screwdriver and stab your rusty rocker like you want to, let`s see what`s what. If you have a curved o-ring puller pull the worst of the rust out.
Once you`ve gutted it you will have a big `ol rust pile at your feet, and might see something like this:

the damage 1.JPG


the damage 2.JPG


The Replacement Parts

Now, you have an option here, you can get the entire rocker panel, which includes the inner metal, OR if you still have at least SOME good inner metal, you can choose the method I used, and which you will see played out in this thread. If you get the entire rocker, you may not want to continue, my method may not appeal to streeters, or overly ****, obsessed Explorer owners. My rig is strictly for off-road duty now, BUT I have to admit, the driver`s side turned out nice.

left rocker done.JPG


Using my method?

OKAY

If you haven`t already, get down to the local parts store and get some replacement parts. If you don`t have them by now, what are you waiting for?

You will need:
-A replacement rocker panel
-A replacement dog-leg

(you might want to get the other side too, cuz I`ve never seen an Ex rust out on just one side)

ALSO:

You need some flat metal of same thickness. In my case I ordered a generic, or universal door panel sheet.
It was called:
"universal door bottom with L lip" (60"X11.5")
It provides us with extra metal to use in the repair process ( both sides ).

I know some of you will ask where I got them, who I ordered from etc. I am in Canada, so My US friends most likely won`t have the same supplier.

My Countrymen can get them from "Cross Canada Replacement Parts and Accessories"
-These were the numbers associated with the parts in the 2005 catalogue, with no indication of which side they were for, so you`d have to ask.

584-41 Dog Leg extension rear 4-door
584-04 Rocker panel 4 door
960-12 Universal door bottom with L lip

the replacement parts.JPG


Determining the cuts

A rule of bodywork is don`t cut too much out so that years down the road, you cannot replace the same area with the same replacement part.
If you`re with me, we still have the luxury of replacing the whole rocker next time, so we won`t be lazy, we`ll replace all we can.

Get yourself an angle grinder and some zip-cut disks. An angle grinder is much more maneuverable for some of the cutting. Trust me, I don`t want to hear sawz-alls mentioned in here.

What I`m doing first is a half-rough cut job, starting at the front and working my way back. The replacement rocker is too long where it reaches to the door-jambs, the front being 24" long.
Make some cut marks in felt pen where the jamb is flat, the replacement is all flat, and the jambs curve up at each end, in case you didn`t notice. In my case I am cutting 21 inches out of my jamb. later I will trim the replacement to 22", because the welds here will be lap welds as you`ll see later. There is many places where you will want to overlap like this, study the photos to be sure.

DON`T CUT YET, LOOK AT THE PIC:

the cuttings 1.JPG


zip cut.JPG


Cutting

Where the rubber door seal sits is the joining of two pieces of metal, which is spot welded, this is where the zip cut disk is invaluable. You need to cut only the outside metal, and you will split the spot welds with an air chisel. Don`t have an air chisel? Better get one now, sorry, it`s the best way.

air chisel 1.JPG


Cutting

You might need to fiddle around a little, pull up the piece, get the air chisel in from below to open up the seam, etc.

cutting process 1.JPG


At first I thought I might salvage this little section of inner metal, but it was too rusty, so I ended up cutting it off anyway:

cutting process 2.JPG


Did you get rust damage in the wiring channel? My wiring channel is falling apart, my rockers are perfectly fine except for a hole right below the door sill.


Cutting

Now that this part is off, this is what I am gunna do. I will replace the rusted piece of inner rocker panel in two sections. Mostly because my extra piece of metal is/was not long enough, and because I need to replace more metal at the dog leg than I do at the front, you`ll see what I mean.
Anyway, decide how much is salvagable in the forward area you decide to replace. Draw a line, it doesn`t have to be perfectly straight. leave some reference material so when you switch to the front, you know how low to go with the replacement metal. Again, it is only the underside lip, it just needs to be close.

cutting process 3.JPG


Replacement metal

We still have to buff the rust away from this area, and get some weld through primer on, but we can start getting our replacement metal together for the inner rocker. It will be lap welded something like this, probably 1/2 inch overlap:

metal replacement 1.JPG


metal replacement 2.JPG


Did you get rust damage in the wiring channel? My wiring channel is falling apart, my rockers are perfectly fine except for a hole right below the door sill.

No, my wiring channel is fine, it`s the lower rocker that is damaged.


Buffing

You need a buffer wheel for your angle grinder and hopefully an air dremel with small buffer attachment.
The Dremel I got in a kit with the air chisel and an impact gun for 100 bucks at Costco. While the impact gun turned out to be of inferior quality, the dremel and chisel are quite useful.

buffers.JPG


Buff at least till the rust is gone, and most of the paint is gone from your weld areas, A little original primer and/or paint here and there is no big deal, IMO.

I`m still just cleaning up the front part for now, as you can see.
Also, use a grinder to smooth down the spot weld points, which are jagged from the chisel.
Last, take a pair of pliers and straighten up the metal in the viscinity of the spot welds, it will be a tad wavy after chiseling as well.

buffing 1.JPG


buffing 2.JPG


Anywhere that is buffed gets a coat of weld through primer.
Don`t do anything to the cavity in the front-most rocker section that is left yet, don`t spray primer in there either.

primer 1.JPG


subscribing. looks good so far and i need to do this soon..


Replacement

Now, using my zip-disk I`ve cut a replacement part out, with about .5" overlap on the back side. Then It should be primed with weld through primer, especially where it overlaps.

replacement.JPG


Join the Elite Explorers for $20 each year.
Elite Explorer members see no advertisements, no banner ads, no double underlined links,.
Add an avatar, upload photo attachments, and more!
.


Welding

For welding, I am using an 80 amp, 120 volt wire feed (flux core) welder. I borrowed this from my neighbor, actually.
I use the low setting (has low or high)
And slow setting for wire (has slow or fast)

welder.JPG


Back
Top