My 2WD 1998 XLT Project AGAIN (prerunner) | Page 2 | Ford Explorer Forums - Serious Explorations

  • Register Today It's free!

My 2WD 1998 XLT Project AGAIN (prerunner)

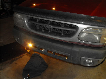
Only picture i have of the Explorer is one of it being stuck.
Bottom one is one of the last ones taken of it moving since i started building it again. Which is on 35x12.5x15 wheels/tires at the time

20180505_101941.jpg


Everything that needs to be done since last picture:

Steering:
Swing steer
Steering box
Steeringwheel

Front suspension:
Coilovers
Bypasses
Bumpstops
Beam pivots
4x4 beam ends
Limitor strap adjusters
New radius arms (lighter)

Engine Bay Area:
Engine cage/shock mounts
Brakes
Radiator
Crossmember
Bumper
Intake relocate

All Around:
Cage
Seats for 3
Harness mounts
Wheel well
Plexiglas rear windows (3)
Fuel cell
Gas lines
Tire rack
Wheels
New in cab liner
Rear glass
Tool mounts
Doors
Dash
Radio
S
Sound system
AC fixes

Rear Suspension:
Springs
Shacjles
U-bolt delete
Hangers
Bump stops
Shock hoop/ wheel well
Brakes
Bypasses
Notched frame
Drive shaft
Braided brake lines

20180517_103657.jpg


Join the Elite Explorers for $20 each year.
Elite Explorer members see no advertisements, no banner ads, no double underlined links,.
Add an avatar, upload photo attachments, and more!
.


Comparison of when it had a spindle lift with torsion bars twisted all the way. The rear had a lift shackle (Ruffstuff Specislties) and SOA.

Bottom picture is when I first was able to get the beams on with homemade brackets and very mild knowledge of long travel.

Both are on 35s top picture is Dunlop Mud Rovers and bottom is General Grabbers

20180505_101735.jpg


20180505_101825.jpg


After hearing about some shady stuff King shocks has done from some very reliable mechanics for offroad racing, I ended up going with SwayAway Race Runners 2.5x14

20180517_103610.jpg


After first time of getting steering hoocked up, i was finding out how far my geometry was off and what needed to be fixed.
I had no idea what i was doing, nothing technically broke while having this set up besides radius arms. Beams were upside down because camber was so bad. Ride height would be rediculously low with the mounts i was using.

20180505_101813.jpg


Had bad steering bump so the pivot points of the beams and steering didnt add up. But it did its job for a while.

20180505_101801.jpg


20180505_101837.jpg


Used forklift at work to see how much travel i had. The rear was limiting me since all it had was SOA with stock Explorer leafs

20180505_101847.jpg


20180517_103634.jpg


20180517_103743.jpg


Ended up ditching the old beams and radius arms after hitting a tree and radius arm tore. so I made some of my own. I ran with the other beams for about a year/ year and a half.


20180505_102051.jpg


20180505_102115.jpg


20180517_103708.jpg


20180517_103717.jpg


Purchased a F-150 Extreme fiberglass conversion from FiberWerX. Had a few problems with it but made it work

20180505_101923.jpg


Ended up having to dove nose the core support for head light to be put in

20180505_101901.jpg


20180505_101953.jpg


20180505_102004.jpg


View attachment 158543

20180514_165651.jpg


20180519_153645.jpg


Was able to build the radius arms and beams out of 1.75"x0.125" DOM tubing and 3/16" plating.
Used 1/2" plating to weld the tubing to the D44 ends.

20180505_102127.jpg


The radius arm mounts were welded by Alex Kiss from Fierce Offroad.
All heims are from Ruffstuff Specialties which are 1.25"

20180505_102041.jpg


Better angle of the plates welded on the sides of beams and radius arms.
Tubing: 1.75"x0.125"
Plating: 3/16"

20180505_102136.jpg


Also made some new leaf spring top plates since I relocated rear shocks used 3/8" plating

20180517_103621.jpg


Started putting them on and noticed i needed new beam mounts (made my own) but decided to use them for the time

20180505_102148.jpg


20180505_102157.jpg


The Explorer has left the ground more than I can count...this is however the only image I have of it, about 3" off the ground

20180517_103733.jpg


After welding up all the suspension, felt comfortable enough to weld up a bumper since the fiberglass was so open.

20180505_102215.jpg


20180505_102224.jpg


20180505_102233.jpg


20180505_102323.jpg


Started putting F-150 headlights in to make it look more complete

20180505_102333.jpg


20180505_102408.jpg


20180514_165712.jpg


Picture of rear bumper brackets 3/8" plating

20180517_103645.jpg


The Explorer started feeling alot better at higher speeds offroad since geometry was alot closer. The y-steer was still restricting me.

20180505_102343.jpg


20180505_102351.jpg


20180505_102400.jpg


Was time to start building rear end so i removed coilovers and bumpstops since it would be sitting for so long.

20180505_102416.jpg


20180505_102426.jpg


Started realizing i would have to completely remove the wheel wells for the up travel of 37s
Got some junk Nittos for mock up

20180505_102438.jpg


The 35s are 35x12.5x15 Dunlop Mud Rovers on some steel 15x10 D-ring style wheels that ive used for spares so the 35 Generals didnt get flat spots
Bought some 37x12.5x17 General Grabber X3 and 17x10 Method Racing bead locks

20180505_102456.jpg


20180517_103806.jpg


After putting on the 37s i realized i had to remove the entire core support and had to build an engine cage while i was at it

Screenshot_20170707-145028.png


IMG_20180417_093043_926.jpg


Removed everything from the firewall forward to start cage and gutted inside for internal cage

20180505_102507.jpg


IMG_20171217_133118_293.jpg


20180311_103805.jpg


20180505_114202.jpg


20180505_114212.jpg


Cut the wheel weels from the rear door to 4" from tail light. Cut all the way up to the window support, will be replacing with plexiglas

20180505_113750.jpg


20180505_113757.jpg


I dont have any "before" pictures of the Ford 9". I pulled it from a early F-150. It's a 31 spline big bearing 9"
All the upgrades were purchased from Fierce Offroad and are mainly RuffStuff Specialties products.
Ford 9" Backbone Truss
3/4 ton disk brake swap
Braided brake lines
5.13 ring and pinion
Locker
Pinion guard
Shock tabs
Brake line tabs
Limiter strap tabs
5/8" wheel studs

20180517_103756.jpg


Florida has horrible humidity so after two weeks, it was completely covered in surface rust

20180517_103838.jpg


20180519_153300.jpg


Swing steer is a W.I.Y. kit from Baker Fabrications
Using 7/8 heims for steering, kept bending 5/8"

20180517_103828.jpg


Since I've beamed the explorer, ive gone threw a few different steering setups.
•3/4 ton Tre steer with tie rods (which broke countless times)
•Heims with only the Tre steer "y split"
•Heims with solid steel 1.75" thick for "y split" which never broke. Just bent 5/8" bolts


Since I want to keep my hatch on the Explorer I made a different kind of tire carrier. It's off to the side of the hatch but not so low that it will be my bottoming out point (still bumper)
Used 1.75"x0.125" for bent tubing and 1.75"x0.25" for straight tubes (welding points) and a solid piece of 1.5" steel tubing about 11" long for the carrier to pivot on.
Had three full grown adults sitting on it while lightly bouncing to make sure I wouldn't lose my tires when offroading

20180517_103815.jpg


Join the Elite Explorers for $20 each year.
Elite Explorer members see no advertisements, no banner ads, no double underlined links,.
Add an avatar, upload photo attachments, and more!
.


On the left is a 5/8" bolt from my steering that I was bending everyother time out wheeling. (1/2" bolt for a straight line comparison)
This is what happens when your geometry is off

20180520_130838.jpg


Back
Top