Need input/advice whether I should attempt Timing Chain Replacement | Page 3 | Ford Explorer Forums - Serious Explorations

  • Register Today It's free!

Need input/advice whether I should attempt Timing Chain Replacement


Join the Elite Explorers for $20 each year.
Elite Explorer members see no advertisements, no banner ads, no double underlined links,.
Add an avatar, upload photo attachments, and more!
.


Establishing TDC on Compression Stroke

I know StreetRod has documented this time and time again, but I need to ask because I will doubt myself until I get a second opinion.

As far as the pictures go, it appears to me I have found TDC on the Compression Stroke; can someone confirm?

On a side note, while turning the crank (clockwise, although I had to turn it counterclockwise to untangle a rag I had over the cams), the left (front) camshaft timing chain guide would jump every so often, like the tension on the chain was changing quite a bit. Is this just because there is no oil pressure to help the tensioner do it's job? I know getting under the timing cover will answer most if not all my questions, I just thought I'd point it out.

Thanks
 

Attachments

  • IMG_4486.JPG
    IMG_4486.JPG
    133 KB · Views: 232
  • IMG_4487.JPG
    IMG_4487.JPG
    116.8 KB · Views: 220
  • IMG_4488.JPG
    IMG_4488.JPG
    96.2 KB · Views: 201


Bank 1 & Bank 2

The first two photos of the passenger side look correct. I can't tell if the TDC pointer is aligned with the "0" or the "l" next to it. The "l" is the timing mark. What about the driver side bank that contains cylinder 1? It should look like below if the camshaft timing has not been lost.
cam1.jpg


Drivers Side Cam Timing

The second picture in the above post is actually the drivers side showing the "nub". But I took a picture of the rear of the drivers side to clarify. It looks ok to me. It's a little tight in there for a photo, but putting the allen wrench in both ways shows the same or nearly the same gap between the bottom of the wrench and head on each sides. Additional picture below.

I currently have the crankshaft position pointer lined up with the "0". So I'll have to back it off a little. Is it ok to turn the crank counter-clockwise a bit, or should I go around two more revolutions?

Thank you,

Chris
 

Attachments

  • IMG_4494.JPG
    IMG_4494.JPG
    108 KB · Views: 227
  • IMG_4502.jpg
    IMG_4502.jpg
    89 KB · Views: 210


no need for two rotations

There is no need for two crankshaft clockwise rotations to avoid a slight counter-clockwise rotation. I suspect the main reason to avoid counter-clockwise rotations is the potential to loosen a retaining bolt. The engineers designed the system so bolts would tighten when the engine is running.


There is no need for two crankshaft clockwise rotations to avoid a slight counter-clockwise rotation. I suspect the main reason to avoid counter-clockwise rotations is the potential to loosen a retaining bolt. The engineers designed the system so bolts would tighten when the engine is running.

Ok, thanks StreetRod. Today kind of got away from me, so hopefully tomorrow I can make some progress.

Chris


Nothing in the pan...

Removed the oil pan, and I've got nothing. No plastic pieces, notta. Pickup screen looks ok. (See pictures)

So, as this point I'm starting to doubt my initial diagnosis, and before I get into the more complicated part of this repair, I need to back up and document how I got to this point and see if the repair I'm about to do is correct.

- Shortly after I bought the truck in 2012, I notice the startup rattle. Came here to find the threads talking about the "death rattle" and the timing chain issues of the 4.0.

- Twice I took the serpentine belt off and started the truck to try and eliminate the fan/pulley system as the culprit. The first time it did not make the noise. However, not satisfied, I tried it again on a later date and it DID make the startup rattle.

- As it was intermittent, and seemed only on cold starts, I let it go for the time being as this isn't my daily driver and timing chain issues were nothing I've ever diagnosed or repaired before.

- Fast forward to this year, I start to get more serious about it as it seemed more often than not, it would have the start up rattle, even sometimes on warm starts.

- Coming back here, I find StreetRod's extensive write-ups on the subject of the 4.0 timing chain issues.

- Finding the information on the tensioners for the left and right camshaft timing guides/chains, I try this as a repair hoping to solve the problem.

- Two new tensioners later; other than a horrible rattle upon startup (guessing because there was no oil in the tensioners), it seemed to help.

- A few days later, the startup rattle returns. A day after that, it persists beyond the startup and I hear it while I'm driving, and when I get to town. It had NEVER made any sort of rattle beyond startup before I replaced the tensioners. It's so loud, I come home for fear the truck will implode. When I got home, it was quiet as could be. I park it.

- A couple days later, I start up the truck. At idle, the rattle stays consistent and seems to be clearly coming from the front of the driver side valve cover.

- I had started the truck a handful of times after that. Once I had no rattle, but most the time, a rattle was present and did not go away.

- So I started this post, deciding that some part of the timing chain system has failed and a major repair was needed. Finally getting the courage to attempt this repair, I have arrived here.

So, not finding any plastic pieces in oil pan, does this mean the timing components are ok?

Should I continue further into the engine?

Did I get crappy replacement tensioner (I wish I had tried putting the old one to see if anything changed, but I didn't)? Or is the metallic o-ring between the tensioner and the block preventing oil from entering the tensioner?

Input appreciated, thank you.

Chris
 

Attachments

  • IMG_4506.jpg
    IMG_4506.jpg
    67.4 KB · Views: 199
  • IMG_4508.jpg
    IMG_4508.jpg
    72.7 KB · Views: 190


nothing in oil pan

Finding nothing in your oil pan is a good sign that neither the front or rear cassettes are broken which you've also determined by removing the valve covers. I suggest that you use an allen wrench or a bent wire to check the inside perimeter of the oil tube pickup screen for particles. I had a lot of pieces in the screen that I couldn't see.

I looked thru your previous posts and saw no mention of the odometer reading. Even though the primary chain tensioner was significantly improved in the 2002 models it still eventually fails. My old style failed but all parts remained in place. It didn't look broken but there just wasn't any tension on the chain. Also, I don't recall reading that the balance shaft chain tensioner has ever been improved. It frequently fails at 150K miles and a sloppy balance shaft chain can make quite a rattle. Unfortunately, the block cradle must be removed to replace the entire tensioner because the two retaining bolts are vertical and inaccessible with the cradle in place.
BlncShft.jpg

Some members just cut the chain and remove it rather than go to the trouble to remove the block cradle.

I suggest that you continue your exploration and remove the front cover. Then you will be able to determine if the "finger" on the front cassette guide is broken,
LftGuide.jpg

if the primary chain tensioner is broken,
PrimTens.jpg

or if the balance shaft chain tensioner is broken. You won't need the timing tool kit or have to time the camshafts if you replace the primary or balance shaft chain tensioner.


Ok, thanks for the reply StreetRod. I will continue my exploration. I'll also check the oil tube pickup too.

The truck has about 160k on it right now. Can't remember exactly and the battery is disconnected, but that's close.

Chris


Trouble with puller

I was able to remove the bolt for the harmonic balancer, but I am having a problem with the puller.

With the balancer bolt partially threaded in, the two bolts that attach to the balancer through the puller will not thread. The ones in the kit were indeed too short, so I went and bought two M8-1.25 100mm bolts, but they won't thread in. They start briefly, but stop, and it's not enough to use the puller (the bolts just pop out). It's almost as though it's the wrong type thread (course vs. fine).

Edit: I did check all four holes in the balancer too. Two seem threaded (right and left), the bottom one goes all the way through, and the top one doesn't seem to do anything.

Any ideas?

Thanks,

Chris


old or new style balancer?

M8-1.25 are the correct thread for the old style balancer.
HarmBalancer1.jpg

At some year Ford replaced the balancer on the 3rd generation vehicles and the Sport Trac.
NewBalancer.jpg

I don't know what threads fit the new one. A lot of old pullers came with a collection of SAE bolts. Maybe a previous owner used the wrong bolts and mangled the threads. Or maybe they're just rusted. Try spraying some rust penetrator into the threads. Some balancers have multiple holes but only one pair is threaded. Make sure you're using the correct holes.


A lot of old pullers came with a collection of SAE bolts. Maybe a previous owner used the wrong bolts and mangled the threads. Or maybe they're just rusted. Try spraying some rust penetrator into the threads. Some balancers have multiple holes but only one pair is threaded. Make sure you're using the correct holes.

I have the old style like in the first picture. I am using the two threaded holes. I'll hose them down and give it another shot.

Chris


cutting oil

Use the rust penetrator like cutting oil for a tap. Don't install the puller until you chase the threads. Work the bolts in a little and then back them out, spray the holes, clean bolt threads and repeat. Do not use much force or the threads will strip and you'll have a real problem.


Use the rust penetrator like cutting oil for a tap. Don't install the puller until you chase the threads. Work the bolts in a little and then back them out, spray the holes, clean bolt threads and repeat. Do not use much force or the threads will strip and you'll have a real problem.

Alright. Yea, I just used some penetrating oil and tried to screw them in. Took them back out and they are being cross-threaded, so maybe someone else used the wrong bolts on the balancer some time ago. They will go in, but yea, I'll work them in little by little.

Thanks for the help.


I'm only getting about 1/4" of threads in there right now, and it gets pretty tight, so much it turns the crank. Anymore than that, and I'm afraid I'll snap off the bolts.

You can see from the picture, the bottom bolt is experiencing some cross-threading, the top one not so much, but they only go in about the same amount.

I'll let it sit overnight and give it a go in the morning.

Chris
 

Attachments

  • IMG_4513.jpg
    IMG_4513.jpg
    59.6 KB · Views: 173


do you have a tap?

If you don't have a tap to chase the threads you can get some shorter (less expensive) bolts and modify them by filing a tapered notch on opposite sides of the bolt with the side edge of a file. The notch simulates a tap providing space for the cuttings to go. I would not use the lower bolt again in the hole. Buy a replacement and don't use the long bolts until you have chased the threads with short bolts. Or you could buy a good quality M8-1.25 tap. Don't purchase one of those cheap sets from Harbor Freight. I bought one of those to chase a couple threads on my 4 valve 4.6L. They were just junk. The threads weren't deep enough to allow the shaft to enter the hole. Instead I modified a couple high quality bolts (only needed two threads sizes) and returned the tap set for a full refund.


One step closer....

Thank you for the additional information last night StreetRod, it came in handy today.

I had decided to go ahead and get a tap and die set from Sears. I figured it's something I would probably use in the future. Got it home and tried it tonight. Guess what? The tap is too short. F...

And I thank you again for this tip StreetRod, because I believe it helped and I would've never thought of it by myself. When I was out, I bought two more 8mm bolts, but at a higher grade. I ended up cutting notches in the threads, and after using a little motor oil and putting them in and taking them out a few times, I was able to get them deeper into the balancer; about 1/2" (although after re-reading, I should've used cheap bolts for that task and saved the good ones for the mounting, but oh well, it worked).

So after mounting the puller, I ran into a problem where the puller bolt was turning the balancer bolt and tightening it up. And even after I snugged the puller bolt against the mounting bolt and then tightened the other two puller bolts, it still wasn't coming off (there is also VERY little room to swing a hammer in there when trying to hit the puller). In a minor stroke of genius (in my opinion), I grabbed the 3/8" x 5.5" bolt I bought to assist in the final pulling of the balancer, and what do you know, the threaded portion fit in the hollow portion of the puller bolt. So I lopped off the head of that bolt, put it in the crankshaft, and low and behold, I was able to pull the balancer off!! Thank god, because I was ready to throw it the towel tonight...

Anyway, I'm one step closer. I apologize for the lack of progress, but I'm also trying to get ready for family visiting in a couple days. Hoping tomorrow I can get the cover off and see what is going on inside.

Question? Should I replace the Harmonic Balancer? I see where it's a known problem with this engine. Mine doesn't look too bad, other than maybe some minor dry rot in the front portion of the rubber insulator. I can get a picture later.

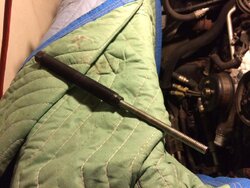
Pics below of the removed balancer, and my minor stroke of genius (sorry, I have to brag. Little moments of success like that, help me with projects like this ;) )
 

Attachments

  • IMG_4521.jpg
    IMG_4521.jpg
    67.7 KB · Views: 164
  • IMG_4520.jpg
    IMG_4520.jpg
    69.5 KB · Views: 179


balancer alignment?

Congratulations on your ingenuity! Did your serpentine belt pulleys line up before you removed the balancer? It may just be the photo but your pulley seems to be more forward of the hub than I remember as normal. Some people try to remove a balancer with a gear puller. Check the rear of the pulley for 3 marks spaced 120 degrees apart or 2 marks 180 degrees apart. A gear puller puts excess stress on the damping material and often separates the pulley from the hub sliding it forward.


Harmonic Balancer

I don't see any marks on the back of the pulley at all. I've attached some pictures...

To my knowledge, all the pulleys lined up previously.

I just figure since it's off, maybe I should replace it now than rather have to worry about it down the road. Although I understand they aren't cheap.

Chris
 

Attachments

  • IMG_4522.jpg
    IMG_4522.jpg
    51.8 KB · Views: 171
  • IMG_4523.jpg
    IMG_4523.jpg
    55.1 KB · Views: 163
  • IMG_4524.jpg
    IMG_4524.jpg
    53.1 KB · Views: 181
  • IMG_4525.jpg
    IMG_4525.jpg
    66.7 KB · Views: 163


Join the Elite Explorers for $20 each year.
Elite Explorer members see no advertisements, no banner ads, no double underlined links,.
Add an avatar, upload photo attachments, and more!
.


looks good

The pulley looks to be centered relative to the cushioning material which appears to be in good condition. If it were me and the threads are in good enough condition to pull the pulley at least one more time I'd reuse it.


Back
Top