PLAN B Build | Page 9 | Ford Explorer Forums - Serious Explorations

  • Register Today It's free!

PLAN B Build

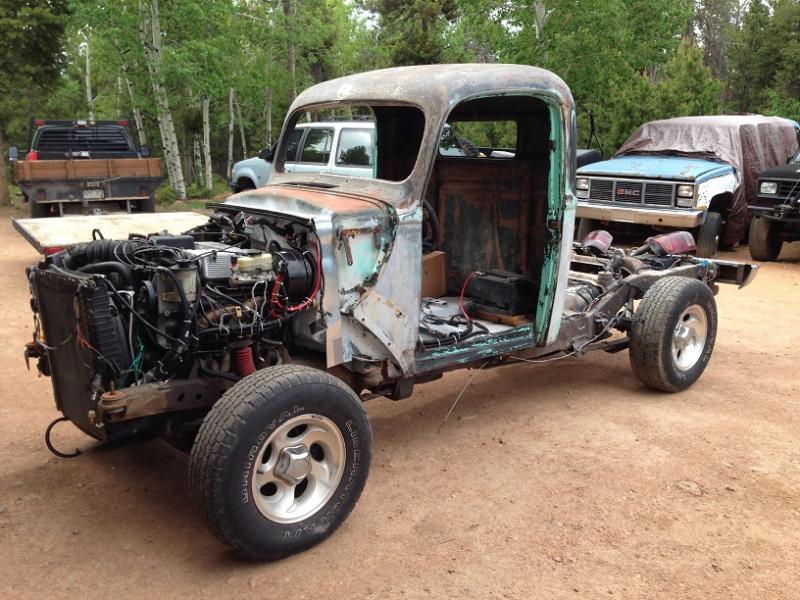
Some of you may know, and some may have suspected, but I'm starting a new project and it starts with a truck you all will recognize.

I picked up R.J.'s Navajo today. She is a little tired and was facing being parted out, but now will start a new chapter, a very different chapter. I give you Plan B.

(dead links)

So let's start off as to why "Plan B"? Well, it has multiple meanings.

  • It starts off as I really wanted a early Bronco. I first learned to drive on Zukmans '71 Bronco he had years ago. But myself owning a early Bronco was not going to happen. There just way to ridiculous priced these days.:eek: So this is My Plan B.
  • JP is not going anywhere, I really just wanted to to do another build and JP is...well, JP!. It works, but it has a following and presence that really can't be changed....it's almost become, dare I say, an Icon of this forum. :jp: So this is My Plan B
  • The Navajo was on it's death bed. R.J. himself had already give it a time of death... :dead: So this is it's Plan B.....or maybe for it C...But for my plan, we'll say B :D
So what does the Plan B build look like? You'll have to watch and find out. But I'll give you some teasers..

  • Starting Base : 1991 Mazda Navajo JX 4x4
  • SOHC - donor: 2000 Explorer Sport 4x2 103k
  • 5R55E - donor: 2008 Ranger FX4 45k
  • 1354 manual - still looking for
  • :sawzall: to smell the fresh air;)
  • Super Duty Axles - '99 F350 4x4 PSD
  • 40's - settling for 37's now
  • Grabber Blue
I think that should be enough to entice you all for now...

This is My Plan B


Join the Elite Explorers for $20 each year.
Elite Explorer members see no advertisements, no banner ads, no double underlined links,.
Add an avatar, upload photo attachments, and more!
.


wow and here i thought you were waving goodbye to me!

Well, you could potentially come back, whereas the donor was on a one-way trip.


Join the Elite Explorers for $20 each year.
Elite Explorer members see no advertisements, no banner ads, no double underlined links,.
Add an avatar, upload photo attachments, and more!
.


.....And now back to your regularly scheduled build ...

Because I have been "borrowing " parts from my build to get my new DD reliable, I ordered off EBay a new cluster from a '01 Sport Trac which has the white gauges, which should look really nice in the Navajo.

I'm working on getting the new motor mounts all set in place, and things are kinda being a pain, because the original 28 year old mounts had a lot of flex in them. The new ones don't.


Well back to this project now...finally:rolleyes:

got a lot done over the weekend, unfortunately my phone is being a pain with pictures, so you'll all have to wait for that.

Got the new firewall in and the 2nd gen HVAC has been test fitted and fits perfect. Some notes however...

  • A/C is out. This is possible, but starting to become a pain. A/C pump, fits fine, but the drier is in the way of the engine cage, as well as some of the lines. Also there is no way 2nd gen radiators, or the condenser will ever fit in a 1st gen. 2nd Gen's are massive and this id why there is a hump in the core support on 2nd gen's So I'd have to source a smaller A/C condenser. This is something that could be done latter if really needed.
  • Blower Motor: I had to move the temperature sensor over in this and make a cover plate for the old hole. This was also interfering with the engine cage.
  • We all have cracks: One thing I really learned here is, I knew the Navajo had cracks in the firewall on the passenger side of the transmission hump, but what I learned is it seems to be normal. The donor also had a crack in the same exact place, only not as bad. I'll have to check JP and even my daily driver, but I'm guessing they will both have cracks too. I welded these up on both pieces, as they overlap.
I just have to make sure the firewall is complete, and throw a coat of paint on it, and then we move to installing the HVAC unit, and start to run wiring back through the entire truck. This should go fast, as it all one piece. Then the motor can go back in for the last time.....hopefully.:dunno:


FYI, reinforce the firewall at the gas pedal. The three spot welds through the pedal bracket will eventually stress crack. I've fixed my 99 truck when I reconstructed it, and my 98 Limited about a month ago.

It's easy to do with access to the firewall, just drill two holes, through about where the outer spot welds are. Install a short bolt and nut, those with the largest integral washers you can find. That will support the bracket much better than the spot welds.

funny you say that.. This happen to JP years ago. I was actually on the freeway or something with the pedal broke off the firewall. Talk about freaking out:eek: :frustrated::censored: it's funny now though :laugh:


Now you guys have got me paranoid and I need to check mine:eek:


I checked my pedal mounts when I was repairing the fire damage. :thumbsup: I think the first gen's have a different mounting for the pedal. I don't really remember, but everything looked solid.
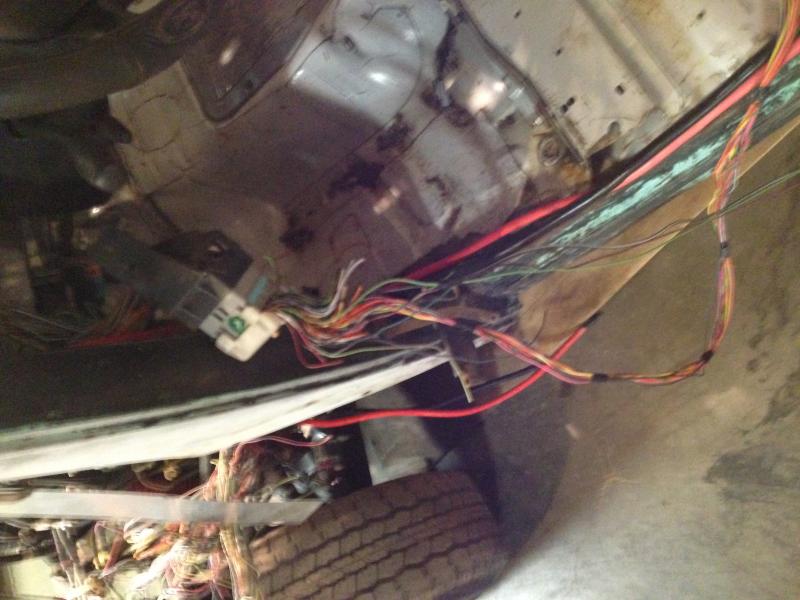
My firewall and floor seam split mostly on passenger side but all the way over the hump to the driver side, many years ago. I stitched the section too wide to weld back up with sections of 1"x1/8" flat bar, welded the ends to keep it from growing and filled the gap with sealant. The cage went in soon after so I think it was the combo of my repairs and the cage that stopped it from getting wider.


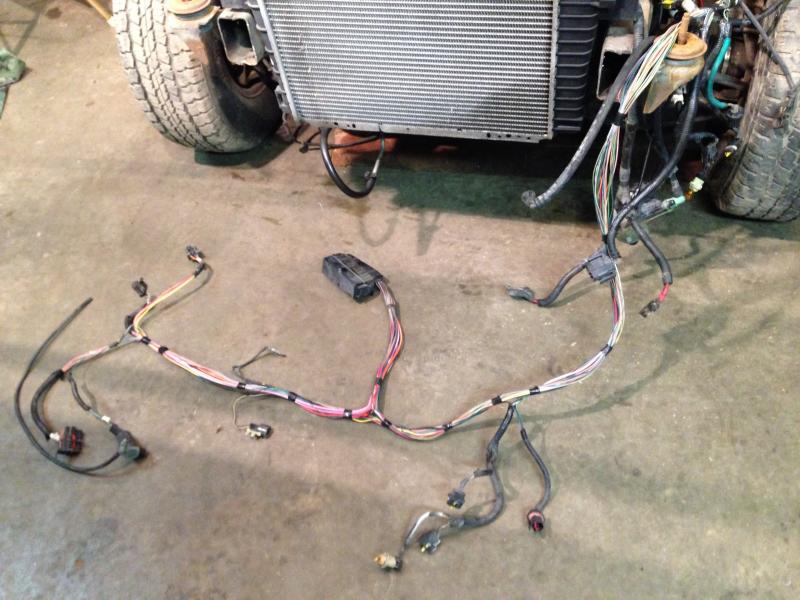
Lots of progress here... wiring is going back in...but I was curious what others have done about unneeded wiring? I have a lot of plugs I just don't need. ABS sensors, Air bag sensors, A/C.....etc. I don't want to just leave them open, and cause a short from water or something later.... however JP has had a tcase plug sitting open for over 10 years with no issues.

Also I still have no idea where I'm putting the ECU. I did find 24” extensions for relocating the ECU but there not cheap. Around $200 bucks.:frown:

Thoughts?


I pulled the wiring harnesses apart when I deleted the ABS and removed all of the wiring, connectors and crap. It took a while, but I figured I pulled about 50 wires out of the engine harness. I also pulled the ABS relays out of the engine fuse box. Most of the internal wiring is open wrapped so pulling wiring out should be easy. You could also leave some in case you want to use it later for some accessory. Between the donor and my Explorer, I have a large box of OEM wiring in all different lengths, and a complete engine wiring harness.


build your own extension.......friend of mine bought one of those extensions for his 86 BII gone 5.0 project and every wire was white between PCM plugs. It worked OKAY but we did have to go back and add some wires for the VSS sensor and a couple of others had to move around. He ended up paying like $350 for it.....
When I did my BII I built my own extension, solder and extend one wire at a time....12 pack of beer and a sore back....one evening of soldering and it was done.

I stripped EVERYTHING from an entire 97 truck that was not needed in an effort to convert it to a 1940 Ford F1
Not one wire, relay or fuse was left that was not needed when I was done...

The wiring harness was awesome..... much much smaller and stripped the the basics
I was able to relocate all the power distribution and relay boxes to the drivers kick panel leaving not much under the hood side of things.

Let me post some pics, not sure how much of this you want to see or is helpful but Ill post it up. I have all my notes from that truck too

171_100941_270000003.jpg


171_100941_260000002.jpg


Pile

171_100942_500000000.jpg


All cut wires were eventually un pinned of course
171_100944_280000000.jpg


171_100944_290000002.jpg


171_100944_280000001.jpg


171_100944_300000004.jpg


Drivers kick panel when done:
171_100947_240000000.jpg


171_100953_430000000.jpg


If you have the dash still out, you could cut the hole in the firewall and install the OEM sleeve that is in the 95-01 trucks. I didn't consider that seriously for my 93/99 project, but I would have done it if I kept the 93 firewall etc.


If you have the dash still out, you could cut the hole in the firewall and install the OEM sleeve that is in the 95-01 trucks. I didn't consider that seriously for my 93/99 project, but I would have done it if I kept the 93 firewall etc.


I have the sleeve from the '00 and there is room on the inside, but under the hood the upper firewall is shaped a bit different. Not sure it will work.... I'm still thinking on it. I was actually going to see if there is room around the gas pedal or maybe on top of the trans tunnel inside.

Also thought about inside the the a/c evaporator core housing...since it's empty now. :dunno:

What, no AC, well that would work if it's not the part right next to the exhaust manifold. The PCM harness is fairly short, so there's limited choices besides lengthening a ton of wires.


Looking at the firewall there is definitely room in between the gas pedal and hvac. This seems the most optimal place for the ecu.

The dash will be removable for future access. Currently I had to have the windshield removed to get the dash out because of the roll cage. You just can't get to the dash bolts. So when reinstalling I will use clevis pins with clips for the top of the dash. It's already really tight just sitting in there.


got my pictures working again....so here's some pics before I started doing the wiring and while I was working on the HVAC and firewall.

The infamous firewall crack... This has been welded inside and out and the new piece covers it.
index.php


Test fitting of the new firewall piece that was overlapped over the existing.

index.php


index.php


Firewall complete and 2nd gen HVAC installed.

index.php


and under the hood...

index.php


I'm liking that blue and silver combo


agreed the color combo matches the threaded bodies perfectly!!!


Join the Elite Explorers for $20 each year.
Elite Explorer members see no advertisements, no banner ads, no double underlined links,.
Add an avatar, upload photo attachments, and more!
.


So I was spouse to work on this between x-mas and new years....but was lazy and i nothing:rolleyes:

So today was back to it and made some good progress.


Behold 2nd gen door wiring in a 1st gen door. This was a royal pain FYI, but it's all done.

index.php


and i got the front fenders painted.

index.php


Next up, is the following....
  • Wrap up the gas tank mount
  • go through and attach all my grounds in the wiring harness
  • wrap up the vacuum and smog system (body)
  • Wrap up the motor mount spacing
After this the motor and trans can go in.

I have still work out a few other things
  • Master Cylinder reservoir wiring. Still original, but with 2nd gen harness. Not sure I should swap (have the 2000 system) or rewire.
  • Windshield wiper motor wiring. (again original motor, 2nd ger wiring) although this really isn't high on my priority list .
  • Ignition Key: I'm pretty sure I can get the 2nd gen key drum to fit in the 1st gen key housing. Then figure out the actual switch from there. I want to keep PATS since it's a open vehicle. Will give it some security from being stolen
  • PCM mounting in the cab, once the motor is in I can figure this out.
  • Air vent ducts fabrication: I kinda figured this out already. (again not high on the priority list, but should do before the dash goes in)
  • Front turning indicators, need to find a small enough light to go in the marker.
  • Power Sterling lines. I need to have a custom line made to go from a fist gen box to a SOHC PS pump, unless some one knows a stock part number that will work.
  • Relocate Battery: Still not sure where this is going, but thinking in the cargo area, maybe behind the the rear passenger wheel well.
  • Floor Shifter: Since the 5R55E, never had a floor shifter, I need to find one I can make work. Thinking a Mustang or F150 floor shifter. Yes I know I can do a B&M or something
  • Need to find a 8.8 tone ring and put it back in, because other going I have no speedometer, and I think the trans uses it.
There's a few other things as well, but as you can see there is still a lot to do.


Back
Top