Radio LED display fix!!! | Page 14 | Ford Explorer Forums - Serious Explorations

  • Register Today It's free!

Radio LED display fix!!!

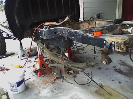
My repair job from 2010 quit working again. The same failure pattern at first, flickering at startup but eventually staying on. But now, it never comes up to full brightness, and it was very very dim at the outer (left/right) edges. Tried resoldering again, with no luck.

I found the ebay site mentioned above which is the same thing as www.1factoryradio.com. I called them, they said their design is "new" and "their own". Not the original design, and not a reconditioned part. Giving them a try. Don't have to ship the radio like most of the repair places insist on.

The one that Dorman makes is only 50.00 bucks and I've had it in my stereo for over 3 months and still looks good.

http://m.ebay.com/sch/i.html?kw=Dorman+586-001&isNewKw=1&pgn=1&epp=24&mfs=GOCLK&acimp=0&itemId=&cnm=&cid=&sqp=dorman+586-001&_trksid=p2056088.m2428.l1313.TR0.TRC0.Xdorman+586-001


Join the Elite Explorers for $20 each year.
Elite Explorer members see no advertisements, no banner ads, no double underlined links,.
Add an avatar, upload photo attachments, and more!
.


beyond soldering

Hello all, I'm new here, and have been doing a lot of forum reading, and to show my appreciation for all the goodies you've shared I'll let you have a peek at what I found in my Mach radio...

radio1.jpg

radio2.jpg


Alas, after carefully cleaning off the mud wasp's home (and a wee bit of restorative soldering elsewhere on the board), still an unlit faceplate. Doh! In my haste I didn't even get to inspect the proper board.

Regards,
Ol' Mountaineer

(2000 Mountaineer 5.0)


Radio fixed!

Worked "just like it says on the can"... pulled the narrow power board, resoldered the resistors (very hard to see the cracks but just do 'em all til they look fresh), plugged it in and all is good!

Thanks to all at explorerforum!


radio and display issues

The mach radio had a display that lit up and would fade out, if I press select it would come back and then go out again display looked weird have to press select to get display back. I took apart the display board the one behind the faceplate the display screen bad solder on 2 pins the one on the left closest to the knob that pin going to display was burnt very little if any solder on pad re-soldered. Put radio back together still radio goes on and off and continues doing this display still not fixed. Now the display is out almost all the time tonight no display sometimes it comes on. If ignition is in acessory engine not running radio works except for display now if car is running the whole radio turns off radio and cd are cutting out and no lights are lit the tapedeck light is on and off also The harness plug I moved it still no change Previously with orig radio and replacement the display would come on if it was dark enough and daytime running light switch was on and manual head light switch was off display would come on and after a while go out. Prev radio cd deck would skipp and finally it would not play cds or eject cds the radio worked properly no display of course. How to fix this?


Pictures Resistor and Chip Solder Cracks

When I resolder the large resistors, the ones that get hot, I raise them off the board as far as the leads will allow or splice extra wire to them.
Under my low power binocular microscope I see that many of surface mount solders are cracked in the area of those hot resistors.

I will try to post the images from the microscope when my attachments are allowed.


803-2002-mach-audio-questions-crackedsolder392-jpg.jpg


803-2002-mach-audio-questions-crackedsolder103-jpg.jpg


2-mach-audio-questions-crackedsolderchipresstr-jpg.jpg


Thank You!! :)

I joined just to say thank you to all the people who posted here. I popped my radio out, took off the front cover, and noticed that 2 of the pins on my LCD were actually bent and didn't look like they made it through the holes quite enough to be soldered on. I resoldered those pins, and then following the directions on the first page I took out the 1 inch by 3ish inch board on the left side of the radio and cleaned it with a brush. I also noticed some bridging solder where it shouldn't have been, and got rid of that. I took it out to my Mountaineer, plugged it in, and turned it on. For the first 30 seconds nothing happened and I was feeling like I wasted my time. Then, randomly, it faded on and I was feeling so much excitement! This is the first time I've ever seen my LCD light up since I've had the Mountaineer!! Thank you all so much for the advice!!

ABS-W5TCPUOgol5sESuQsUEkU0bdKWVwcfA84dwu5gk


Best of all, aside from the $5 radio removal tools, it was completely free! :) Thanks!

(Quick question, is there a way to make the song name scroll across the LCD rather than me having to push the SEL button?)


I have to repair mine, and just bought the radio removal tool from Amazon for $6. Try as I may up here, no one has posted good pictures of how to do this, so...

I will take pictures of the process and upload them to the site when I'm done - if the work is successful, that is. I worked for Motorola for 24 years, and 6 of those were spent assembling, testing and repairing their MT500 radios. I have the soldering tools and enough experience to do this. All I'm wondering is how to take apart the radio to get to this board.

I hope to take pictures of every step - wish I had a good video camera, or I'd do a YouTube video.

I meant to take pictures of the process, sorry about that. :[ After posting that picture, the display died again, so then I raised the resistors up about half an inch (or just enough so that they didn't touch the metal shell) to allow them to cool better, and I also found two SMD caps that were bridging and fixed it. Good luck! :]


I originally posted (#153) the then available fixes for this problem on 2/22/2008. I replaced the board with a new one from Pioneer. This worked until August 2013, it then failed as before. This was to be expected since they never addressed the original design flaw.

Since then it appears that this kit is no longer available from Pioneer. Also many of the mail-in options for repair seem to have moved on to more profitable endeavors. Today I followed the link from post #256 . It is an expired e-bay offering but there is a link to the sellers new site. There I found an old/new condition board for $75. Ordered that and will install it when it arrives in a few days.

The only other current choices I found where to find a local expert willing to do a good fix or to do it yourself. The most comprehensive fix I found was on post #251 . Post # 265 has good pictures to show what you will find on the board and need to solder. The first couple pages of the post give several fixes by different people to get an idea of what you will be doing. All involve soldering the board, lifting capacitors and resoldering them and cleaning burnt material from the driver board. For that matter, read the entire post. Its not that long. An hour read or so, even reading for detail and making notes.

If you have the low wattage soldering equipment and something to magnify the board so you can easily see the solders, this fix is not difficult but it is time consuming. Be careful not to burn the board while soldering.

As for an expert to make the repair, read the last few pages and start making contacts. You will find someone. Most of the earlier sources in the thread have moved on. Expect to pay $75 to $100 for the repair plus shipping both ways. You may also find a local shop. If so, post them here. More business for them and another potential source for those of us still trying to keep our explorers on the road with a factory radio.


Great post Joe, that's a fine summary.

I have a spare Mach radio that I'd like to get repaired, and I'd love to get it modified to match the one in my truck, with RCA outputs. I have not tried to contact the Dave Miller who did that work for me many years ago. He was great but he probably has retired also.

I know of another great radio repair individual, who has been doing the special work on several devices in the 84-92 Mark VII's. He can fix almost any radio, message center, compass, EATC, and digital dash of those, plus some of the CD changers. I doubt that he knows anything about these Pioneer decks, but he could do the work if he would like to.

I don't have his email handy, but search for "Paul Protos Mark VII" if other sources don't turn up quickly. On the Mark VII site, his email has been posted many times. Most of the repairs he does that I mentioned, cost about $100. The capacitors go bad very commonly in all of the electronics. Regards,


I originally posted (#153) the then available fixes for this problem on 2/22/2008. I replaced the board with a new one from Pioneer. This worked until August 2013, it then failed as before. This was to be expected since they never addressed the original design flaw.

Since then it appears that this kit is no longer available from Pioneer. Also many of the mail-in options for repair seem to have moved on to more profitable endeavors. Today I followed the link from post #256 . It is an expired e-bay offering but there is a link to the sellers new site. There I found an old/new condition board for $75. Ordered that and will install it when it arrives in a few days.

The only other current choices I found where to find a local expert willing to do a good fix or to do it yourself. The most comprehensive fix I found was on post #251 . Post # 265 has good pictures to show what you will find on the board and need to solder. The first couple pages of the post give several fixes by different people to get an idea of what you will be doing. All involve soldering the board, lifting capacitors and resoldering them and cleaning burnt material from the driver board. For that matter, read the entire post. Its not that long. An hour read or so, even reading for detail and making notes.

If you have the low wattage soldering equipment and something to magnify the board so you can easily see the solders, this fix is not difficult but it is time consuming. Be careful not to burn the board while soldering.

As for an expert to make the repair, read the last few pages and start making contacts. You will find someone. Most of the earlier sources in the thread have moved on. Expect to pay $75 to $100 for the repair plus shipping both ways. You may also find a local shop. If so, post them here. More business for them and another potential source for those of us still trying to keep our explorers on the road with a factory radio.

I sent out some e-mail inquiries, and got one response back. For anyone interested, Mike, in South Carolina, still repairs these units, and here's the post he sent me:
Hello,

I still repair the radios. My charge is $45.00 plus shipping.
My address is:

Mike Harrington
304 Hartin Blvd
Summerville,SC 29483


This is a fall-back for me, as I'll try the fix myself and send it to Mike if that fails. I will also take photos of every step I take in fixing my radio - I'm glad I found these threads and this fix, and I'd love to keep it working.


Well, about two hours and some light cussing, I re-soldered almost everything on the board, and lifted the two power resistors. Checked everything under a magnifying glass, cleaned off the board, re-assembled it, took the radio out and plugged it into the dash...

NOTHING!

The board is discolored in the area of the resistors, so it has seen some bad over-heating. I hit every solder joint I could find, checked for solder shorts, and cleaned it up, and it really LOOKED good. The only thing I can think of is those power resistors...

Anyway, I think I'll look for a replacement board before I send it away for repair. I've got the dis assembly down pat, so I can tear this thing apart in a few minutes now. Before I scout the Web, let me ask again if anyone has a lead on replacement boards.


First, see my post above. Then go to post #256 . Mine arrived last night so it is not in yet but it appears to be the correct one. It even came with some instructions and pictures. Not as good as on this forum but at least they are trying to help out.


Hey guys, I had posted a link to Amazon for the Dorman part #586-001 that should be the same, I think my post didn't take. I found it using the part number member cbranning2012 posted in #259; http://www.dormanproducts.com/p-647...orer&parttype=Radio%20Display%20Power%20Board This includes a video also.

Amazon wants $43.97 plus tax for it;
Amazon Dorman-586-001 display power supply board


The eBay source is 1 Factory Radio and they list the part number 1FR-DCC, for $67.50 total right now;
1 Factory display power supply board 1FR-DCC on eBay


The Dorman part by description sounds a little better.


Hello all, I have an '07 Sport Trac, and the digital display in my radio intermittently goes dim, or even completely blank. It is not and LED display though, but some sort of fluorescent type digital display. Is the fix being discussed here for my unit? I am fairly technical, possess good electronic/electrical skills and tools. This just started happening in the last few weeks but is even more annoying today, because I renewed my Sirius membership, and have a hard time getting the unit to SAT1 for Sirius with no display. Any others with experience on this problem and this unit?

Thanks!


You can get them on ebay and on Amazon, as well as the local auto parts store can order it.

The prices vary from $43.95 up to about $75.


Join the Elite Explorers for $20 each year.
Elite Explorer members see no advertisements, no banner ads, no double underlined links,.
Add an avatar, upload photo attachments, and more!
.


Funny, but looking at the way the shield tabs are soldered to the board, the Dorman board is going to suffer the same fate as the OEM board. I can't see how the resistors are mounted, but it wouldn't surprise me if they were mounted close to the board same as the originals...


Back
Top