You Can Change the radiator on a 5.0L Explorer
I just replaced the radiator on my 2001 Ford Explorer and found the information in this thread to be very helpful. Hopefully what I learned by doing the job will benefit someone else contemplating it. If you reached this forum through an Internet search let me say don’t be over intimidated or afraid of all the horror stories you read on the Internet about replacing the radiator in a 5.0L. All these tend to do is knock your self confidence down and make you doubt your ability to do the job. Believe me, you can do it and do it right. Carefully read this entire thread (not just my post, but the entire thread) which will give you valuable insight how. After reading some of the posts in other forums I was tempted to have it done by a garage, but the thought of paying $600 to $700 to replace a radiator just didn't sit well with me. So I ordered a TYC-2308 radiator from Amazon Warehouse Deals for $84 which was described as used, like new. I figured someone ordered it and couldn't complete the job and returned it because it looked new to me. Amazon sells a new TYC-2308 for around $132. The radiator is a perfect fit. The only thing I needed to do was remove two rubber mounting grommets from the old radiator and I used the old radiator cap, both which fit perfectly.
http://www.amazon.com/TYC-2308-Alum..._1?s=automotive&ie=UTF8&qid=1318800453&sr=1-1
The entire job cost me around $200 with a new fan, belt, hoses, and antifreeze. Also, if you haven’t changed your thermostat or had your cooling system flushed in a while now is a good time.
Let me say that the job wasn't as bad as I thought it was going to be. I had some doubt going in because of everything I read on the Internet. Don't get me wrong, it still took about 5 hours from start to finish and can be accomplished by anyone with decent mechanical skills. I did the job with the help of my wife who has none.
1) Remove the plastic splash shield and the A/C line bracket.
2) Drain the radiator.
3) While it is draining remove the transmission lines and secure the lines towards the firewall with a bungee cord so they won't interfere with the rest of the job. You will lose some transmission fluid so place a rag under the lines. It is a very miniscule amount that won't even register on the dipstick, even when the job is complete.
4) Remove the air intake duct, top hose, and overflow hose. Some repair guides (like Hayne's) say to just remove the fan shroud and rest it towards the back on the fan, but I recommend you completely remove the shroud and the fan (these have to come out together) because this gets them out of the way and gives you a lot more room to work. I believe the extra 5-10 minutes it takes to remove them is time and effort well spent and will save you a lot frustration later on. Never having removed the fan before I was surprised how easily it loosened. Look on the fan shroud for the thread design stamp. Most will be RH (right hand) which means you tighten clockwise and loosen counterclockwise. Don't assume this and check the shroud. You will need a special wrench set to get the fan out. I rented a fan clutch wrench set from Advance Auto Parts (Powerbuilt Kit 34). Other users on this forum have also reported success using an inexpensive Performance Wrench Set Model # W80585 which can be purchased from Pep Boys or Amazon. (
http://www.amazon.com/gp/product/B0...&pf_rd_t=101&pf_rd_p=470938631&pf_rd_i=507846) or (
http://www.amazon.com/Powerbuilt-64...JXGE/ref=sr_1_5?ie=UTF8&qid=1318853200&sr=8-5)
Plus, take a good look at your fan. It's basically plastic. After 141K miles there were cracks at the base of the fan of my Explorer and I needed to replace it anyway (Motorcraft YA228 Radiator Fan -
http://www.amazon.com/Motorcraft-YA...YRSQ/ref=sr_1_1?ie=UTF8&qid=1318799590&sr=8-1).
5) While optional, removing the serpentine belt does make it easier to remove the bottom hose. Plus, if you haven't changed it in a while or it is getting close now would be a good time to do so. When removing the bottom hose have a bucket ready.
6) Remove three bolts holding the radiator and condenser in (two on the passenger side and one on the driver side, ALL on top). Also, this is optional but you can also remove the plastic shield surrounding the hood latch which will give you better access to the condenser and may help when sliding it to separate it from the radiator.
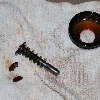
Now you are ready for the fun part. Take a good look at the photo below (this is the radiator I removed). This is the front of the radiator which you cannot see because it is attached the condenser. Also, take a good look at your new radiator.
Once the three bolts are removed from the top the only thing holding the radiator in are four clips on the condenser. One clip on the bottom passenger side, one clip on the bottom driver's side, and two horizontal clips top and center both on the driver's side. Circled in the photo are the clip mounts. The clips themselves are on the condenser.

7) Start with the clip on the passenger side. In the lower left bottom corner of the photo you will see a slot where the clip mates to the radiator. It’s a fanny pack clip which you can squeeze with your hands (I did) or a small pair of pliers and slowly push the condenser forward while pulling the radiator gently back and then either slide the radiator a little bit to the driver's side or slide the condenser just a little to the passenger side (it won't take much) until the clip clears the radiator. Otherwise the clip has a tendency to re-insert itself back into the radiator mount. Once this clip is undone, use some bungee cords to support the condenser. I wrapped a bungee cord under the metal lines on both sides of the vehicle and hooked those to holes in the front of the vehicle. The right length bungee cords will have some stretch which will still allow you to move the condenser and also keeps it from drooping after it is separated from the radiator. This may be being overly cautious but i wanted to protect the condenser and lines at all cost. My radiator was leaking and I didn't want to compound my problem.
8) After the passenger clip is removed, there is a small anti-rattle clip on the bottom of the driver’s side that separates from the radiator very easily. If you look carefully at the photo all the way towards the bottom right you will see a small horizontal channel mount where this clip attaches. I separated it by simply pulling slightly on the radiator. Popped right out. Chances are it may have already come undone when I was pulling the bottom of the radiator away from the condenser on the passenger side.
9) The only thing holding the condenser to the radiator at this point are two horizontal clips on the driver's side. Look at the photo and you will see two clip slide mounts below and to the right the neck of the radiator. Slide the condenser to the passenger side as far as it will go while sliding the radiator towards the driver’s side. Do not manhandle it because you don't want to damage the condenser lines. However, they are partly rubber and have some play which will help in separating the condenser from the radiator. It will take some moving and slight wiggling but with some patience it will separate. Finesse it out. Angling the radiator and condenser ever so slightly on the driver's side towards the firewall will help.
The key here is patience, don’t get in a hurry. Once the radiator is detached lift it straight up and out and the condenser should be hanging securely by the bungee cords. You have reached a milestone in the replacement. Take a break.
10) To install your new radiator start with the two horizontal clips. With the radiator out, angle the condenser ever so slightly towards the firewall on the driver’s side. Again, not much because you don't want to stress the condenser lines. This will make it a just little easier to mate the horizontal clips. Be patient because this will take some wiggling and repositioning but, once the clips on the condenser line up to the mounts on the radiator it will slide together rather easily. With patience it isn't as hard as you think. It took me about 30 - 45 minutes (time flies when your having fun, yea right) to remove and replace the radiator which included a well deserved break in between.
11) Once joined, push the bottom clips in, position the radiator on the mounts, remove the bungee cords from the condenser lines and bolt it it up using the three top bolts removed previously.
12) Install the bottom hose, the A/C line bracket to the bottom of the radiator, the serpentine belt, the transmission lines (use some thread tape or a small amount of pipe compound), the shroud and fan if removed (these have to go in together, bolt the shroud to the radiator with the fan resting inside the shroud, and then lift and screw the fan back on which is best started underneath and then moving up top to tighten), top hose, air duct, and overflow hose. Don't install the splash shield until after you check for leaks.
13) Be prepared to add as much as three gallons or more of antifreeze. The system will be almost empty. According to my Hayne's manual (1991 thru 2001) the coolant capacity is 12.8 to 15.7 quarts for a V8 which means this thing will suck antifreeze and seem like a bottomless pit.
14) With the radiator cap off, start the the engine, and let it run until the radiator burps. There will be pockets of air trapped in the system. You should see the coolant level drop and may even see an air bubble or two come to the top as the system burps. Be sure to keep an eye on the temperature gauge. Refill the radiator to the top and the coolant reservoir as needed and put the radiator cap back on. I initially added a little over two gallons and noticed a slight hose collapse (air pocket) after replacing the cap which made me nervous, but everything was OK after adding close to another half a gallon of antifreeze. Don’t forget to run your heater to make sure you get the system full. If the engine runs hot there may have been another pocket of air that burped in which case you need to add more coolant. After the system is full and heated up check the overflow for signs of small bubbling which means your cap is good. Hopefully at this point you won't have any leaks (after spending a good part of my day outside working on this I consider myself fortunate in that regard). If not install the plastic splash shield. Drive the vehicle and the next day when the vehicle is cold check the radiator overflow and add more coolant as necessary.
Congratulate yourself on a job well done and the money you saved.