-
Performance Upgrades - Maintenance - Modifications - Problem Solving - Off-Road - Street Trucks.
Covering the Explorer, ST, Sport, Lincoln Aviator, Sport Trac,
Mercury Mountaineer, Mazda Navajo, Ford Ranger, Mazda Pickups, and the Aerostar.
Featuring H.I. - Human Intelligence.
Register Today It's free!
You are using an out of date browser. It may not display this or other websites correctly.
You should upgrade or use an alternative browser.
You should upgrade or use an alternative browser.
Worklog: 7 beats 3... NOT as cool as typhoons
- Thread starter hydroxy
- Start date
Elite Explorer members see no advertisements, no banner ads, no double underlined links,.
Add an avatar, upload photo attachments, and more!.
hydroxy
I like to fiddle...
- Joined
- April 23, 2002
- Messages
- 2,275
- Reaction score
- 2
- City, State
- Fairfax, VA
- Year, Model & Trim Level
- 1995 Limited v6
Originally posted by mhn3773
just use a counter sink bit..that way u are not putting any force on the seal at all
a countersink bit can just be a large drill bit that is the same size as the head of ur screw..ud then "drill" the size of the head on the screws u are using..so no force on the seal at all then just snug the screws up when u screw it back together
Right, but the screw will be digging just a tad bit deeper into the wood since it will be in further... Probably nothing to worry about I just dont wanna take any risks =P
Hartman.... why didn't you tell me a while ago about the screws ?!?!!? huh??? well??? jeeeze!!!!!

And I wasn't thinking of the cordless drill to help sand.. I was thinking of it to help me back out and put in the 50 or so screws that are in this beast.
So - is anything wrong w/ those eBay drills?
hydroxy
I like to fiddle...
- Joined
- April 23, 2002
- Messages
- 2,275
- Reaction score
- 2
- City, State
- Fairfax, VA
- Year, Model & Trim Level
- 1995 Limited v6
Well got a lotta work done this weekend (kinda). There is still a ton left to do. And to top it off, the speakers on the side dont have enough backspacing to fit anymore, so I have to build some rings to pad them out a little bit (arg!!!).
This weekend I added a t-shirt layer of glass on the inside. This box is REALLY strong now. I can pick it up by the sub rings.
Here are some inside shots of the enclosure... You can see the new t-shirt layer of fiberglass.


I added a 2nd layer of fiberglass behind this layer today.


got some of the sub-rings cut out... got the rest cut out today (Today's pics later... these are yesterday's pictures)


This is where sections of the 2nd layer of fiberglass were cut off because it didn't stick very well... I'm just going to fill it in with bondo. The enclosure is strong enough to not need more glass there.


There is an inch of dust (and a broken dremel friction cutter) in the bottom of this enclosure... going to have to find a vaccuum to use on it.


The bondo work has started...

Me trying to get something out of the inside of this piece.


Here is why building stuff at college SUCKS. Since my car is 1 mile away, I keep everything in there so I dont have to haul it back and forth each day. It is a mess. And I've put about 15 nicks in my rear bumper so I'm going to have to paint that again...


Trying to figure out why my HU is cutting out...

Also, I now have 3 amps (all the same)... so I'm debating if I should use all 3 or stick w/ only two.
I would have the three top subs in parallel (4ohm load) going to a bridged amp.
The two pairs of subs on each side would each have a bridged amp going to them. They would be wired in series giving a 4ohm load as well.
The top 3 subs are 12ohm subs, the ones on the sides are 4ohm subs which is why they would be wired differently.
Let me know what you think.
ALSO - I need to think of colors. Right now I'm really leaning to painting all the fiberglassed part in a bright red... lemme know.
-patrick
This weekend I added a t-shirt layer of glass on the inside. This box is REALLY strong now. I can pick it up by the sub rings.
Here are some inside shots of the enclosure... You can see the new t-shirt layer of fiberglass.
I added a 2nd layer of fiberglass behind this layer today.
got some of the sub-rings cut out... got the rest cut out today (Today's pics later... these are yesterday's pictures)
This is where sections of the 2nd layer of fiberglass were cut off because it didn't stick very well... I'm just going to fill it in with bondo. The enclosure is strong enough to not need more glass there.
There is an inch of dust (and a broken dremel friction cutter) in the bottom of this enclosure... going to have to find a vaccuum to use on it.
The bondo work has started...
Me trying to get something out of the inside of this piece.
Here is why building stuff at college SUCKS. Since my car is 1 mile away, I keep everything in there so I dont have to haul it back and forth each day. It is a mess. And I've put about 15 nicks in my rear bumper so I'm going to have to paint that again...
Trying to figure out why my HU is cutting out...
Also, I now have 3 amps (all the same)... so I'm debating if I should use all 3 or stick w/ only two.
I would have the three top subs in parallel (4ohm load) going to a bridged amp.
The two pairs of subs on each side would each have a bridged amp going to them. They would be wired in series giving a 4ohm load as well.
The top 3 subs are 12ohm subs, the ones on the sides are 4ohm subs which is why they would be wired differently.
Let me know what you think.
ALSO - I need to think of colors. Right now I'm really leaning to painting all the fiberglassed part in a bright red... lemme know.
-patrick
expo5.0
Elite Explorer
- Joined
- October 18, 2001
- Messages
- 7,196
- Reaction score
- 5
- City, State
- Red Wing, MN
- Year, Model & Trim Level
- 1996 xlt
and i thought ripping out my whole interior glassing all 5 doors, a custom center console, and my sub box looked daunting....
holy hell that is honestly impossible to sand without power tools, lol.
what a first glass project
holy hell that is honestly impossible to sand without power tools, lol.
what a first glass project
hydroxy
I like to fiddle...
- Joined
- April 23, 2002
- Messages
- 2,275
- Reaction score
- 2
- City, State
- Fairfax, VA
- Year, Model & Trim Level
- 1995 Limited v6
Originally posted by expo5.0
and i thought ripping out my whole interior glassing all 5 doors, a custom center console, and my sub box looked daunting....
holy hell that is honestly impossible to sand without power tools, lol.
what a first glass project
Yea, I definetly would not recommend someone who has never worked w/ glass before to start on something this big. One of the hardest parts about working on this, is the fact that I can't get at stuff from the back. So I have to stick my head in one sub opening to see what I'm doing when working on the inside
As for sanding... I think I'm going to break down and buy a sander. I need to have this thing done on the weekend of the 3rd (atleast have primer on it) for a car show. "If it isn't done by then, I'm going to light it on fire" I just dont think it'll be physically possible for me to complete it by then without a power sander.
That timeframe might seem like a lot, but from here till then I think I'll have 3 or 4 days that I can actually work on it.
Question: if I solder RCA cables together to my own home made splitter will there be any negative effects? I dont feel like spending $20 on adapters to split a signal 3 ways...
Hartman: Having all the stuff isn't toooooo bad, besides the fact that after every turn I hear a bang of stuff being tossed around... It is the SMELL. This thing sits in there with all the windows CLOSED for 5 days in a row, till I get it on the weekend. It REEKS inside. I think I could get a very very nice buzz if I sat in there for a couple hours straight.
As for standing on it.... I'm not going to do that lol. It has to be close to 1/4" thick if not more right now in most places.
hydroxy
I like to fiddle...
- Joined
- April 23, 2002
- Messages
- 2,275
- Reaction score
- 2
- City, State
- Fairfax, VA
- Year, Model & Trim Level
- 1995 Limited v6
someone in another thread asked me how much this piece was costing me, so I added it up.... It scared me when I saw the final figures. It has definetly put anything else I might do to my X off till the summer. If I did it all over again, it would be about $50 cheaper because I wouldn't waste as much as I did.
Right now I'm probably getting close to $160.
3 gallons resin @ $25 ea (should have only needed 2)
2 gallons Bondo @ $12 ea
2 yards fleece - $10
screws $6
MDF board - $18
Scrap board - $8
Liquid Nails: $8
Sandpaper: $3
Dremel bits: $25 (could have done it w/ one diamond cutting bit)
wow, it adds up quick. I'll prolly need another $10 - $15 in sandpaper and then some primer....
I dont even want to think about it.
jssong
Explorer Addict
- Joined
- September 19, 2001
- Messages
- 2,326
- Reaction score
- 0
- City, State
- .
- Year, Model & Trim Level
- 09
Originally posted by hydroxy
3 gallons resin @ $25 ea (should have only needed 2)
Hartman
Explorer Addict
- Joined
- October 16, 2001
- Messages
- 8,315
- Reaction score
- 13
- City, State
- Indianapolis, IN
- Year, Model & Trim Level
- 1996 5.0
Originally posted by Hartman
A box that big is not going to be cheap to build.
Hmm, I remember someone saying something about the cost of something this big.
etc makes a good point, I hope you used some matting on the box? Just using fleece with resin isn't going to be that strong, and the box will flex and crack. Just to put things in perspective, I'm on my 8th gallon of resin on my box and mine isn't quite as big as yours. Just be SURE that it's strong enough for you'll just end up redoing it!
etc
Dead Inside
- Joined
- June 21, 2003
- Messages
- 1,167
- Reaction score
- 0
- City, State
- Miami, FL
- Year, Model & Trim Level
- '96 XLT 2WD
Originally posted by hydroxy
3 gallons resin @ $25 ea (should have only needed 2)
That's ony resin. It's the combination of glass and resin that makse the actual strength. Considering there's 7(?) subs, there will be alot of thumping aka force pushing on it. If it's just fleece and resin it won't be that strong, unless he's using an epoxy resin(even then..), which I don't think he is.
hydroxy
I like to fiddle...
- Joined
- April 23, 2002
- Messages
- 2,275
- Reaction score
- 2
- City, State
- Fairfax, VA
- Year, Model & Trim Level
- 1995 Limited v6
Originally posted by mhn3773
id put the subs in it and run em before i did any finish work to the box
just to make sure everything is dandy =)
That is the next thing I'm going to do.
Hartman: As for the gallons used... my box might be bigger, however the fiberglassed section is probably a bit smaller then just the top part of your box. Only the front was fiberglassed, not the back.
Concerning strength, there are 2 layers of fleece and 1 t-shirt layer. There is only one place where the fiberglass is more then a couple inches wide without touching wood, and that is ontop. Many sections are < 2" wide. That doesn't leave much room for any flex.
Only thing to do from here is to test it... if it cracks, it cracks. Then I know I need to add more.
Elite Explorer members see no advertisements, no banner ads, no double underlined links,.
Add an avatar, upload photo attachments, and more!.
hydroxy
I like to fiddle...
- Joined
- April 23, 2002
- Messages
- 2,275
- Reaction score
- 2
- City, State
- Fairfax, VA
- Year, Model & Trim Level
- 1995 Limited v6
Well got about 3 hours work on it today. Got most of the small things done.
Hartman, this one is for you
I'm 180-190... I was standing only on the fiberglass... not the MDF backboard
.JPG)
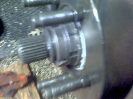
here is a pic of its thickness. This is probably the thinnest part on the box. It is next to a 1/2" drive.
.JPG)
Ok, here are the rest.
.JPG)
.JPG)
.JPG)
Test fitting the subs:
.JPG)
.JPG)
To get the side subs to fit in, I had to cut out a section behind it. I put a balloon there, so when I put a piece of fiberglass there to seal it back up again, it will retain its rounded shape. Then I'll just pop the balloon.
.JPG)
.JPG)
Look at the thickness of the section I took out. You can see the wooden dowel in there as well.
%20(Small).JPG)
After I had finished smoothing out all the sub openings, and test-fit the sub in all locations.
.JPG)
.JPG)
.JPG)
.JPG)
.JPG)
Tomorrow, I'm going to fiberglass the holes I made today and then start on the bondo. Should be fun...
edit:
I'm not liking how square the back end and sides look. I dont know how I'm going to fix that, but I definetly am going to do something. It just doesn't help it flow.
Hartman, this one is for you
I'm 180-190... I was standing only on the fiberglass... not the MDF backboard
here is a pic of its thickness. This is probably the thinnest part on the box. It is next to a 1/2" drive.
Ok, here are the rest.
Test fitting the subs:
To get the side subs to fit in, I had to cut out a section behind it. I put a balloon there, so when I put a piece of fiberglass there to seal it back up again, it will retain its rounded shape. Then I'll just pop the balloon.
Look at the thickness of the section I took out. You can see the wooden dowel in there as well.
After I had finished smoothing out all the sub openings, and test-fit the sub in all locations.
Tomorrow, I'm going to fiberglass the holes I made today and then start on the bondo. Should be fun...
edit:
I'm not liking how square the back end and sides look. I dont know how I'm going to fix that, but I definetly am going to do something. It just doesn't help it flow.
Featured images


Featured images
Similar Threads
- Replies
- 28
- Views
- 6,402
- Replies
- 4
- Views
- 5,809
- Replies
- 4
- Views
- 957