speaker
The bad news: I didn't document this build like my other one's, I realize that. Sorry this is not as helpful as it should be. It's to demonstrate it can be done. The Explorer your looking was is totaled April 29th 2012.
The good news: I will be building another first gen explorer from the ground up and this is one of the first mods. I will document it much better.
The tools:
Close quarter hacksaw - Primarily
Die Grinder with cutting wheel - One hard to reach spot
Medium File
Utility knife
Scissors
Flat head screwdriver
Syringe and needles
The Materials:
Rustoleum - Specialty Paint for Plastic 12 oz - Textured Black
IPS Weld-on 3 and 4
IPS Weld-on 16
Silicone - Any, but I used black.
Fiberglass reinforced resin (for stregth)
Small C-clamps
Blue masking tape
Plastic container
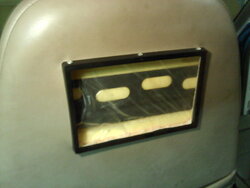
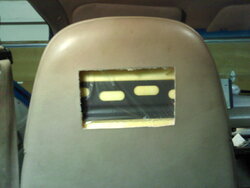
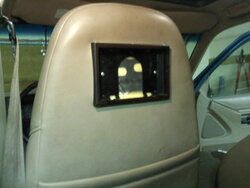
This mod is not as hard as it looks. All the little parts can all be done in your living room in front of the TV on a small table. It is detailed, but not too bad. There was a lot of time the first time through just because there was a lot of time spent thinking about the best way to do it and if I wanted my vents to work or not. Doing this a second time will go much smoother and I can provide helpful pics.
It ended up being very sturdy, not fragile and it looks factory. The vents work. They can be aimed and closed. The ducting behind the stereo is reduced, and that's what the plastic container is for. I used a cheapy food container like what you'd put left over spaghetti in to build the recess in the venting and glued it with the silicone to seal the air ducting back again.
More to come...
Rusty


 Sweet job man!!!!
") but I'm guessing you trashed it. But please add more pics if you can
but I'm guessing you trashed it. But please add more pics if you can


