Altenator Rebuild 98 Explorer | Ford Explorer Forums - Serious Explorations

  • Register Today It's free!

Altenator Rebuild 98 Explorer

4pointslow

Explorer Torture Tester
Elite Explorer
Joined
April 3, 2008
Messages
3,277
Reaction score
892
City, State
Gloucester City, NJ
Year, Model & Trim Level
98 2Dr,2,000 & 04 4dr xlt
My 98 4 door Explorer had an alternator failure last friday Night on the way home from work. Red light for charging system was lit up on instrument cluster and the charging gauge was low.
Made it home on the battery alone. Very Lucky I did not get stuck in rush hour traffic, could have ended up with a tow truck ride home. Being that I have 2 explorers and love junkyards, I had a spare in my garage at home.
installed it and all is fine. But then I started thinking, can the old one be rebuilt? What about the grooves where the regulator brushes ride on the slip ring, could that be the problem or is it just a bad regulator or worse.
I stumbled across http://rebuilderinabox.com/ , they have have awesome videos of alternator rebuilds and even sell the parts pretty inexpensively. I ordered a kit and it arrived before the weekend. Now it is friday and I hit the garage.
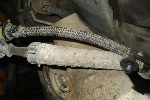
Pictures to come.....


Join the Elite Explorers for $20 each year.
Elite Explorer members see no advertisements, no banner ads, no double underlined links,.
Add an avatar, upload photo attachments, and more!
.


Here is the problem

My old alternator rotor with the worn out slip ring.
DSC07352.JPG
DSC07348.JPG


More Pics

Rotor
DSC07442.JPG
DSC07383.JPG


New Parts

New Parts from rebuilderinabox.com
about 55.00 shipped to my house.
 

Attachments

  • DSC07318.JPG
    DSC07318.JPG
    147.3 KB · Views: 892
  • DSC07302.JPG
    DSC07302.JPG
    150.9 KB · Views: 872
  • DSC07391.JPG
    DSC07391.JPG
    154.1 KB · Views: 895
  • DSC07325.JPG
    DSC07325.JPG
    153.6 KB · Views: 881


Some More Pics

Pics
 

Attachments

  • DSC07387.JPG
    DSC07387.JPG
    147.3 KB · Views: 899
  • DSC07381.JPG
    DSC07381.JPG
    151.5 KB · Views: 892
  • DSC07376.JPG
    DSC07376.JPG
    149.5 KB · Views: 892
  • DSC07375.JPG
    DSC07375.JPG
    152.1 KB · Views: 893


All Done

Finished, putting it on tomorrow when its light outside again.
 

Attachments

  • DSC07397.JPG
    DSC07397.JPG
    142.5 KB · Views: 880
  • DSC07433.JPG
    DSC07433.JPG
    146.7 KB · Views: 895
  • DSC07434.JPG
    DSC07434.JPG
    147.6 KB · Views: 877
  • DSC07440.JPG
    DSC07440.JPG
    154.3 KB · Views: 890


Good choice on the rebuild. I've done a few over the years. Pretty inexpensive and easy to do. Good job!


Thanks my98nnj,
We will see if it works later, and for how long.....I have 210,000 miles on my blue 4door truck now.Trying to keep it going to at least 300,000.


I installed it today, 4/1/2012.
Miles 210,238
It is working perfect so far.
Charging 14.6
No noises.
Now it is time to put some miles on it.


These are great photos 4pointslow. I am ready to rebuilt my 96 XLT V8 alternator. How difficult was it to get it apart and get the bearings in?

I think this is the way to go since you cannot trust the Chinese parts that are sold as alternator replacements these days in the local parts stores. Even the rebuilt ones, you don't know what quality of parts went in them.

Any problems for me to look out for? How do you know if you have a 95 or 130 amp?


Jay


jay1028,

Thanks, it is still working great too.
My Alternator came apart pretty easy, I followed the video instructions that rebuilderinabox sent me. Watching them before disassembly is a must.These guys know all the tricks to a successful R&R.

As far as the amperage rating goes, try looking at the case when you remove it, there is usually a number stamped on it. Also if you vehicle has all powers (windows,locks,rear defrost) it is probably the 130.

According to the rebuilderinabox website for your vehicle, I only saw one option anyway, so it proably doesn't matter.

Just a few things I remember using, hammer, deep sockets, and a vise. Follow hammering Instructions from videos and it comes apart.
Good luck, and post your results if you can.


Thanks for reply. Good to hear it is easy job.


Jay


1996 XLT 5.0L belt tensioner

I couldn't get the case apart so I gave up. Advance has a 25% off on internet orders. I ordered a Remy (new) for $137 Part No 92400. It's 130 amp. I found that if you have keyless and power windows, you get the 130. Put it in this morning. Alternator was a very easy job. The tensioner was a big PITA. There is no 3/'8 square hole like others have mentioned. The 5.0L is really tight and the way you release the tension is to use a 15mm on the tensioner bolt in the center of the pulley for future reference for anyone reading this with a 5.0L. I could not find this mentioned anywhere in my searches and the Haynes book is useless. They don't even show a photo of the tensioner. They state to release the belt tension. No Kidding!! After the belt tension was released, I found it easier to pull the belt off the power steering pulley than the alternator. The core was only $12 so I may bang on the case some more.

Jay


This is one of the links to a video from rebuilderinabox.com on youtube.
About 5:20 into the video is where he is taking the two halves apart, the instructions at that point is how mine came apart. I did not put mine in the oven. Watch the whole video though, its full of great information.

http://www.youtube.com/watch?v=qu_FeipzTzY


Excellent writeup.
I found the stator assembly wires were soldered to the rectifier assembly which made it somewhat difficult
to pull the alternator apart until I broke those solder joints.

btw, How difficult is it to push the rear bearings back into the case when you are putting the rotor back into the case?
I'm presuming you remove the entire rear bearing, not just the inner race and the outer race is a tight fit.

Also does rebuilder in a box have a video of the re-assembly?
I only saw the one where they disassemble the alternator.


@MrWizard,
Thanks,
I'm just sharing information on where to get parts and what wears out.
The stator wires should stay with the back half that is being removed, problem is that corrosion forms between the case and stator wires locking them in place. I followed the video Instructions to the T and it came apart with some persuation. The rear bearing almost fell into place on mine, almost too easy but it is working fine. The bearing is a sealed bearing, doesn't come apart.It stays with the old rotor and gets put it the scrap pile. rebuilderinabox.com has a second video but it is private until you buy from them, then they send you a link to the video.


Anyone reading this, hear is my recomendation.
If your altenator fails, check the rotor where the regulator wears into it. If it is worn then order the kit from rebuilderinabox.com .
Then watch the video's they send you a link to. after that then try to disasemble your old one once the parts arive.
Good fortune.


I bought the kit and assembled it today. Only problem I had was because I had broken the stator wire solder joints to pull the case apart.
The stator wires were frozen to the side of the case and when I pulled the alternator case apart all the solder joints broke loose.
I'm not sure how I could have avoided this, but it is a PITA to resolder all the wires.
If that didn't happen assembling everything is pretty easy. Although it is helpful to have an impact wrench to get the front nut on and off the pulley.

And, yes, the slip ring was completely worn out, as predicted.

This kit is quite a good value compared to buying a rebuilt alternator.


Who makes the bearing for that kit. I took mine to an alternator shop and had him install new slip rings for around $15. Ordered new bushings for the regulator and soldered them in. Works like new. The guy at the alternator shop told me about those wires breaking that's why I was so leery about taking it all apart. Good job though...


Join the Elite Explorers for $20 each year.
Elite Explorer members see no advertisements, no banner ads, no double underlined links,.
Add an avatar, upload photo attachments, and more!
.


The bearings in that kit are made by:
Perfect Fit Industries.


If you had the slip rings replaced for $15 that is an amazing deal.

You can buy just the slip rings on EBay for about $10, but it seemed impossibly difficult to just replace the slip rings,
because the "fan" plate appears to be welded in place and blocks removing the slip rings easily.


Back
Top