I was unable to find a how to on changing the color of the dash lights on a 1st gen explorer, so I made one. There are a bunch of them for 2nd gens, and the procedure is the same, only the removal of the cluster is different, but at the same time, I can't recall seeing a write-up that actually showed the best way to get rid of the green filter paint on the back of the gauge faces. If there are any write-ups on how to do this then I must have missed it/them, but I spent a considerable amount of time searching.
This is now the 3rd vehicle I have done this on, and the same process has worked for all of them. Although I didn't do it at this time, I will also show you how to change the bulbs in the other switches on the dash so they are also a different color. The one drawback is the climate controls. I was unable to find a way to get rid of the green filter/paint on the back of the face to allow a different color to shine through. I will update if I ever do find a way to do it, and if anyone else knows a good method, please let me know so I can add it to the write-up and credit you with the help.
Tools needed (roughly): Phillips head screwdriver, torque bits size 15 and 20, flathead screwdriver, sharp knife, needle nose pliers, 14MM socket, 8MM socket, pen or cell phone/digital camera, black marker or black paint (optional)
Materials needed: At least 5 LED bulbs in the color of your choice to change the color of the instrument lights only, 1 additional LED to change the ashtray light if you so desire, 1500 grit (or similar) wet sandpaper
First, we need to get the instrument cluster out of the truck. To do that, we need to remove the trim that surrounds the radio, climate controls and the instrument cluster. Start by removing the ashtray. Simply push down on the silver tab shown here with the red arrow and pull straight out. Next, remove the two screws at the green arrows and pull the inner ashtray assembly piece out.

NOTE: On top of the inner ashtray assembly you will see the ashtray light. This is easily changed by removing the socket from the metal piece, removing the green dome light filter, and changing the bulb to whatever color you choose. You can see the bulb socket here with the green dome light filter already removed.

I will mention it a few times, but most LED bulbs will only work if installed in the correct orientation. i.e. positive to positive and negative to negative. The easiest way to do this is to install it, if it doesn't turn on, remove it and turn it 180 degrees, re-install it and re-test.
Now we want to remove the radio. If you have an aftermarket radio, gently pry the small trim ring around the outside of the radio off. You must use something to release the radio from it's sleeve that should be attached to the trim if the radio was installed properly. To do this, I used a couple cheap tweazers that were laying around and inserted them horizontally on either side of the radio. This released the radio and allowed me to slide it out and disconnect the wire harness and antennae cable from the back of the stereo.


If you still have the stock radio, you will need the ford radio remval tool. Essentially ist's just 2 horseshoe shaped pieces that insert into the holes on the sides of a stock radion and allow you to pull it out.
Now we want to remove the plastic piece under the steering wheel by first removing the 2 screws underneath seen here:

and then just working the clips at the top loose and pulling the whole piece out. Now remove the remaining 4 screws in the metal pan underneath that plastic piece you just removed as seen here:

Now remove the two 14MM bolts on either side of the steering column shown here:

Next you pull the whole trim piece outwards towards you, releasing it from its clips. Don't pull it too far though, as there are still wires attached that need to be released from the back of the 4X4 buttons, rear defrost, and rear washer/wiper switches. Here you see the two switches to the left of the steering wheel under the headlight switch:

And behind the 4X4 buttons, looking down from above:

Now you can wrestle the rest of the trim out. Next, remove the 4 screws that hold the instrument cluster into the dash as indicated by the arrows:

Now, while pulling the cluster out as far as you can with one hand, reach underneath and squeeze the sides of the speedometer cable to release it with your other hand. You will have to do this blindly so study this next picture to get an idea of what your feeling for back there. Unhook the speedometer cable first by pushing on the plastic clip that surrounds the end of the cable, from the drivers side towards the passenger side. This releases the little clip you see on the right-hand side of the speedo cable. Releasing the speedo cable first will allow you to pull the cluster out just a bit further to unhook the 2 wiring harnesses. Push on both and of each harness to release it from the back of the cluster housing. This pic shows you what you are feeling for back there:

Now you should be able to pull the cluster out completely. Now remove the seven screws as indicated by arrows in the next pic and remove the clear cover:

Now remove each section of gauge pods starting with the ones on the left, which are the voltage and temp gauges. I had to use a flathead screwdriver to lightly pry them up and out of the housing. Remove the two pods on the left side first, followed by the tachometer, and lastly, the speedometer.

Next we want to remove the needles from each gauge, but first we need to mark them to make sure we get them back in the same position they came on in. Some clusters I've taken apart had needles that are REALLY hard to pull off, but trust me every single one of the needles in this cluster pulls straight off. I have had to lightly pry up on some with needle nose pliers before. I have also broken the round black piece at the center off, but a little superglue fixes that, no problem. first you will need to remove the 2 pins that the speedometer and tachometer rest on when the truck is shut off. These simply pull out. Take your time and work them free. Now the needles can come to rest at their neutral position. Either take a picture with a cell phone before taking any needles off or mark where they go with a pen as I have shown here:

Once they are all marked, or you have some good pics to reference later, you can take all the needles off.
You also need to remove the trip odometer button on the speedo:

That simply pulls straight off.
You will also want to remove the odometer from the back of the speedometer by removing the two Phillips head screws on it.

Now to remove the vinyl gauge faces from the gauge pods, take a knife and slowly and carefully work it down between the vinyl gauge faces and the gauge pods using a teeter-totter type motion with the knife to separate the rubber cement type glue they used to put them on with. It's easy to cut into the vinyl gauge faces doing this, so MAKE SURE you take your time and keep the knife angled slightly toward the gauge housing and away from the vinyl faces. If it seems too difficult to get the knife down between them, or if it seems like the vinyl is stretching while trying to separate them, try warming the gauge face up a bit with a hair dryer to soften the glue. It will look like this when removed from the housing.

Once you have them all off, flip them over and you will see the colored paint they use to make the gauge light appear green, although it appears white. Use some 1500 grit wet sand paper and wet sand the back of the faces where the numbers and lines are. Soon you will see the green paint showing through.

Hold the face up to a light after sanding for a bit and you should see the green numbers and lines turning white.

Continue until it is all white. NOTE: some parts of the face are other colors and no amount of sanding will change it. For instance, on the tach, there is red at the "red-line" area at 5-6k RPM. This will stay red.

They should look like this once you have removed all that needs to be removed to allow the new color of light to shine through.

In retrospect, I would probably use some black paint or a black marker, and black out the km/h letters, numbers and lines so that only the MPH gauge shines, just to clean it up a touch.
Ford used a ton of glue on these to attach the faces to the housings and I've found that as long as the glue isn't cold, I can stick them right back on where they came off. If you don't feel that they are sticking good enough, simply warm up the remaining glue with a hair dryer and press them on with your fingers. You can add some glue if you wish, but make sure you don't get any on the numbers you just sanded or you could end up with streaks through your numbers or lines.
Now turn the gauge housing over so you are looking at the backside where the speedometer and wire harnesses hook in. We will need to replace the 6 bulbs for the gauges from the back of the cluster with the size 194 LED bulbs. The ones we want to replace are marked "ILL" as seen here:

I got a pack of 20 of these bulbs off amazon for under $10 and have done both my Explorers, and my eclipse gauges, as well as some other lights (I converted the 96 Ex, and Eclipses' entire interior to blue LED's except for the map lights). I got my bulbs here http://www.amazon.com/gp/product/B010N8YFYA?psc=1&redirect=true&ref_=oh_aui_detailpage_o04_s00 You can get whatever color you like. There are no fitment issues with these particular bulbs as I have experienced with other LED bulbs, and they put off a lot of light. Replacing them with the gauges still removed makes it easier to make sure you are replacing the correct ones. Now, before you put the gauge pods back in the housing, put the housing in the truck and hook up the 2 wire harnesses. Turn on your park lights and make sure all the LED's are on.

As you can see in the above pic, only 2 of the five LED's are lit, this means the other 3 are not installed correctly. Remove the bulbs right from here, turn them 180 degrees and re-install them. They should all be lit now like this:

Now you can finish reinstalling everything else in reverse order. I recommend putting everything back together with the clear lens/cover still removed and test everything, including going down the road to check the speedometer and other gauges for proper operation. You can still pull the needles back off at this point to adjust their position if need be. It may be a good idea to check your speedometer against a GPS app on your cell phone to make sure it is accurate. I once screwed up and lost the placement of the speedometer needle, so I installed everything without the clear cover, went out on a back highway and set my cruise at 55MPH according to a GPS app, and stuck the needle on pointing to 55MPH. I recommend having someone help with this to either drive while you stick the needle on or visa versa. Once you are satisfied with them, put the clear cover back on, you can do this while the gauge housing is already installed in the truck. Finish re-installing everything else in reverse order. When all done, it should look like this:

And at night:

They can be dimmed with the stock dimmer just as the old bulbs did as well.
Now, as I mentioned above, the climate controls, 4X4 buttons, and the 2 switches under the headlight switch will still be green. I attempted to change the color of the climate controls with no luck. I removed the vinyl the same as I did all the others and attempted to wet-sand the green filter off the back. Before I knew it, I had sanded off the black color as well to the point that you can't tell what word was there.

Holding it up to a light shows what I mean a little better:

You can also see where the black was messed up while removing it from the controls. This alone could easily be fixed with a few coats of black marker or paint.
I did try one chemical cleaner to remove the green with no success. I'm sure, however, if I did find a chemical that would do it, it would also remove the black as well (if it doesn't melt the vinyl altogether.)
The only other possible way I can see of doing this is to make a new face by scanning an original into a computer, and using photoshop or the like to tweak it how you want but leaving the words clear, then print it out on a transparency, cut it out, and glue it on. This isn't a possible solution I will be trying as I plan on swapping out my instrument cluster and climate controls to the white face Indiglo gauges. Because of this, I'm open to sacrificing my stock piece for the greater good if anyone has any ideas to remove the green filter without removing the black.
That issue aside, I did go ahead and remove and disassemble the other switches and buttons that are green to show you what would be required to change those to blue as well. I will be doing this at a later date, but I invite anyone who may is able to do it sooner, to either add a write up here or add a link to your write up here.
To change the 4X4 buttons' color, squeeze the 4 tabs on the side of the button housing on the backside of the dash trim and remove the button housing. You will see a small round circle on the back of the housing with a slot in it. Use a flathead to turn this circle a 1/4 turn to the left. This is actually a bulb and it is now free. You can order the proper size LED from multiple places online along with the proper resistor to allow the LED to be used in a 12V platform. Wire up some leads and connect them to the wires in the harness that become hot when the park light/headlights are turned on. This is another mod I will not be doing as I have a manual shift t-case for this truck and the area where the buttons are now will become a panel to hold various light switches.
As for the switches on the other side below the headlight switch, squeeze the sides together on the backside of the dash trim on each switch to release it from the trim. For the defrost button, you will need to use a very small flathead to release the lock tabs on both sides of the switch housing to remove the inner workings:

Here is what it looks like when removed:

The bulb you need to replace is the green one (obviously). You may be able to get a voltage reading off this order to get the proper resistor for a replacement bulb in the color of your choice. Another option would be to remove the green rubber "condom" over the bulb and find a way to filter it to blue. You could also make and run your own LED through the housing and up into the area where the original bulb was housed.
For the rear wiper/washer switch, it's a simple twist in socket just like the 4X4 buttons' housing was. Use your chosen method to do the same thing here.
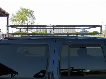
As I said at the beginning, this is the 3rd vehicle I have done this to now. Here are some pics of my 96 XLT with the full swap done to blues on the interior as well as the dash lights. I still need to do the window, lock switches, and other dash areas, though. You can see here the under dash lights I added, and the lights in the door I changed out to blue as well.


I installed the overhead console last year and retrofitted some LED lights into it. I also had to wire in the same type of light into the rear cargo light.


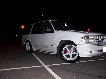
And here is my Eclipse with the same type of conversion throughout, minus the stereo which will be getting changed out anyway.

Well, there you have it, my version of changing out the dash lights to a different color. Any and all questions are welcome as long as they haven't been addressed in the write-up. Thank you for checking out this 'how to', and good luck on your modification of your dash lights, feel free to show them off here when done, or add any other tricks to this thread for us all to use!! Any and all feedback (as long as it's constructive) is more than welcome as well.
This is now the 3rd vehicle I have done this on, and the same process has worked for all of them. Although I didn't do it at this time, I will also show you how to change the bulbs in the other switches on the dash so they are also a different color. The one drawback is the climate controls. I was unable to find a way to get rid of the green filter/paint on the back of the face to allow a different color to shine through. I will update if I ever do find a way to do it, and if anyone else knows a good method, please let me know so I can add it to the write-up and credit you with the help.
Tools needed (roughly): Phillips head screwdriver, torque bits size 15 and 20, flathead screwdriver, sharp knife, needle nose pliers, 14MM socket, 8MM socket, pen or cell phone/digital camera, black marker or black paint (optional)
Materials needed: At least 5 LED bulbs in the color of your choice to change the color of the instrument lights only, 1 additional LED to change the ashtray light if you so desire, 1500 grit (or similar) wet sandpaper
First, we need to get the instrument cluster out of the truck. To do that, we need to remove the trim that surrounds the radio, climate controls and the instrument cluster. Start by removing the ashtray. Simply push down on the silver tab shown here with the red arrow and pull straight out. Next, remove the two screws at the green arrows and pull the inner ashtray assembly piece out.
NOTE: On top of the inner ashtray assembly you will see the ashtray light. This is easily changed by removing the socket from the metal piece, removing the green dome light filter, and changing the bulb to whatever color you choose. You can see the bulb socket here with the green dome light filter already removed.
I will mention it a few times, but most LED bulbs will only work if installed in the correct orientation. i.e. positive to positive and negative to negative. The easiest way to do this is to install it, if it doesn't turn on, remove it and turn it 180 degrees, re-install it and re-test.
Now we want to remove the radio. If you have an aftermarket radio, gently pry the small trim ring around the outside of the radio off. You must use something to release the radio from it's sleeve that should be attached to the trim if the radio was installed properly. To do this, I used a couple cheap tweazers that were laying around and inserted them horizontally on either side of the radio. This released the radio and allowed me to slide it out and disconnect the wire harness and antennae cable from the back of the stereo.
If you still have the stock radio, you will need the ford radio remval tool. Essentially ist's just 2 horseshoe shaped pieces that insert into the holes on the sides of a stock radion and allow you to pull it out.
Now we want to remove the plastic piece under the steering wheel by first removing the 2 screws underneath seen here:
and then just working the clips at the top loose and pulling the whole piece out. Now remove the remaining 4 screws in the metal pan underneath that plastic piece you just removed as seen here:
Now remove the two 14MM bolts on either side of the steering column shown here:
Next you pull the whole trim piece outwards towards you, releasing it from its clips. Don't pull it too far though, as there are still wires attached that need to be released from the back of the 4X4 buttons, rear defrost, and rear washer/wiper switches. Here you see the two switches to the left of the steering wheel under the headlight switch:
And behind the 4X4 buttons, looking down from above:
Now you can wrestle the rest of the trim out. Next, remove the 4 screws that hold the instrument cluster into the dash as indicated by the arrows:
Now, while pulling the cluster out as far as you can with one hand, reach underneath and squeeze the sides of the speedometer cable to release it with your other hand. You will have to do this blindly so study this next picture to get an idea of what your feeling for back there. Unhook the speedometer cable first by pushing on the plastic clip that surrounds the end of the cable, from the drivers side towards the passenger side. This releases the little clip you see on the right-hand side of the speedo cable. Releasing the speedo cable first will allow you to pull the cluster out just a bit further to unhook the 2 wiring harnesses. Push on both and of each harness to release it from the back of the cluster housing. This pic shows you what you are feeling for back there:
Now you should be able to pull the cluster out completely. Now remove the seven screws as indicated by arrows in the next pic and remove the clear cover:
Now remove each section of gauge pods starting with the ones on the left, which are the voltage and temp gauges. I had to use a flathead screwdriver to lightly pry them up and out of the housing. Remove the two pods on the left side first, followed by the tachometer, and lastly, the speedometer.
Next we want to remove the needles from each gauge, but first we need to mark them to make sure we get them back in the same position they came on in. Some clusters I've taken apart had needles that are REALLY hard to pull off, but trust me every single one of the needles in this cluster pulls straight off. I have had to lightly pry up on some with needle nose pliers before. I have also broken the round black piece at the center off, but a little superglue fixes that, no problem. first you will need to remove the 2 pins that the speedometer and tachometer rest on when the truck is shut off. These simply pull out. Take your time and work them free. Now the needles can come to rest at their neutral position. Either take a picture with a cell phone before taking any needles off or mark where they go with a pen as I have shown here:
Once they are all marked, or you have some good pics to reference later, you can take all the needles off.
You also need to remove the trip odometer button on the speedo:
That simply pulls straight off.
You will also want to remove the odometer from the back of the speedometer by removing the two Phillips head screws on it.
Now to remove the vinyl gauge faces from the gauge pods, take a knife and slowly and carefully work it down between the vinyl gauge faces and the gauge pods using a teeter-totter type motion with the knife to separate the rubber cement type glue they used to put them on with. It's easy to cut into the vinyl gauge faces doing this, so MAKE SURE you take your time and keep the knife angled slightly toward the gauge housing and away from the vinyl faces. If it seems too difficult to get the knife down between them, or if it seems like the vinyl is stretching while trying to separate them, try warming the gauge face up a bit with a hair dryer to soften the glue. It will look like this when removed from the housing.
Once you have them all off, flip them over and you will see the colored paint they use to make the gauge light appear green, although it appears white. Use some 1500 grit wet sand paper and wet sand the back of the faces where the numbers and lines are. Soon you will see the green paint showing through.
Hold the face up to a light after sanding for a bit and you should see the green numbers and lines turning white.
Continue until it is all white. NOTE: some parts of the face are other colors and no amount of sanding will change it. For instance, on the tach, there is red at the "red-line" area at 5-6k RPM. This will stay red.
They should look like this once you have removed all that needs to be removed to allow the new color of light to shine through.
In retrospect, I would probably use some black paint or a black marker, and black out the km/h letters, numbers and lines so that only the MPH gauge shines, just to clean it up a touch.
Ford used a ton of glue on these to attach the faces to the housings and I've found that as long as the glue isn't cold, I can stick them right back on where they came off. If you don't feel that they are sticking good enough, simply warm up the remaining glue with a hair dryer and press them on with your fingers. You can add some glue if you wish, but make sure you don't get any on the numbers you just sanded or you could end up with streaks through your numbers or lines.
Now turn the gauge housing over so you are looking at the backside where the speedometer and wire harnesses hook in. We will need to replace the 6 bulbs for the gauges from the back of the cluster with the size 194 LED bulbs. The ones we want to replace are marked "ILL" as seen here:
I got a pack of 20 of these bulbs off amazon for under $10 and have done both my Explorers, and my eclipse gauges, as well as some other lights (I converted the 96 Ex, and Eclipses' entire interior to blue LED's except for the map lights). I got my bulbs here http://www.amazon.com/gp/product/B010N8YFYA?psc=1&redirect=true&ref_=oh_aui_detailpage_o04_s00 You can get whatever color you like. There are no fitment issues with these particular bulbs as I have experienced with other LED bulbs, and they put off a lot of light. Replacing them with the gauges still removed makes it easier to make sure you are replacing the correct ones. Now, before you put the gauge pods back in the housing, put the housing in the truck and hook up the 2 wire harnesses. Turn on your park lights and make sure all the LED's are on.
As you can see in the above pic, only 2 of the five LED's are lit, this means the other 3 are not installed correctly. Remove the bulbs right from here, turn them 180 degrees and re-install them. They should all be lit now like this:
Now you can finish reinstalling everything else in reverse order. I recommend putting everything back together with the clear lens/cover still removed and test everything, including going down the road to check the speedometer and other gauges for proper operation. You can still pull the needles back off at this point to adjust their position if need be. It may be a good idea to check your speedometer against a GPS app on your cell phone to make sure it is accurate. I once screwed up and lost the placement of the speedometer needle, so I installed everything without the clear cover, went out on a back highway and set my cruise at 55MPH according to a GPS app, and stuck the needle on pointing to 55MPH. I recommend having someone help with this to either drive while you stick the needle on or visa versa. Once you are satisfied with them, put the clear cover back on, you can do this while the gauge housing is already installed in the truck. Finish re-installing everything else in reverse order. When all done, it should look like this:
And at night:
They can be dimmed with the stock dimmer just as the old bulbs did as well.
Now, as I mentioned above, the climate controls, 4X4 buttons, and the 2 switches under the headlight switch will still be green. I attempted to change the color of the climate controls with no luck. I removed the vinyl the same as I did all the others and attempted to wet-sand the green filter off the back. Before I knew it, I had sanded off the black color as well to the point that you can't tell what word was there.
Holding it up to a light shows what I mean a little better:
You can also see where the black was messed up while removing it from the controls. This alone could easily be fixed with a few coats of black marker or paint.
I did try one chemical cleaner to remove the green with no success. I'm sure, however, if I did find a chemical that would do it, it would also remove the black as well (if it doesn't melt the vinyl altogether.)
The only other possible way I can see of doing this is to make a new face by scanning an original into a computer, and using photoshop or the like to tweak it how you want but leaving the words clear, then print it out on a transparency, cut it out, and glue it on. This isn't a possible solution I will be trying as I plan on swapping out my instrument cluster and climate controls to the white face Indiglo gauges. Because of this, I'm open to sacrificing my stock piece for the greater good if anyone has any ideas to remove the green filter without removing the black.
That issue aside, I did go ahead and remove and disassemble the other switches and buttons that are green to show you what would be required to change those to blue as well. I will be doing this at a later date, but I invite anyone who may is able to do it sooner, to either add a write up here or add a link to your write up here.
To change the 4X4 buttons' color, squeeze the 4 tabs on the side of the button housing on the backside of the dash trim and remove the button housing. You will see a small round circle on the back of the housing with a slot in it. Use a flathead to turn this circle a 1/4 turn to the left. This is actually a bulb and it is now free. You can order the proper size LED from multiple places online along with the proper resistor to allow the LED to be used in a 12V platform. Wire up some leads and connect them to the wires in the harness that become hot when the park light/headlights are turned on. This is another mod I will not be doing as I have a manual shift t-case for this truck and the area where the buttons are now will become a panel to hold various light switches.
As for the switches on the other side below the headlight switch, squeeze the sides together on the backside of the dash trim on each switch to release it from the trim. For the defrost button, you will need to use a very small flathead to release the lock tabs on both sides of the switch housing to remove the inner workings:
Here is what it looks like when removed:
The bulb you need to replace is the green one (obviously). You may be able to get a voltage reading off this order to get the proper resistor for a replacement bulb in the color of your choice. Another option would be to remove the green rubber "condom" over the bulb and find a way to filter it to blue. You could also make and run your own LED through the housing and up into the area where the original bulb was housed.
For the rear wiper/washer switch, it's a simple twist in socket just like the 4X4 buttons' housing was. Use your chosen method to do the same thing here.
As I said at the beginning, this is the 3rd vehicle I have done this to now. Here are some pics of my 96 XLT with the full swap done to blues on the interior as well as the dash lights. I still need to do the window, lock switches, and other dash areas, though. You can see here the under dash lights I added, and the lights in the door I changed out to blue as well.
I installed the overhead console last year and retrofitted some LED lights into it. I also had to wire in the same type of light into the rear cargo light.
And here is my Eclipse with the same type of conversion throughout, minus the stereo which will be getting changed out anyway.
Well, there you have it, my version of changing out the dash lights to a different color. Any and all questions are welcome as long as they haven't been addressed in the write-up. Thank you for checking out this 'how to', and good luck on your modification of your dash lights, feel free to show them off here when done, or add any other tricks to this thread for us all to use!! Any and all feedback (as long as it's constructive) is more than welcome as well.