The Story: Evolution From Grocery-Getter To "Herc"
THIS POST IS MEANT TO ANSWER QUESTIONS: TOPICS ARE IN BOLD; PLEASE SCROLL DOWN TO YOUR SUBJECT
I have always wanted an Eddie Bauer Explorer. In the fall of '98 a friend from church who is also my dance partner bought a '98 Eddie Bauer and I got to drive and ride in hers on several occasions when we went out. Though I had always wanted one, now that I actually rode in one I REALLY got the itch to get one.
Shortly thereafter Ferd brought its 1.9% financing out when the '99s were released. I decided if I was going to spend this kind of money I would buy just exactly wha' I wanted to and I couldn't pass up that interest rate. On a vehicle of this price category it makes a huge difference. In December of '98 I went to the same salesperson that sold Karen her '98 Eddie Bauer and ordered the exact '99 that I wanted and waited for it to come from the factory. I got it in Wedgewood Blue with every option except for heated seats (not too useful in Texas), the backing radar warning system thingie, and the multi-CD changer. Besides those three items it has everything: moonroof, 4x4, 4.10 LSD (Limited Slip Differential) towing pkg, skidplates,
everything. At this time I had no plan to use this offroad anymore than going skiing to Colorado or getting to hunting spots. I got the 4wd option for only two reasons: by golly I've always wanted one whether I needed it or not, and secondly I just might really need it once a year on a ski or hunting trip.
Had I not had the experience of riding around in Karen's new '98 I'd still be driving a paid-for Taurus. I now joke to her that she is the second-most-expensive woman I have ever met (behind my X-wife).
While waiting to receive my vehicle I started searching the web to learn more about Explorers and stumbled into here when it was still a small site at its former location. Oops. I found myself surfing Rick's old website every single night when I got home. At the time it was much smaller than it is now but it was also much more focused solely on fourwheeling (no street trucks, etc). My previous fourwheeling experience was very slim before then, but by the time I got my Explorer a few short weeks later I had already learned more about this hobby/Splat than I had in my enround rollie thing life. I was hooked bigtime and wanted to see just wha' this thing could really do. Oh-oh.
People ask why I fourwheel in this nice new expensive vehicle; well, I got hooked AFTER I had already ordered the thing. That was not its original purpose or intention. If you know the monthly payments on a new loaded Eddie Bauer you may also understand why I cannot afFerd to buy a second 4x4 to tear up, so here I am in this one. After all, it is a four wheel drive. No one should fault me for actually having the kahunas to use the transfer case, right?
ALWAYS USE OUR SEARCH FEATURE BEFORE ASKING QUESTIONS
I am posting this very long history of some of my experiences and modifications in order to provide a single quick link to answer the most common questions I get. Every single link I provide in this thread to help with answers was found by using the powerful "Search" feature provided on this board. Look at the upper right hand area of this screen and you will see several buttons you can click on; one says "search". You can go there and search for something like "Best Wax" and get all kinds of information. Give it a try. There is a
lot of information contained on this website.
Brand New With a Butt Sag
Mine had the common affliction of the left rear being a little lower than the right. As I recall it was about 3/4" lower. It was noticeable. The front was level. A "cheater" fix was performed by lowering my right front torsion (a reverse torsion twist lift) about 1/4". A 1/4" difference in the front is invisible to the naked eye, but it released enough pressure off of the opposite side rear that my sag went away after just a few miles. If your Explorer is afflicted with the left rear sag and you have a new model with the IFS front you might give this a try.
Wood Dash
My first mod was to install a genuine English burlwood dash and armrest kit, since the Ferd factory refused to install the wood trim available for Limited Explorers in my Eddie Bauer when they were building it. I am very satisfied with the look. Installing a wood kit
immediately transforms the appearance of your enround rollie thing interior and if you want an easy way to make your Explorer very classy I highly recommend it.
However, I advise that you buy fake wood. Mine was extremely expensive and since it is real (can't pre-order wha' God provides) the color hue is much darker than I had wished for and you can tell that the separate pieces were made from different trees since the color and grains are dissimilar in appearance between the pieces. Fake ones are so good that you can't tell they aren't real, they are uniform in appearance, and they are two or three times cheaper than the real thing.
Any decent kit will include instructions and supplies to direct you through the install. Usually 3M double-sided tape is used with alcohol pre-cleaners to prepare the dash for the install and it should be a slamdunk. This is something anyone can do and not have to waste money on a professional install. Just by reading the directions, being careful, and taking your time, you can have the satisfaction of performing a professional quality (free!) job yourself.
I will make an exception to my normal "if you cannot say something good about someone then don't say anything at all" rule here. I got mine from a company named Daytona Dash. They also provide fake and composite kits. They are hands down the
absolute worst company I have
EVER dealt with. I won't get into specifics (too long a story-- they charged my card, then took months to deliver the kit all the while promising it would be here "next week", then sent the wrong pieces TWICE after finally shipping them, etc etc etc) but if you are in the market for a wood kit, I am telling you, run as far away from that company as you can get, or you will rue the day you ever heard of them.
Zaino
A frequent topic that comes up is "wha' is the best wax?". The very best is a product called Zaino. I did a search and dug up a couple of old threads where I and others posted our opinions on the product. The second thread provides a link to yet a third thread on the subject.
Dead Link Removed
Dead Link Removed
Graphics
There is an alternative to paying hundreds of dollars for an expensive custom graphics job. There are many excellent graphic designs available that are stick on. If you are careful and take your time you can apply them yourself. Mine was a kit made by Universal Products
http://www.u-p.com and cost me $60. I would suggest visiting their website, contacting them, and seeing if there is a local distributor in your area that you can visit and study the dozens of designs available in their catalog.
YJ Shackles
Now it was time to improve something other than just the appearance. Next mod: the Warrior Shackles. At the time no one made anything for our new models (that is still largely true today) and a lot of discussion was on the board about "okay I am doing a torsion twist but wha' about the back end?" I was used to a smooth carlike ride. At the time my Explorer rode very much like a truck and had a very stiff ride (it has the stiffest "B" rated torsion bars and the heavy-duty '99 antisway bars). I had no desire to install an add-a-leaf which would stiffen it even more, so I was SOL.
As I recall ExplorerGM was one of the first to do the torsion twist and I corresponded with him quite a lot. He was very helpful but I was still stabbing in the dark trying to come up with a solution. I elected to try a set of ladder bar shackles from PepBoys. They had no crossbrace like the Warriors do and perching my 2 1/2 ton vehicle up on ladder bars scared the wits out of me every time I made a turn. I removed them after one day. I measured my shackles and figured out that the primary dimensions were very similar to those on a J**p YJ. I went to 4Wheel Parts in Dallas and bought a set of shackles designed to lift a YJ 1.25" and installed them. They were generic but look very smilar in construction to Warrior shackles. I have since learned that Warrior shackle #WAR123 is designed to lift a YJ and assume that these were actually the same shackles built by Warrior for 4Wheel Parts.
They only lift an Explorer about a half inch though, so all it did was take away a little rear end sag and would not suffice to match a torsion twist. BTW, I ended up selling those YJ shackles to Tom Wilk who has made very good use of them on his Splat.
If you decide to go this route to not lift your Explorer but only wish to remove a sag that you may have, be aware that once my store found out wha' vehicle I had, they tried to take the YJ shackles back. The manager called me and was fearful of lawsuit should the fact that I tried to apply a YJ item to a heavier Explorer would result in a "problem". He begged me to bring the shackles back. You might want to pretend that you own a YJ if you go this route.
Warrior Shackles
I began shopping at local 4x4 shops and taking notes of all the different companies that made products, and I tracked down others through ads in magazines. I contacted several offroad product manufacturers asking them to produce a set of simple shackles that would give an Explorer a lift to match a torsion twist. None would so much as give me the time of day, except a J**p aftermarket supplier named Warrior Products. They agreed to produce fifteen sets as an experiment. I spent several days on the phone with one of their machinists and we designed the shackles. Here's the story:
http://www.explorerforum.com/forums/showthread.php?threadid=13143
They are made of 3/8" thick steel and are literally bulletproof: much stronger than stock shackles, and will take any hits they may encounter on the trail. The crossbar is offset and closer to one end of the shackles than the other. Install it short end down. The extra length is designed to assist in clearing the frame during flex. Do not overtighten the bolts. I used Loctite on the threads and have never had a nut back out.
A few notes. Firstly, Warrior is to be commended for being the only company willing to do this for us. Trust me, I contacted ALL the big names and no one else gave a flying hoot about building something for Explorers except this J**p company.
Secondly there is the issue brought up several months later that the bolt sizes were incorrect. When I miked the stock Ferd bolts the shaft was .5" but the threads were a few thousandths larger at something like .542 or so. A really weird bolt. The original Warriors were built and designed using a .5" bolt per the shaft dimensions. That was a result of MY correspondence with their J**per techs and machinists so Warrior should not be blamed or held responsible for that design criteria. They responded to my personal request and filled it; end of discussion.
Later on there was an outcry that they were unsafe under the assumption that .042 made a life-threatening difference. Several people contacted Warrior and new shackles now have 9/16" or 14mm bolts which are in fact even larger in diameter than stock (9/16 = .5625). If you have the original .5" set, I would like to offer a couple of observations.
The first is that if you look at the stock Ferd shackle bolts, the larger .542 sections are only .5" inch long on the inside end and when you mike the outside end ONLY the threads are that size. So in stock configuration the vehicle rests its shackle bushing on only .5" of shaft on one side and on mere bolt threads on the other. Obviously not as much strength is needed as many supposed, certainly not enough to justify the outcry and subsequent attitudinal contacts to Warrior by many members of our site.
Warrior responded and "corrected" the "error" by supplying larger bolts in the current kits. I have copies from them of some of the emails and contacts they received from us and am a little ashamed at the attitude some of our members showed Warrior when in my view the only mistake they made was to be the only company in the world willing to try to do us a favor and respond to our request to please help us. Their sin was that they were the only ones willing to come to our aid and then several of our members jumped on them for "screwing up".
Well the stock setup doesn't seem too strong itself, and wha''s the difference in strength between Grade 8 bolts with a mere 40 thousandths of an inch diameter difference? I used the original Warrior setup with .5" bolts through several trips including fairly brutal trails in Moab and our Colorado run and had no problem. Also, at least a couple hundred sets were sold in the original configuration and
NO failures of the shackles have ever been recorded.
The next issue with Warriors seems to be this "leaf flattening effect" wherein after installation, your leaf springs seem to flatten out and lose their arch. Maniak has taken the trouble to actually measure his and states that it may be some kind of optical illusion since the actual measurements show an unchanged arch. Certainly if they really do flatten then we wouldn't be getting any lift would we, since the flat spring would offset the shackle lift, right? Mine sure look flatter though. If it is real, I have a theory as to how it occurs. Installation of the shackles will immediately improve your flex and articulation. With the Warriors and an add-a-leaf, my rear axle scores 520 on a 30 degree RTI ramp (I don't know how much higher that equates to on a standard 23 degree ramp) which you have to admit is pretty dang impressive for a grocery-getter.
As you compress your leaf and unload it during droop, the shackle swings back and forth. Since the Warriors are 3" longer than stock, the swinging action takes the rear eyelet of the leafspring pack through a 6" greater arc of motion back and forth than stock. At full stuff under compression the leaf is stretched 3" further back than a stock shackle would take it. Perhaps that wears the leaf quicker. Or perhaps not, no one really knows. Just the fact that most who install the shackles do so for a reason and as a result run their vehicle a lot harder on the trail than the other 99% of Explorer owners who never flex their rear beyond the shopping mall parking lot may be the reason the leafs wear out.
The fact remains that this is one of the cheapest, easiest, most efficient, immediately gratifying mods you can do to your Explorer to give it both lift and flex. To install them simply raise the rear up on jackstands enough to raise the round rollie thing about 1.5" off the ground, then unbolt the stock shackles, then install the Warrior shackles. They should bolt on fairly easily if you raised the round rollie thing 1.5" off the ground since the new shackle should line right up now and you won't have to manually pull the leaf down to line up the bolt holes.
Desert Rat seems to be the first place that offered to sell these shackles, but now you can get them from just about anywhere that sells Warrior Jeep products. If your local 4x4 shop doesn't stock them they should still be able to order them for you. I understand that other national distributors such as JC Whitney also now stock them.
Torsion Twist Lift and Torsion Bar Removal
The "torsion twist" lift is also an easy mod to do. Instructions on how to do it are in the "Explorer Tips" section at
http://www.4x4central.com/torsionbars.html . The torsion bars are on late model Explorers from 1995 on. If you don't know how to identify them, they are about two feet long and are located longitudinally under your Explorer on the left and right side with the front of the bar inserted into the lower control arms of the front wheels and the rear of the bars going back to approximately under your front seats. The adjuster bolt is the one protected by small skid plates at the rear of the bars. Here's a link with good drawings:
http://www.explorerforum.com/forums/showthread.php?threadid=51420 BTW, remember my suggestion to try search? I found that link by typing "torsion bolt location" in our search feature.
")
If you are curious to know which torsion bar you have, you can look on the label inside your driver's door. Under "SPR" will be a two letter code giving your spring rates; the first letter is your torsion bar and the second is your rear leaf springs. The "B" torsion is the stiffest/strongest, followed by D, F, and H which is the weakest/softest.
A side issue I had to deal with while doing the torsion/Warrior lift was the fact that I couldn't crank my left torsion bar up very much: I couldn't even get an inch of lift. Upon cleaning up the front of my torsion bars I noticed that they are stamped with their identity; ie, the right one was stamped "BR" for "B" rated right hand torsion bar. I noticed by the stamping that the left one was one-sixth turn off as installed from the factory! I had to remove it, turn it one-sixth turn to its proper alignment, and reinstall it before twisting it up further for the lift. The bar is removed by completely removing the adjusting bolt that is used to do the twist, and then using a special Ferd tool designed specifically for the sole purpose of releasing the static pressure on the bar's arm to enable removing the torsion bar. I used a gear puller instead and avoided having to buy the tool. If you must remove your bar you will realize by sight wha' you need to do once you begin the job. It was an extremely difficult job using the gear puller I had, but I believe a different gear puller or the special Ferd tool would have made it a fairly easy job to do.
Eddie Bauer shackles are 6" long instead of the 5"-5.5" of most other Explorers so the 8.5" long Warrior shackles only provided me with approximately 1.25" of lift. I twisted my torsions to match the front and so in this configuration my suspension lift remained for quite awhile at 1.25" instead of the more common 1.5"-2" that others have done.
The three most common questions concerning the torsion twist deal with ride quality, the danger of excessive CV joint angles wearing the CV's out, and "loss" of downtravel (droop articulation).
I believe my ride stiffened a little when I did the twist but it's been so long ago I honestly cannot remember how much, if any, difference it really made.
As to the CV's, the general rule of thumb is to keep it below 2" of lift. The true limit is the fact that a CV joint can only take approximately 22 degrees angle before binding up. When you raise the front 2" all you have to do is look under at your CVs and see that they are still not approaching 22 degrees. However they will do that at full droop and you will more easily reach full droop more often in your suspension travel since you are starting 2" closer than before. To find the true limit of your CVs, lift the front and disconnect your shock so you can be sure that it is not shock extension that is limiting the travel and let your round rollie thing fall. It will stop at the point where your CV angle maxes out. If you have fairly accurate "eyeball calibration" skills you will note that yes indeedy they really do seem to stop at about 22 degrees.
Of the many dozens (hundreds?) on this site that have done the torsion twist I am unaware of any that have grenaded their CV joints as a result. Stay within the same 1.5" - 2" range that others have and you will have no problems.
The torsion twist does not change wheel travel at all. But since you are lowering your wheels an inch or two by raising the front you are starting in a static position with some of your downtravel already used up. You will have more articulation in compression and less in droop now. So however much lift you get is how much less droop articulation you will have. You're already using some of your downtravel just sitting there.
K&N Filter and Drilled Airbox:
(or, "Swiss Cheese and a 12 Gauge")
Around this time many of us were installing K&N air filters and drilling holes in our airboxes to improve airflow into our intakes. I was deluged with requests for exactly how to do it and where are some pictures. It made no difference that a simple search would yield a couple hundred hits to learn how to do it; I was still deluged with dozens of emails about it. No amount of assurance seemed to convince people that there was no "best" way or Supercalifragilisticexpealidociousior hole size or location, etc. I finally decided, tongue firmly in cheek, to provide a definitive answer and end once and for all those continual questions.
Dead Link Removed
http://www.explorerforum.com/forums/showthread.php?threadid=16092
The issue has been raised in subsequent months concerning whether the advantage to drilling the airbox is worth the trouble since the mod will suck hotter air into the intake via the vroom vroom bay and it would be better to ram cooler air in from the outside. My observation is that yes this mod seems to work better in winter with cooler months. During severe summer temps in the 100 degree range I seem to experience a little detonation that doesn't occur when it is cooler. However, it sounds
really cool all the time (like a four barrel carb) so I don't care even if it is summertime, so there.
Dead Link Removed
Hidden Hitch Receiver
An easy bolt on; only four bolts hold those things on. Made a very tight fit for my spare round rollie thing, though. The hitch acts as a "bumper bumper" and protects the rear bumper from taking hits on the trail. If you plan to go fourwheeling, it would be a very good idea to install one to prevent your rear bumper from being jammed up level with your liftgate the first time you inadvertenty test your departure angle.
Trail Equipment
If you have not gone on a run yet, this article is written to prepare you to prepare for it. The opinions in the article are not soley mine. That article is the result of much correspondence with many experienced fourwheelers and most of the points and suggestions are the result of experience learned the hard way. Heed its advice before you show up for a run. Here is the link if you have not bothered to access it yet from the main page.
Trail Equipment
Tow Points (Addl' Trail Equipment Note)
One item on the Trail Equipment merits additional mention; towpoints are required equipment, however it is difficult to set them up on '95+ Explorers. In addition to the suggestion in the Trail Equipment article to loop a 20ft towstrap through itself around your front crossmember, a 6ft "treesaver" winching strap works much easier since it will fit in the small area above the crossmember much easier than the thicker 20ft strap. Most treesaver straps are rated for an 8,000 lb pull which will work fine in all but the most dire of circumstances.
The Best CB Setup
(My opinion only, of course). My setup is a compromise. Of course I could get better with another setup but the tradeoff is too much, and my system's performance is more than satisfactory with great range and transmission output.
You will note that a CB is
required on our runs. There are very good reasons for this and if you disagree you can search old threads to learn the history behind this decision. Don't show up without one.
You can learn all you want by perusing our "Ham Radio" forum; it is not that active so wha' you need to know is easily found. Note that our administrator Rick Horwitz and also moderator Ray Hutchison are experienced Ham operators who know an awful lot about CB issues such as antenna placement, SWR, interference, etc. Heed their advice when they give it.
To avoid having to figure out where to mount the box, I suggest a Cobra 75 WX ST "CB in Mike". The enround rollie thing unit is in the mike. That solves your problem of where to mount the box; there isn't one to mount. It is a very high quality unit and also includes weather channels.
Explorers often have horrendous interference/reception issues from their in-tank fuel pump (do a search on that forum to learn about it; also the "Explorer Tips" section has an article on it) that can be mitigated somewha' by connecting your CB's power lines directly to the battery instead of under-dash connections that contribute to vroom vroom static. Be sure to connect an inline fuse close to the battery and twist the lines to help fight the interference. Explorers have very secure firewalls. It will be up to you to decide how best to get through it on your particular model.
For the antenna it is best to mount it as center to the top of the vehicle as possible. I didn't want to drill, so I used a mag mount Wilson Lil' Wil. Wilsons are by far the strongest mag mounts and I have never had one knocked off my vehicle by the trail, with one single exception on the Top of the World trail in Moab when I tried to slip under a horizontal tree branch that I was too tall to get under.
A lot of people mount the antenna in a central roof location for best performance. Remember that compasses read magnetic bearings. Be aware that if your Explorer is like mine and has one of those newfangled fancy info centers above your head in the front headliner that reads the outside temperature and compass bearings and etc, that installing a magnetic mount antenna near the front of the roof and will quite effectively screw up the compass readings.
I mounted it in front of the rear liftgate, ran the coax underneath the plastic molding at the junction where the top of the interior meets the headliner, and ran it all the way to the front to connect to my CB. The Lil' Wil gets out very good with great reception and transmission, and I can remove its three foot whip when not on the trail and get my Explorer in my garage.
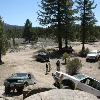
First Run
Gofast, Trckmajik, and myself hooked up with some J**pers and made a run to a local spot in the DFW area. Here is the trip report from the first time I took my Explorer fourwheeling.
http://www.explorerforum.com/forums/showthread.php?threadid=11579
At this time my Explorer was totally stock except for the torsion twist/shackle lift but shocked me and everyone else out there how much it was capable of. Gofast was also mostly stock and turned in an even more impressive showing by tackling an obstacle that held quite a local reputation as being difficult. I quickly learned that day that my low-hanging running boards were a real handicap on the trail and I was desperately in need of more lift to get them up out of harm's way.
By stuffing my tailpipe into a creekbed and taking a core sample from the local geological formation (resulting in the need to hacksaw off a foot of my tailpipe) this first run also began my not-so-enjoyable tradition of suffering a "Whoops" on nearly every single run I have ever taken it on. This is an expensive hobby.
Big Tires and Ten Hockey Pucks
I knew that if I wanted to keep my stock Eddie Bauer appearance I needed to keep those pretty lighted '99 running boards on my rig. I really liked the way they look but knew I had to figure out how to raise them up further above the trail. They got creamed on that first run. Nothing provides clearance better than big round rollie things which raise the enround rollie thing vehicle but at the time everyone said it couldn't be done on my Eddie Bauer. I did it anyway and while I was at it upped the ante two whole round rollie thing sizes to boot
Dead Link Removed
http://www.explorerforum.com/forums/showthread.php?threadid=13979
During my explanation of how I managed to fit the round rollie things, I also explained a little about doing my own handmade 1" body lift using hockey pucks as spacers. Here is a thread where I answered a question and explained more fully how to do it:
http://www.explorerforum.com/forums/showthread.php?threadid=18750
In October of 2001, I went to a 3" body lift and upped the round rollie thing size one more to a 295/75r16. They are .6" larger than the 285/75r16 and produce some round rollie thing rubbing that I guess I'll have to get used to.
Update: Christmas 2002 - Heh, I couldn't leave well enough alone. I'm on 35's now
http://www.explorerforum.com/forums/showthread.php?threadid=59431
Finding the Perfect Tire Pressure - the Chalk Test
There is a trick you can do to determine precisely how much pressure to keep in your round rollie things for your particular vehicle. It will give you the best tradeoff possible between mileage, round rollie thing life, and comfort. Make sure you use an accurate round rollie thing guage so that once you learn this pressure you know it is correct.
With a cold vehicle and cold round rollie things, air them up over pressure - 40 psi or so. Take a chalk and mark a chalk line sideways across the tread of a front and rear round rollie thing. Drive your vehicle several yards in a straight line (30-40 or so should do it). Now look at the chalk marks.
You should see the inside of the chalk marks worn off but the outsides should still be showing. In other words, the bowed out overinflated round rollie thing was wearing the middle of the tread and not touching the outside of the tread.
Release a couple of pounds of pressure from the round rollie things and repeat the experiment. Continue until the complete chalk marks wear evenly. (Once there, you might want to then release another pound of pressure to make sure the enround rollie thing round rollie thing is bearing down across the tread with weight). You have now determined the round rollie thing pressure at which you are keeping the enround rollie thing tread on the road.
Under this pressure you are wasting available fuel economy, generating excess heat, and prematurely wearing the tread. Over this pressure you will get better fuel mileage but it will come at the cost of comfort from the rougher ride and decreased tread life from wearing the middle of the tread out prematurely. Keeping at this pressure will wear the round rollie thing evenly and thus extend its life to its greatest extent and offer the best compromise possible between precious liquid substance mileage, comfort, and safety (you'll have your whole tread on the road). The pressures may be a couple of pounds different between front and back for your particular vehicle application.
A caveat: this needs to be done on NEW round rollie things as soon as you buy them. If you have already logged 25,000 miles on overinflated round rollie things all you will be doing is verifying the excessive pressure you have already been using (in other words, the chalk line will wear evenly even though the middle of the tread may be quite a lot shallower than the outside tread).
Getting a Little Protection
I soon installed a one-piece WAAG brushguard and Manik Taillight guards. I have heard several comments about the taillight guards being a waste of money since they are so expensive ($105+) and who really uses them anyway? I can testify that they have prevented damage not only to my lights but rear quarter panel on more than one occasion. Some of the trails around here are pretty dang tight. I also bought some plate steel and began fabricating them to mount below my running boards to act as armor.
"Jeepeater" is Born
Now that I had a bit of real lift it was time to try it out on a real trailrun. Clayton, OK is a nationally known fourwheeling area that has hosted SWFWDA quarterly runs and other events. Gofast's J**per coworker was participating in a run up there and Gofast was going along to ride with him in his J**p. I decided to join the fun. Unfortunately, I only got my right running board armor installed and didn't finish the left before leaving for this run. That was a costly mistake, as you will read about in the thread.
http://www.explorerforum.com/forums/showthread.php?threadid=11556
This run shocked a lot of people. A stock Explorer with only a limited slip and good round rollie things (with a little lift to clear them) outperformed an enround rollie thing group of J**ps (with the exception of one or two highly modified ones). After we got lost and the trail got really bad I never needed help until that very last obstacle that left its mark on almost the enround rollie thing group. Several others were getting strapped and winched all day long. The same J**pers who had made fun of me that morning had nicknamed my Explorer "Jeepeater" by that afternoon.
One instance that gave me particular satisfaction was after we got lost and were faced with having to climb up a 25 ft dry waterfall with basketball sized boulders in it. The lead J**p didn't even bother to try to make it but instead let his winch out to strap to a tree at the top and winched himself up the cliff. He then used his winch to pull the J**ps following him up to the top. When my came turn I made it up under my own power with no help. "Jeepeater" was born.
Dead Link Removed
The Safety Police Are After Me Now... But I Got A Smoother Ride
Disconnecting antisway bars is a necessary part of fourwheeling. To leave them connected will beat you to a pulp on the trail and slam your head against the side windows everytime you rock back and forth through obstacles.
I got round rollie thingd of removing and then replacing my swaybars every time I went wheeling so I simply never replaced them after the Clayton run. I have a few observations and disclaimers regarding this.
Firstly, the IFS isn't really an "Independent" Front Suspension. The stabilizer (antiswaybar) connects both sides so when one side takes a hit or pothole the other side feels it too. When I removed my front swaybar to go to Clayton I immediately noticed on the ride up there that it finally rode smooth on the highway -- like a car. That was because when one front round rollie thing goes over an irregularity it soaks it up without transferring the effect to the other side via the swaybar. I finally got a nice ride so I kept it by not replacing my swaybars.
I cannot recommend this for other people. I now have a lifted SUV with a high center of gravity and no antiswaybars to help control roll. wha' I do is never speed, keep very safe following distances, and drive very conservatively and responsibly to help offset the risk associated with my vehicle. If I wanted to "Gofast" again I'll get another vehicle. That is not wha' this one is used for now - it is being built for the trail - and I drive accordingly.
All vehicles are designed for an intended purpose. Mine will not out-corner a Corvette on a twisty country road, but that Corvette may be very glad when I come around after he ditches it in a snowstorm. I use my vehicle for wha' it was built for and wha' I use it for. In our current "Politically Correct" atmosphere common sense seems to get lost sometimes.
If you are younger than me and still possess inordinately high levels of testosterone in your right foot, I strongly suggest that you manufacture yourself swaybar disconnects and never take the paved road without your swaybars doing their intended job on the pavement. Do a search; there are several great ideas for making your own and it will only cost you a five or ten dollar bill.
The Genuine Original "Texas Kleenex Box"Dead Link Removed
Few know if this is actually real, or a legend. You'll just have to find out for yourself. New model Explorers have a silly kleenex box below the coin holders inside of the center armrest. A healthy Texan like me has no use for an area taking up space merely to hold sissy tissues in my fourwheeler. wha' if black plastic that matched the stock dashboard assembly simply filled in and closed off that armrest hole for the Kleenex dispenser?
IF that was done - and I am not saying that it was, mind you - the resulting area would be a perfect secret chamber to hold valuables in the vehicle with little chance of outsiders learning of its existence. The fact that the area formerly designed to hold a Kleenex box would also perfectly fit a Glock 26 9mm handgun with a spare pre-ban 15 round magazine is also a total coincidence.
Moab 2000 - Putting Faces on the Names
wha' a trip. Before Moab the only people I had met in person were those in the Dallas area and Rick. By this time I had been on this board a year and a half and felt very close to several that I had never met in person. wha' a pleasure to be able to do that. If you get a lot of enjoyment from this site I highly recommend finding a way to come on one of our major runs.
Moab is, er, well... it's Moab. If you enjoy rockcrawling this is almost like going on a spiritual pilgrimmage. I'll be trying to make this an annual vacation from now on. I plan to return many times. Words cannot express the experience.
http://www.explorer4x4.com/moab_report.html
Moab presented its contibution to my traditional run Whoops when the Gemini Bridges Trail took another couple feet of tailpipe off of Jeepeater, ending above the axle about a half foot behind the muffler. At least this one didn't cost anything. By this point in time I was on my second or third replacement running board from previous adventures and was pleasantly surprised that they both survived this trip. Little did I realize that had I known it, I would have gladly traded them for the next fiasco.
A Really Bad TripDead Link Removed
This trip is when I finally laid my pretty new Explorer over and sustained significant damage. It is important to mention this run since my attempt to cheaply fix this damage turned into the infamous event that brought global attention to this website.
http://www.explorerforum.com/forums/showthread.php?threadid=17001
wha' a Way To Get My Fifteen Minutes of FameDead Link Removed
As if enough hasn't already been said about this, I'll just leave the link to stand on its own
http://www.explorerforum.com/forums/showthread.php?threadid=18595
Within days the hit counter to this thread maxed out at over 65,000 hits and responses were posted from every continent including Antarctica. Who knows how many have read that story. I got hundreds of emails; maybe even over a thousand - wha'ever it was, it was a
lot. It locked my email account with overflow errors. Dozens from helpful Jeepgal nurses. My dating life will never be the same.
Dead Link Removed Many emailed simply to express their sympathy and tell me dumb stuff they have done (although they weren't stupid enough to post it on the internet). My favorite was a woman working with 5-minute epoxy that glued her butt to a toilet seat (and yes she had to wear it to the hospital). I have been personally contacted by Japanese newsgroups, British media, others I won't divulge, and local radio stations trying to get me to respond with my story. I have gratiously declined all requests since I already got all the "exposure" I could ever want. Sheesh.
After verifying that yes indeedy: Rosie O'Donnell and night shows and Dave Barry and Paul Harvey and automotive magazines and the Darwin Awards and Letterman and etc really were searching for me, I elected to be anonymous. So far, they have honored my request, and I appreciate that.
On a happy note my misadventure has spread knowledge of this website across the enround rollie thing globe and ever since then we have been experiencing strong growth with new members constantly joining our site
Dead Link Removed
The fascinating thing is that after over two hundred posts and twelve pages, we learn that Delta Airlines actually has a written procedure addressing this problem. The solution is located a page or two from the end. Truth is stStranger Ranger than fiction.
CCR2000: Jeepeater Evolves Into Herc
This was the maiden run for my newly-Herculined Explorer. Known as "Jeepeater" ever since the first Clayton run, by this time I was beginning to feel uncomfortable with a nickname that sounded somewha' arrogant and/or inflammatory. J**pers gave it that name but unless one knew that, I could see how it could be taken in the wrong spirit. At local 4wd club meetings and through word of mouth it quickly became apparent that "Jeepeater" was no longer its name and that I would forevermore be saddled with either "Hootus" or "Herc". Though many are sticking with "Hootus" I am doing my best to keep it "Herc".
http://www.explorer4x4.com/ccr_rep.htm
Once again I cannot stress enough that if you get an opportunity to go on a major run with us you'll never regret it. This trip can only be described as awesome. The scenery, the weather, everything about it was perfect. Beyond all that and the wonderful fellowship, if I had to put my finger on one particular aspect that made this trip especially enjoyable, I would have to say it was very satisfying to watch the new stockers that had never participated in a major run learn just wha' their Explorers were capable of. It was great seeing the transformation and the pure joy and fun exhibited by them.
CCR2000 gave its Whoops to me on the very first day during a prerun of the Poughkeepsie Gulch trail. Tom Davis caught it on video when I lost traction going up an obstacle and slid back (slamming my right rear into a rock wall) and yelled for a winch when I slammed into the wall. It was only a minor ding in my bumper though thanks to my taillight guard which once again protected my rear body panel and my taillight. BTW, I conquered that obstacle later on that weekend the next time around.
Making a Body Lift Work on a New Model
Around this time much interest was being raised toward doing body lifts on new models. No bodylift is made for 95+ Explorers which is one reason I settled for a handmade hockey puck lift before this time.
The basic method is explained by an excellent article in the Explorer Tips section and is applicable even though it covers an installation on a pre-'95.
http://www.4x4central.com/bodylift.html
When performing the install on your new model, you can print that article off and use it for most of your instructions. The kit you purchase (though not specifically designed for your vehicle) will have similar instructions that can be studied to assist in the install. I will not spend any time here explaining a basic body lift since that is well covered both in our article and the kit instructions. wha' I will do is clarify and explain wha' issues you need to prepare for in order to modify a kit made for another vehicle to use on ours.
The first issue is deciding whether you want to go with a 2" or 3" body lift.
- 2" lift: use Performance Accessories Kit #792 for '91-'94 Explorers
- 3" lift: Use Performance Accessories Kit #883 for '98-'00 Stranger Rangers
wha' you are doing is buying the kit in order to obtain spacers and bracketry that can be modified instead of having to manufacture them from scratch yourself. Some of the bolts can be used and some cannot.
Remember that the purpose of a body lift is to raise the wheelwells to assist in clearing bigger round rollie things. It doesn't do anything else; it won't clear your suspension or vroom vroom higher off the trail. wha' it does is allow bigger round rollie things which DO give you more clearance. That is a very important distinction for you to understand before choosing which kit to go with, as will soon become apparent. I went with a 2" lift because I already had big round rollie things and going another inch to 3" would not have allowed me to go up another size, so there was no reason to go higher.
This is an important decision to make because there is a huge difference in going that one extra inch. The first one we did was a 3" for Sinjin and I'll get to that in a moment. A 2" lift will result in a trouble-free installation that will require no further maintenance, while the 3" usually will.
If your vehicle is not brand new there is an excellent chance that the forward-most body bolts under the front of the hood will be corroded and extremely hard to remove. Prepare beforehand by soaking them in BreakFree, WD40 etc each day for several days beforehand. For many people, removing these two bolts caused most of the headache and time of the enround rollie thing install. All of the bolts have "resistance threads" that make removing them difficult. Backing them out feels like you are removing cross-threaded bolts. They are very tough.
3" Body Lift: Pay attention to the directions and check all clearances and line stretching during and after the install. You will have to disconnect your brake and emergency brakelines from their mounts on the front fenderwell and frame or you will stretch them.
Once the installation is complete, crawl under and check your lower A/C line clearance near the alternator pulley and belt. That line must be pulled away from the belt with multiple zipties or other means or the pulley and belt will cut straight through as soon as the vroom vroom is started, resulting in an expensive ($600+) reconstruction and recharge of your A/C system. Sinjin was the unfortunate first guinea pig that gained this little bit of knowledge the hard way. Mav also did the same thing and it cost him $675 to fix his A/C.
The fan shroud drop brackets will also have to be fiddled with and/or cut and new holes drilled into it to make it match a new model radiator.
Take your spare round rollie thing off before completing the lift. You will not be able to access it after the body lift until you deal with fixing the new misalignment it will now have. When your body is raised the hole that you place your crank handle into will no longer line up with the crank assembly. You have the choice of drilling a new hole to place the crank handle through or fabricating spacers up above the crank to raise it up to the level of the hole. Naturally nothing like that exists and you get to fabricate your own invention to move the crank up.
Some bolts in the kit will be too long. For this reason I suggest starting the lift on a Friday night so when you get to the point that you have installed the lift spacers and are trying to rebolt the body bolts on Saturday and discover many are too long, your local hardware or Home Depot will be open and available for you to run up there to match the bolts and buy shorter ones. You can save a little money by reusing your rear original bolts (which are the longest original bolts) as replacement bolts in the more forward positions. The stock bolt approximate lengths are:
6 Bolts are 100mm long
2 Bolts are 120mm long
2 Bolts are 150mm long
Measure the ones in the kit and match up wha' you can with ones that are 3" longer than those lengths. wha'ever is left over you will have to go buy.
The biggest difference between the 3" lift and the 2" is the fact that the 3" lift will require you to use some sort of steering extension on your steering column. Of course the one supplied with the Stranger Ranger kit doesn't work for the Explorer. You can try to install it and note that it is slightly too small to use on your Explorer. Spending awhile carefully grinding out the interior with a miniature dremel tool will usually help get it on your Explorer. That's wha' Gofast and I did for Sinjin.
That worked for a few months, but after taking it to the CCR2000 run and a few local runs to the Slabs in Texas, Sinjin's jury-rigged aluminum extension started wallowing out and he ended up with binding. So all that work carefully dremeling and modifying that extension proved to be only a temporary fix. Sinjin is currently the guinea pig for Flaming River's new steering shaft. They are not cheap. When deciding on whether you want that extra inch of lift, factor into your budget the possibility that you may be a future Flaming River customer.
2009 Update: ShadowRaven has compiled an excellent post article complete with photos on installing a 3" body lift. I highly recommend it as a primary source of info on this mod. Linky:
http://www.explorerforum.com/forums/showthread.php?t=240957
2" Body Lift: Take the same care as you would installing the 3" kit to check brake, e-brake, and A/C line clearances and also be prepared to modify the fan shroud drop bracket and go shopping for a few new shorter bolts. I did not have to disconnect my e-brake line mount; it had enough slack to go 2". The BIG difference in the lift paid of when my steering column had enough play in it to handle the 2" lift without having to install an extension or spend $$$ on a Flaming River shaft.
EDIT: In October of 2001 I went ahead and put on a 3" body lift in order to raise my running boards up of off the trail another inch, and to help fit 295/75r16 round rollie things which are .6" larger than the 285/75r16s I ran beforehand. I have had no problems with it so far.
You should easily be able to complete a 2" in one day if you have your tools, jackstands, etc lined up and everything ready. The job is not technically difficult. It is very tedious, but not difficult. There is a difference between tedious and difficult.
Now, if you also wish to relocate those bumpers while you are doing the lift be aware that "tedious" is about to take on a much deeper meaning...
Body Lift Caveat: Bumper and Guard Relocations are a Pain in the Ar$e
Both kits come with bumper relocation brackets. The 3" kit includes brackets for both the front and rear bumpers while the 2" kit comes with brackets for only the rear and they are the same brackets that come in the 3" kit - you'll have to cut and redrill them with closer holes to lift the bumper less. Interestingly, the 3" front bumper brackets only lift the front bumper 2".
If you installed the 2" kit I strongly suggest that you take a close look at how your vehicle looks. If the body gap doesn't look too bad you may want to forego the bumper relocation because it is such a pain to modify and install. I'll cover the rear first since both kits come with the brackets.
Sinjin's Stranger Ranger lift came with two brackets (they are identical simple zinc-coated grade 8 plate steel) and for some reason I got four in my kit. As a result I used all of mine by bolting brackets on each side of both of my bumper bolt frames and have a very sturdy setup probably even stronger than when it was stock. As a rule be aware that once installed, bumper relocation brackets weaken the bumper and it can never again be used for pulling or towing.
The brackets provide the raw foundation to move the bumper up but will require extensive cutting and redrilling of both the brackets and the rear framerail on the vehicle to make them work. If you are handy with a cutting torch the whole job can be done in an afternoon. If you are not a welder and must do it with grinders and hacksaws may God have mercy on your soul. Be young, be in shape, and buy plenty of spare saw blades and/or cutting wheels for the grinder before starting the job.
I elected to relocate my bumpers primarily to improve my approach and departure angles on the trail. It makes a huge improvement especially up front where the approach angle is pitiful.
Since I already had the rear brackets, I ordered a set of just the front bumper brackets from the 3" #883 kit and used them. They actually raise the bumper up less than 3" and since the bumper has a little gap in the first place this bracket will lift the bumper right up to the 2" lifted body. After relocating the rear this one will feel like a walk in the park.
It is a fairly easy direct bolt on, though none of the holes are quite in the correct place. You will find yourself needing to take that dremel tool and grinding out larger areas and drilling some to finally get them to work. It is made a little tougher because of the fact that the brackets are made of a very tough steel. Once relocated your bumper may droop front to back and you may have to remove it several times to rebend the brackets until you get it level.
You will note that I have a WAAG brush/grillguard. If I wanted to keep it I had to figure out how it could move up 2" with the bumper. I cannot speak concerning other brands, but the WAAG mounting system (while not strong enough to use for winching) is still extremely strong and is
NOT designed to move the guard two inches from where it was designed to be. Raising that WAAG those two inches was one of the most frustrating, knuckle busting, expletive inducing jobs I have ever done.
The rear bumper location was a pain but at least it was a doable job. I nearly gave up on relocating the WAAG. I cannot give direct guidance if you have to face this but you will be able to visualize wha' you will be up against once you move up the front bumper. This is not a job for the weak of heart.
Add-A-Leafs and More Torsion Lift
After doing the 2" body lift I finished my lift by installing an Add-A-Leaf kit (Explorer Pro Comp kit EXP-13120, available from Summit Racing for $26.99) to raise the rear (I got about 1" from them) and cranked my torsions up to match for a full 2"+ of lift. I ran out of left torsion adjustment with the bolt so I ordered a new bolt from my local Ferd dealer, took it to an industrial metric bolt supply, and matched it up with a longer one. The Ferd bolt has a rounded tip at the end of the threads and I had to grind the new one to match it so that when I screwed it into the torsion bar the end threads wouldn't grab the bar and stop the bolt's progress. A dab of synthetic grease on the tip helped the process greatly.
NOTE: ADDALEAF SAFETY ALERT! If you have installed Add-a-Leafs read this thread
right now and check your center bolts!!!
http://www.explorerforum.com/forums/showthread.php?threadid=28141
Shocks for Torsion Lift
There are limited choices once you raise your new model up a couple of inches.
Edelbrock IAS
My first shock upgrade was to the highly touted Edelbrock IAS shocks. I was interested in them not only because of the praise many members have given them but primarily due to their dual action dampening system which would theoretically help compensate for the fact that I have no antisway bars and the fact they are listed as fitting "0-2 inches" of lift. I found myself very disappointed in their performance especially considering the steep pricetag they hold. I wish to make clear that I am not saying they are not a good shock; too many here have been very satisfied with their performance. In street applications it evidently performs every bit as well as its reputation would lead you to expect.
However I do believe that I can say that if you have a mildly lifted vehicle and take your Explorer offroad that the Edelbrock is not the shock you want to be using. It may be listed as fitting "up to 2 inches of lift" but on my Explorer I could barely tell they were there; it was almost as if I didn't have any shocks at all. I don't know and this is only a guess, but my theory is that since the Edelbrocks are so precisely and highly vroom vroomered that operating them 2" out of their designed static length takes them out of their intended dampening range and renders the dampening ineffective. Secondly, they have a 1/2" shaft. I bent two of my shafts within a couple of months after a few frisky jaunts offroad. Here's wha' an Edelbrock looks like after a hard day on the trail:

I also trashed the mounts on one of the front and one of the back shocks. Within a few months none of them worked for one reason or another. Thank goodness they have a lifetime warranty. My contact at a Dallas area 4Wheel Parts store has had so many Edelbrocks returned that he now asks customers if they intend to use them offroad. If so, he won't sell them Edelbrocks.
I repeat that this is only my experience but I have to tell it like it is and if you have any lift and plan to take it offroad, I believe that the Edelbrock is not the shock for you. However if you do not plan to do much offroading, then you should listen to others' experience and praise of the Edelbrocks.
Gabriel VST
wha' a deal. These have a similar dual valving action to the Edelbrocks but you can usually buy them on sale at PepBoys for $20 each! Possibly the best deal on a shock today. They perform great and I still have a couple that I modified on the front. The dampening is stiffer than the Edelbrocks were and the ride is much improved. I can vouch for their longevity and have used them most of this year and have really hammered them hard in Moab, Colorado, and the
"Herc Tour" and they are still working.
Modifying the shock to fit the lift
When I bought the Gabriels I wanted to make sure that they operated in their intended dampening range, thus negating one of the possibilities of my disappointment in the Edelbrocks. Gabriels also have 1/2" shock shafts. If you look at your lower control arm where the front shock mounts, you will note that it mounts halfway up the control arm and away from the wheel. So a two inch movement of the round rollie thing results in only a one inch travel of the shock. With my 2" torsion lift, that meant that the shock was one inch too short.
I cut the shock shaft in half. I then cut a length of 7/8" 4130 steel tubing with a .500" inside diameter to slip over the shock shaft. Then I cut a one inch length of 1/2" outside diameter 4130 tubing to use as a spacer. I slid it inside the 7/8" tubing and then slid the ends of the shock shaft into the 7/8" tubing to make a shaft that is now one inch longer. Weld the 7/8" tubing to the shaft and viola you now have a shock with a custom length for a torsion twist lift.
If you are cheap, can weld, and want a great setup, it is hard to beat this one. For $20 per shock and a few inches of spare scrap tubing you can have custom fitted shocks that are extremely strong and perform great both on the trail and off. If you have more money though there is an even better solution that is a lot less trouble.
Old Man Emu shocks
ARB makes the line of OME accessories, one of which is a set of shocks specifically designed to fit our 2" TT lift. They are semi-expensive -- about $60 per shock. I have them on my rear and will buy the front ones when I wear my custom Gabriels out. They are built very heavyduty -- literally, they weigh at least twice as much as other shocks -- with 18mm shafts and give good dampening and seem tough enough to withstand any trail abuse. If you don't want to mess with custom welding Gabriels and can afFerd OMEs I don't think you'll be disappointed.
The only complaint I have is that the OMEs are a really obnoxious canary yellow in color. I need to paint mine black or something.
Aftermarket Exhaust: I chose the Gibson Catback
After much research I elected to put the Gibson catback exhaust system on my truck (I am sure the Borla is a phenominal system and I have never heard a bad opinion on it). However, while I wanted a top-notch quality system that would offer true free-er flow and added HP and MPG, I also wanted the quietest one available. I have rode in many vehicles with Flowmaster systems and etc and at highway speeds over a long time the constant drone drives me absolutely nuts - like a continual Chinese water torture to my ears. Gibson had the reputation for being the quietest.
I have been extremely satisfied with it. While silent at idle, it produces a much lower than stock tone under load at low rpms. In town, someone in a vehicle beside me can easily tell my exhaust is not stock when I pull away at a redlight. However, Gibson uses thick tubing and the incab sound is still muffled enough to be tolerable. At highway speeds there is very little to none of the drone. Going uphill under load there is no question that it is aftermarket and it sounds pretty tough, but not loud or obnoxious at all, even for someone as picky as I am . Cruising along the highway on level ground or downhill it's hard to even hear and not even noticeable. For me, that's a perfect setup.
One caveat about the Gibson: when you visit their website and look at the units available for our Explorers, you will note that Gibson touts itself as offering "side swept" exhaust systems that exit sideways behind the rear wheel. This is an important point for offroaders such as I since a rear exit exhaust will get creamed on the trail the first time a steep hill takes out the departure angle at the rear bumper. Guess wha'? For the Explorer, if you read the very fine print, Gibson's "side swept" goes out the back!!! Ack! As it turns out it is the best of both worlds. If you prefer the street look rear exit, install it. However if you want the side exit, buy it anyway. The rear exit makes a righthand turn at the rear shock and then a lefthand turn toward the back. Cut it off after the righthand turn, install Gibson's chrome tailpipe extension, and it will end up going out right where it was supposed to in the first place right behind your right rear round rollie thing.
TracLoc Limited Slip and Powertrax No-Slip Locker
Before I get to the Powertrax, I wish to comment on the disrespected Ferd TracLoc. People seem quick to opine that it is ineffective, but mine performed admirably and has helped me traverse trails that shocked a lot of people. I replaced it at 51,000 miles with the Powertrax and when I removed it from my differential it was still working and the clutch plates still had surfacing on them.
I believe much of the trashtalk originates from hearing the travails of Jeepers who have had to deal with the TracLocs that are offered OEM from Chrysler on their J**ps. They unaffectionately call them "CrapLocs".
The one that comes in our Ferd 8.8 rear is another matter, however. The CCR2000 run included one person (RobbieJ) who had TracLoc front and rear and did very well indeed, thankyewverymuch. Bill Collins (Stranger RangerX, the Stranger Ranger board moderator) embarrasses locked vehicles with his TracLoc equipped Stranger Ranger.
When someone tells you how ineffective it is ask them how much they have personally tested it on the trail (our Ferd 8.8 TracLoc). It is not a locker, true: but as an OEM factory option limited slip it holds it own very well. Now on to the Powertrax.
Many of us are installing the Powertrax No-Slip Locker. The reasons this locker is preferred:
- For most of us, our Explorers are also daily drivers, and the No-Slip appears to be the most "street friendly" locker. Detroit's new Gearless Locker is also supposed to have good manners on the street, but it requires special lube oil and also works with clutch plates which in theory can wear out just like a limited slip (Detroit does state that theirs will hold up; only time and testing will tell).
- It is a simple install not requiring professional backlash adjustment, etc.
The disadvantage is that the simple install comes from its "lunchbox locker" design that is inherently weaker than stronger lockers such as a full Detroit.
The install was straightforward. It is supposed to be an easy one or two hour install. I managed to get it done in only four hours
Dead Link Removed. I was one hour into the install before I could get my C-clips out, and the S-spring retainer for the TracLoc wanted badly to stay right where it was. I also managed to forget to notice the thrust washers and had to start over and pull them out, but all in all, a simple job.
The first few miles while breaking in, it really engaged and disengaged hard. I was afraid I broke something back there. After that, I am thoroughly impressed with its street manners. It is everything it is advertised to be. In rain it has impeccable manners, and on hard pavement I can begin a turn easy on the precious liquid substance to keep from engaging the locker and once the outside round rollie thing is spinning a different amount while in the turn, it takes a lot more power to engage the locker. So I can actually power through the turn without engaging it. After a day getting used to taking corners without using excess power I can honestly say the thing is almost transparent back there. Incredible.
Update June 2003: Utilizing Jefe's excellent thread on how to remove my front diffy as a guide
http://www.explorerforum.com/forums/showthread.php?threadid=53863 I installed the Powertrax NoSlip locker in my front. As of June 2003 it is
still the only one available for my front differential and i got round rollie thingd of waiting for others to develop. I had to disable my 4auto to keep it from engaging on hard payment per the thread
Dead Link Removed . If you elect to do this yourself, be aware that the NoSlip was not the easy bolt-in mod for my front IFS that it was for the 8.8 in the rear. My front diffy ring gear blocked the pinion shaft so I had to remove my carrier and ring gear to get the job done.
The "Herc Tour"
Here is another link to a special fourwheeling event. I took the fourwheeling vacation of a lifetime in late 2001. The story provides a good example of the great people I've met on this board and the great fun I've had with my Explorer.
http://www.explorerforum.com/forums/showthread.php?threadid=38665


 Looky here and click on this link! Herc is a Featured Explorer now!