1997 MM 5.0 TC & WP refresh & ignition coil-near-plug conversion-Finished with fuel lines- | Page 5 | Ford Explorer Forums - Serious Explorations

  • Register Today It's free!

1997 MM 5.0 TC & WP refresh & ignition coil-near-plug conversion-Finished with fuel lines-

Here is another Chevy firing order that matches the old Ford 289 and early 302 firing order. Ford 154263781 matches Chevy 18436572.
fo2.jpg


Join the Elite Explorers for $20 each year.
Elite Explorer members see no advertisements, no banner ads, no double underlined links,.
Add an avatar, upload photo attachments, and more!
.


HAHAHAHA you are awesome
I am surprised your head has not exploded
Mine was about to
Our notes look really similar


Holley still makes us pick our firing order from a chart during setup LOL
with the Ford you just have to pick from two, I assume early 302 and then the HO like we use

When wiring the Holley just make sure wire for cyl 1 goes to cyl 1 and 2 to 2, etc...it sounds easier here then it actually is because we have to feed them through the coil drivers and the wires on the coil drivers are labeled circuit, a b, c and d (generic) plus all the wires going in and out are black! all 15 of them.... so it must be done carefully by marking the connector pin letters to the wire


@410Fortune Is that for cylinder 1 on the Ford or cylinder 1 on the Chevy LS? ;)
I see in the instructions the firing order defaults to LS firing order.
*********************************************************************************************************************************************************Tools needed:


*********************************************************************************************************************************************************
collecting info for a later post...
Below, picture of PontiSteve's programming set-up
pontistevesetup.jpg


1996C115.jpg

1997mmc115.jpg

Thanks, Jamie for the info!

ADDED 6-15-23 ADDED 6-19-23 Not entirely correct compared to '98 and '99 Explorer C115 connector chart
97 Explorer connector c115F
Pin # Circuit-----Color-----function-----104 pin PCM #(99CV)------ Circuit number
1-----16 (R/LG)?----Ignition coils +12 Volt power ?
2-----11 (T/Y0)-----Tach ?
3-----915 (PK/LB)--DLC SCP data bus - CV C103 pin 3 pin 15 (915)
4-----511 (LG)------Brake On/Off (BPP) switch input CV C206 pin 8 pin92 (511)
5-----238 (DG/Y)--Fuel pump monitor (input?) CV c102 pin 5 pin 40 (238)
6-----658 (Pk/LG)--MIL 99CV C102 pin2 pin 2 (658)
7-----679 (GY/BK)--VSS input ?+ or -? 99CV C173 pin7 pin 58 (679)
?8-----37 (Y)-------KAP +12 volt C107 pin3 pin5 pin55 (554)
9-----361 (R)------Power hot in start or run KOP pin71 (361)
10----29 (Y/W)---Fuel gauge to fuel sender pin 9 (29)
11----914 (TN/OG)-DLC SCP data bus + pin 16 (914)
12----224 (TN/WH) Transmission control switch (TCS) pin29 (224)
13----676 (PK/OG) Case ground? CV VSS (-) pin 33 (676)
14----91 (PK/WH) (CV VT/WH) Canister vent solenoid pin 67 (91)
15----926 (LB/OG) Fuel pump control pin 80 (926)
16----39 (RD/WH) Engine coolant temperature indicator pin 42 (39)
17----791 (RD/PV) Fuel tank pressure sensor 99CV(RD/VT) pin 62 (791)
18----351 (BN/WH) Reference voltage (VREF) pin 90 (351)
20----199 (LB/YE)Digital Transmission Range(DTR)sensor pin 64 (199)
21----140 (BK/PK) ?back up lamps? C105 pin8
22----107 (P) DLC 99CV (VT) Flash EPROM power supply pin13 (107)
23----BLANK BLANK
*24----329 PK starter circuit
25----298 (PK/OG) ?back up lamps? 99CV (VT/OG) C102 pin 1 no pin in 104
26----253 (DG/WH) Oil pressure switch *not sure of route, instrument cluster?
27----305 (LB/PK) Not used, will double check
28----394 (OR/BK) air suspension NOT USED
29----BLANK
30----331 (PK/YO) WOT AC cut off, NOT USED
31----32 (RD/LB) stater circuit ?NOT USED ?
32----BLANK
33----463 RD/WH ????
34----570 BK/WH ground
35----BLANK
36----34 (LB/OR) +12 volt for O2 and EGR sensors
37----198 (DG/OR) AC high pressure cut out NOT USED
38----BLANK
39----191 (LG/BK) Vapor management valve
40----911 (WH/LG) Overdrive indicator lamp
41----BLANK
42----570 (BK/WH) Ground

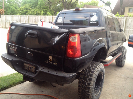
Ken's 5.0 pictures 6-14-2023 with 1" spacer
Ken5.0p1.jpg

With 1" spacer
Ken5.0p2.jpg

I can't make out much from the pictures.


Post #84
It has been over a year since I've been able to lay hands on my 5.0 repair and upgrade project. Me and Jamie were discussing Ford vs Chevy firing orders at the time. To refresh everyone's mind that was following and for those starting to follow, I had an ignition system failure with the wasted spark coils and decided to upgrade the system to a coil-near plug arrangement. Back around page #2 I think, I had collected up many parts to replace the timing chain and water pump. Also parts for a remote oil filter kit. The old anti-lock brake motor assembly is in the place that I want to mount the remote filter part of the kit. Hopefully I will be able to put my hands on a really high quality double flair tool to remove some really odd brake line fittings and replace them with the double flair style. Also, it will involve pairing the left and right front brake lines together. I've looked at it and I need to determine which bowl/line on the master cylinder is front and which is rear. I'm sure that I will need some advice too.
I have been "brainstorming" the ignition system swap that I've been working on. A year ago, I was almost ready to purchase the Holley Terminator "X" system however, the cost being the biggest hold back, I decided to revert back to my original idea. At first I didn't think that there were enough similarities with the 4.6 coil-on-plug ignition system to the Explorer wasted spark system but when I studied both of the enough to see that they both use 35 tooth (36-1) tone rings on the back of the harmonic balancer, I decided that it can be done. It is possible to convert the "wasted spark" 5.0 ignition system to a coil-near-plug ignition system.
1997-5.0hbtonering.jpg

Explorer 5.0 crank pulley/harmonic balancer/36-1 tone ring.
1999CV4.6tonering.jpg

1999 Crown Vic 4.6 tone ring (36-1=35)

I have been collecting parts for the conversion.
4.6 power-train control harness from a 1999 Crown Victoria
1999CVpowertrainharness.jpg

A PCM from a 1999 CV Cop car catch code ARA1 that doesn't have PATS
1999CVP71PCM.jpg

Note: Eventually I will upgrade to a 2003 Luxury Full size sedan PCM. It is faster and for a couple of other reasons. For now, the '99CV P71 PCM.
An 8 pack of 2020 f350 7.3L "Godzilla" coils, less than half the cost of Holley "smart" coils. Here is a pic of one.
2020GozillaCNPcoil.jpg

An LS boot set for the coil end of the spark plug wires
LScoilboots.jpg


A new set of Motorcraft plug wires for the 5.0 Explorer/Mountaineer
(A few minutes ago, I couldn't find them. Right before I parked the truck, I removed them so mice, rats and squirrels wouldn't chew them up. I'm using the stock Motorcraft set for the '97 MM application so that I have the unique spark plug ends and will shorten the wires before putting on the LS boots)
A 1" inch intake spacer to make room for the coils under the upper plenum.
I have one made of Delron but I might have to have an aluminum 2" CNC'd
97mmspacer.jpg

Aluminum to make coil brackets
aluminum for coil brackets.jpg

Thursday 6-22-23 I took a piece of 5054 aluminum 12x24x3/16", a 5.0 valve cover and a 7.3 coil to the local CNC fabricator. Last spring I checked out his work over a 3 month period. I had him do various small jobs for me. It as a variety of little jobs including finishing up one for me in an emergency the day my old Argon regulator blew up on me. During the different visits, I was able to check out turbo's that they are CNCing from scratch, some steel projects, a large work table that they fabricated to fabricate a very cool totally hand-made chassis for the owner's 55 Chevy truck. I trust them with my parts and to do good work. I showed him 2 pictures of theses 5.0 coil brackets and he is going to make me something similar.
5.0coilbracketsmarked.jpg

I'm going to have 5.0 inscribed into the brackets. Left circled area for the drivers side right for the passenger side.
I have found at least 2 more people here in the US doing a coil-near-plug conversion to a 5.0.

The '97 Mountainneer and the '99 Crown Vic have the same size MAF, throttle bodies and injectors and with the ARA1 "Cop car" PCM with the PATS switched off, I can make it run but I'm not doing so until I have installed a bung in the collector of the passenger header to install a "wideband" AFR gauge to see what is going on with the air/fuel mixture. The PCM is tuned for the 4.6 and the 5.0 (4.95) is several more cubic inches. I will need to use a later style 5.0 2 wire cam sensor to work with the Crown Vic PCM. Can anyone tell me if this is is a direct swap with my 3 wire, just this piece pictured?
1999-5.0camsensor.jpg

I need some more parts. I've broke the "cash bank" again!


You will need the 1999-2001 Explorer 5.0 cam synchronizer, the main unit and the top sensor. The shape of the "flag" for the sensor is different from the 96-98 model.

I hope that goes well, the COP bracket etc. Let me know how much that group weighs when it's done. I'd like to mount mine onto the VC bolts along the bottom side. My FMS VC's have two upper surfaces, and I don't want to cover the top which is flat. So I'd like the coils on the side surface, which is near vertical.


@CDW6212R I need to see the inside of a 1999 to 2001 5.0 cam sync to see what the flag looks like. I must have one if I have a sensor off of one. I bought a few used ones back in August 2018.


That's good, the stock Ford part should be good for 150k miles. The three I have had to deal with were all over 175k, one I just lubricated with oil and it's been okay for about 30k(my Mercury). I still don't think there is a reliable aftermarket version, so if you have to pay $250 on eBay for example, that's better than $400+ for a Holley or other top EFI system brands(plus those would all have a unique sensor and its connector).


@410Fortune @CDW6212R After Jamie or Don or anyone else, show me the insides of a 1999 to 2001 5.0 Cam sensor assembly, I will go out to the "scrapyard" 15 miles from here and see if I can locate one and I can pop the top on one and verify that it is in fact correct for that year. I looked inside my '97 ones just yesterday and saw the flag was a half circle? I should have took a pic, I was going to offer 2 '97s for trade for one 1999 to 2001. Monday I'll edit this post and add a picture of them.


96-97 has 3 wire and half moon flag
99-01 has 2 wire and a tiny flag

100_2362-jpg.jpg


Thanks, Jamie. Did you just take that pic or have a file photo? Thank all of you that help, for helping me. It's too bad that the wide "flag" couldn't accurately be cut down to the skinny flag.


i found that pic here on EF when I googled 2000 5.0 camshaft synchronizer :)

Never a problem We enjoy watching you!


This Monday morning, when I got here to the Shop, packages were waiting on me. I may have broke the "cash bank" last week, but I have enough parts to work with and plenty of labor to do before I need to order more parts. I want to order some software from a guy in Europe that will allow me to access the ~1997 to~2004 EEC-V PCMs. Different Ford models changed to the newer PCMs at different years. I have the old SLL4 PCM out of the '97 MM, and a "scrapyard" $20- PCM out of a '98 V-6 Explorer. Neither of them mean much to me so they will be fine to experiment with.
I'll have the coil brackets to pay for and I really don't know what to expect ($$$) as far as the design/layout time, the CNC time and the time to clear powder-coat them. Nothing bare aluminum will survive here with our relative humidity always 75% and higher. I may have him powder-coat the "Fox Body" aluminum valve covers that I have been hand sanding to prep them before I go through the multiple steps to buff them. It's probably more time to do this to them than they are worth. Probably a good reason to coat them. Back to the present.
Below is the picture with the AN to Ford quick disconnect fittings. I'm having to reroute the fuel lines away from the top of the valve covers. Also the O2 bung for the AFR gauge and two Timken bearings for my Toro LX420 that I need to finish repairing this afternoon before I can replace the timing chain on the 5.0. It figures that some assembly will be required as it has to do with the AN fittings. Link below is about AN fittings.
AN fittings explained
1997efiANfittingsO2bung.jpg

Also the AFR gauge kit showed up today...
AFRkit.jpg

It's cheap but I'll see how it will do.


EDITED: New picture and added text...
AN/Ford spring/lock fuel line fittings assembled. I'll need 2 different size pieces of braided fuel line and 2-6 and 2-8AN female line fittings.
I have some AN straight swivel fittings on the way for the adaptor ANs. Locally I can purchase some braided fuel line for fuel injection/pressure.
AN4fittings.jpg

AN straight swivels pictured below
ANstraight swivels.jpg


@410Fortune @Josh P I'm wanting to delete the antilock brake system on my MM. If I'm following correctly, the front line on the MC is for the front brakes and where it is screwed into the antilock brake mechanism, you cut the odd fitting off of that end of it, slide on a 3/8" brake line fitting and the double flare the line. That line screws into the center spot of the T-block. Then install 3/8" fittings on the two front brake lines to thread into the two remaining spots on the T-block. Then take the rear brake line out of the ABS and cut off funky fitting and install the fitting that is threaded into the rear bowl of the MC? I'm not near the truck at the moment, so I am going by my "photographic" (LOL) memory. Recently I asked Josh P if he happens to own a real high quality Double flair line tool that I can borrow for a few minutes in September, but I haven't heard back from him. Jamie, I read another Forum user's thread where you said you have a picture of this if needed. That would be great, and I can collect up the parts but not "crack" the system until time to be flaring the lines. Thanks for any input!
Like you are planning i always remove the factory abs from my personal vehicles. With some flaring and a brass tee block to split the front line out of the master cylinder to each front caliper… you won’t miss it. I use the factory lines that were removed and bend/ re flare them (double flare) the factory lines are
Metric but they all also accept a standard fitting on the other side to go into your new tee block. I am getting ready to do this again on my personal
Sport trac build when I do I will post up details.
I have pictures from when I have done this before I can post them up if needed


@410Fortune @Josh P I'm wanting to delete the antilock brake system on my MM. If I'm following correctly, the front line on the MC is for the front brakes and where it is screwed into the antilock brake mechanism, you cut the odd fitting off of that end of it, slide on a 3/8" brake line fitting and the double flare the line. That line screws into the center spot of the T-block. Then install 3/8" fittings on the two front brake lines to thread into the two remaining spots on the T-block. Then take the rear brake line out of the ABS and cut off funky fitting and install the fitting that is threaded into the rear bowl of the MC? I'm not near the truck at the moment, so I am going by my "photographic" (LOL) memory. Recently I asked Josh P if he happens to own a real high quality Double flair line tool that I can borrow for a few minutes in September, but I haven't heard back from him. Jamie, I read another Forum user's thread where you said you have a picture of this if needed. That would be great, and I can collect up the parts but not "crack" the system until time to be flaring the lines. Thanks for any input!
I've been busy working 20+ hours a day this month. I'll get back to you by this weekend on that PM and I owe you some $$$ too. Based on your description, that's how I'd delete the abs. I deleted the rear abs system on my van by splicing a line where the block was.


I do have pics!
I am about to do this again to our personal sport trac

IMG_3613.JPG


IMG_3614.JPG


IMG_3615.JPG


IMG_3616.JPG


IMG_3617.JPG


IMG_3618.JPG


IMG_3619.JPG


IMG_3621.JPG


IMG_3622.JPG


IMG_3623.JPG

IMG_3624.JPG


IMG_3625.JPG


IMG_3627.JPG


IMG_3629.JPG

IMG_3634.JPG


This was on a 1949 F100 gone 97 explorer awd

the tee block was made from part of the old system, it did not work, I ended up ordering a brass tee from summit, it worked just fine

You nailed it in your description
the rear line is simply re flared with the factory fitting at the master bypassing the old 4WABS unit
So much cleaner under the hood
I already installed non ABS wheel bearings on our $700 03 sport trac, so it just makes sense to delete the rest of the system
lighter is faster HAHAHAHAHAHA


@410Fortune @Josh P Jamie, I see how you are using the "C" clamp to keep the tubing from slipping. Josh, I thought you might have a hydraulic line tool having the trucks and being a heavy truck and auto tech...


@410Fortune @Josh P Jamie, I see how you are using the "C" clamp to keep the tubing from slipping. Josh, I thought you might have a hydraulic line tool having the trucks and being a heavy truck and auto tech...
The heavy trucks are air brakes


Join the Elite Explorers for $20 each year.
Elite Explorer members see no advertisements, no banner ads, no double underlined links,.
Add an avatar, upload photo attachments, and more!
.


I'm only able to work a few minutes at a time at work on the MM. Today I mounted up the 3rd Wrangler that was born 3417. Ironically, these tires started out on the Mountaineer then ended up on the blue '97 V-6, then when the wife started driving the white truck, they were put on there. 20 months go, she wanted new tires. I kept these in dry storage off the wheels. They are in great shape. Now they are back on the Mountaineer.
These have gone full circle.
wrangler3417.jpg

ADDED 4 hours later:
My wife had been complaining about the tire noise from the Wranglers. She purchased some Dexteros. She had a recurring noise that she described as a limb dragging. Everytime I drove the white '97, it wouldn't make the noise for me. The next Monday morning, she called 8 miles from work and said the right front wheel felt like it was locking up, and the vehicle was pulling hard to the right. I suggested that she not stop and do her best to get the Explorer to the parking lot where she worked. I knew then what the noise was. A locked up right front wheel bearing. A Chinese piece of crap that came with the new front rotors that the PO installed. Don't use import bearings. I stripped the good spindle off of the MM that had been sitting in the penalty box. I took the part and all the tools that I used to remove it and put them in a box. I got to where she works right when she finished for the day. I R&R d the spindle assembly in the parking lot. I mis-diagnosed that one! Now her Dexteros are noisy and I did a front/rear swap and the noise went away. The front end needs aligned but I don't trust the Import front wheel drive alignment guys to do it. I'll just have to do the alignment myself. The camber is off on both sides. I hope it is not time for ball joints yet. Waaay to much going on at the moment.


Back
Top