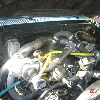
Just got A/C back up and running super cold on my '02 Explorer XLS. Platicseng is right about the compressor (but I have a spare if you need one!). One trick is to open the hood with engine off and come over to the passenger side, looking down over the wheel well. Between the cruise control servo/cable and the coolant reservoir (on an '02, at least) you will see a cylinder with two wires attached to one of the coolant lines running to the evaporator (behind the firewall/dash). Disconnect the two-wire connector to that cylinder and unbend a small paperclip to bridge the two female leads in that connector. This will tell the system that there is enough freon (vacuum, actually, I think) to trigger the compressor to engage. Then start the engine, turn the selector knob to max ac, and come back around to see whether the compressor clutch engages w/in 20 seconds or so.
If it does, one of two things is happening: (i) the freon (or vacuum) is faulty, so that the low pressure switch is not triggering the compressor; or (ii) that switch is bad. Both turned out to be true in my case. Ford no longer makes that style switch--they've changed the connector and now make you buy a pigtail that you have to splice in (need crimper and heat gun to seal splice). $50 for the pair. The switch itself is easy to remove/reinstall (it connects over a shrader valve, so don't over-tighten).
Assuming the the jumper trick gets the compressor running, at this point you need access to expensive shop equipment to complete the repair. But here's another suggestion to save $. Re-connect the low pressure switch (don't replace it yet, since you don't know whether its bad). Go to parts store and buy a $20 a/c low pressure hose with the little three-color dial (no can of freon included). Then buy one can of 12 oz 134a freon with infared dye (maybe another $23). Then go to Menards or other big-box store that sells 12oz R134a freon for less than $5 a pop (the auto parts store are way more expensive).
With the engine off, connect the hose/dial to the low pressure valve, which sits atop a "dryer" that is at the front of the engine compartment adjacent to the passenger side of the radiator (again, on an '02). There should be a light blue plastic cap with "L" screwed onto a schrader valve there. Connect the hose/dial to that valve. Then again disconnect and jumper the low pressure switch, as before. Now screw on the other end of the hose to the can of freon with the UV dye. You first thread the can onto the brass fitting until it seats; then turn the handle for the piercing needle so that it punctures the can. There should be no leakage/hissing at this point (okay, maybe a short hiss). Leave the can threaded onto the fitting, but withdraw the piercing needle so that it is retracted. Lay the can/hose down on the fender, and start the car with max a/c switched on.
Return to the passenger side of the engine compartment. You might want gloves for this (b/c the can of freon will get cold when it empties). The A/C clutch/compressor should be engaged (due to jumpering of the low pressure switch). Rotate the can of freon from upside down to parallel to the ground every 15 seconds or so while the a/c compressor pumps the freon into the system. The needle on the gage will fluctuate--not to worry. Every now and then hold the can upright and, while the compressor is engaged, check that gauge. It should be in the "low" and headed toward the "normal" (green) range. If it goes over 40 lbs psi or above normal, you need to stop.
The can will get cold and gradually feel light and empty. At that point, unscrew the can from the brass fitting and attach a second can, repeating the process until you get the gauge to read "normal" or 35 lbs when in the upright position with the compressor engaged. My '02 took approx 2.5 12-oz. cans from empty.
Once you reach this level, turn off the engine, re-connect the low pressure switch, disconnect the hose, re-screw on the light blue cap to the low pressure valve, and test your A/C. The compressor should engage and the fan should blow cold air. If the a/c clutch refused to engage, you probably have a bad low pressure switch. (I have a spare, good original one if you don't feel changing to the new style switch.)
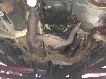
You are not done yet! You may have a leak in the system (which could be why you lost a/c in the first place). With the engine off, listen at the front of the radiator area/grill for a leak in the condenser (this is thing that looks like a radiator that sits in front of the radiator immediately behind the front grill of the truck), and in the various pipes and connectors in the engine compartment. If you hear no leak, go to next step. If you do hear a leak, then head to a/c mechanic to have it repaired.
Next step. Depending on how many cans of freon you, if you do not hear a leak, then you have a choice. First, start by running the a/c when you drive around for the next few days/week. If the air continues to blow cold, then either you have no leak or a very, very small one. If you loose cold air, then you have a leak. You can either (a) buy a special u/v flashlight that connects to the battery and some cheap u/v glasses to visually find the leak; or (b) take it to a mechanic and tell him you have a leak and that you already added freon with u/v dye (he'll have the light/glasses). You (or he, or she) has to fix the leak before re-charging the system.
If the a/c continues to blow cold air for a week, you have a different decision. If you put in no more than one can of freon, you might elect to skip the mechanic altogether, and count you lucky stars. Note: this is probably not what a real a/c mechanic (which I am not) would tell you. This option may degrade you system slightly more over time than the next option (see below) but could also save you a couple hundred bucks in mechanic charges. Your call.
If you put in over a can of freon, then you should probably do what I did: take it to a mechanic and ask them to "recover" the freon in the system, vacuum out the system, and re-charge the system. The reason for this is that you want to start with a a/c system with as little atmospheric air (which has water vapor) as possible. The water vapor can damage the components of the system over time. There is even a "dryer" (tall cylinder, at the top of which you connected your hose to fill with freon) whose function is to dry out any water vapor in the system. If the system is left open for a significant period of time (squirrels or chipmuncks chewed open the pipes on mine before I bought it), then you have to replace the dryer b/c its no longer capable of drying.
I also had to replace the condenser on my truck, with a used one. Followed a thread that showed how to do it w/o removing the radiator, which was a life-saver (removing the radiator is no fun).
So to maximize system longevity and performance, best to start with a vacuum. Also, by vacuuming a system and "holding" a vacuum for an hour or so, the mechanic can verify no leaks. The machine he uses will "recover" the freon that you put in the system as part of the process, so its not wasted (and so the mechanic does not charge you for more freon). This is one of the advantages of putting in (cheaper) freon yourself before heading to the mechanic.
Of course, you COULD have a bad compressor, but don't assume so. The scroll type compressors used on these trucks are not cheap. And if you need a good used one PM me!
Note: The freon 134a used in our 'xploders is environmentally-friendly, so don't fret too much about harm to ozone if you loose some to atmosphere.