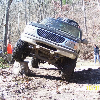
I got the truck for free from my parents because my Camaro (1996 ex highway patrol B4C) became not suitable as a daily driver anymore (It's a monster) and I have slowly been working on this instead. I have had it for about 3.5 years. I don't have to many pics but I have a few.
-1998 4.0 SOHC. 150k on the body and trans, about 30k on the engine rebuild. Crankshaft pully broke clean off.
-Custom air filter - Auto zone cone air filter. I ground down the MAF housing round. No adapter plate.
-Removed the orange reflector from the headlights. - Found the "how to" on the forum here.
-I re-painted the front bumper stripe. The tan had faded to an odd silver and black mix.
-Chrome door pillar stick on accents, stainless steel, 6 pieces. - Ebay.
-Removed the roof rack, partially.
-Lowered the front about 3 to 3.5 inches. Airbagit.com re-indexed keys with no adjuster bolts in.
-2 inch block in the back.
-Mid grade auto zone replacement shocks.
-7 inch in dash dvd touch screen. Valor 700W. Works great and looks great for cheap.
-Bazooka amp EL 2150 bridged at 2 ohms, 3 12's, mtx 6000's wired in series, 2 farad cap. DP audio super tweeters. Polk Audio 8 inch sub to replace the factory one. I blew it the 2nd day I had the truck.
-Radar detector mounted above the rear view mirror. Wired to the left map light switch to turn off and on.
-22 inch Velocity Racing U2-75 chrome wheels, 10.5 wide on Kumho 420s 265/35/22 tires.
-Clear/Euro tailights - Ebay.
-Painted ford logo's and third brake light white. Removed EXPLORER and Limited logo's.
-Painted all my bulbs with high temp silver engine paint in the clear housings. Light coat.
To do:
-Install new bulbs for the headlights and fog lights. Have not arrived yet.
-Paint radio dash bezel and map light trim white.
-Tint front 2 windows.
-Make my own mesh grill to fit in the limited grill.
-Maybe go to 3 inch blocks in the rear.
-Maybe paint the mirrors and running board black plastic white.
-Maybe add a white vinyl strip along the top of the windshield (6 - 8 inches thick) for that "chopped" look.
- etc.