How to: - A4LD transmission rebuild diary | Page 5 | Ford Explorer Forums - Serious Explorations

  • Register Today It's free!

How to: A4LD transmission rebuild diary

Prefix for threads which are instructional.
Allright...newb question. Can you give a brief explanation of how auto trannies work or if you have a website that it explains it or something.


Join the Elite Explorers for $20 each year.
Elite Explorer members see no advertisements, no banner ads, no double underlined links,.
Add an avatar, upload photo attachments, and more!
.


Originally posted by Glacier991
I am saving this space for a short discussion about snap rings. I am more and more believing that SNAP rings, of all kinds, are somethnig that you should NOT re-use. I have some pix to illustrate this, and I'll add them as soon as I get time.

Considering the relatively low cost of most snap rings vs. the damage that can occur if one fails - I would put reusing them in the "false economy" catagory.


Hey thanks a lot glacier, I really appreciate it. That site is awesome...I've spent all night reading about everything I ever wondered about. Now i just need the experience :)


Final aspect of teardown

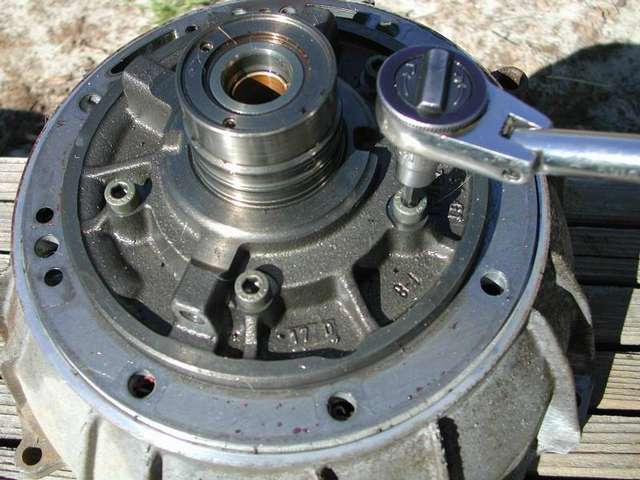
Well, as I write this I am already starting into th rebuild, but the onething we didn;t do in this teardwn part of this thread is tear down the pump/bellhousing. No a lot to it. Remove the pump allen head bolts (6mm)

15286Dscn4276-med.jpg


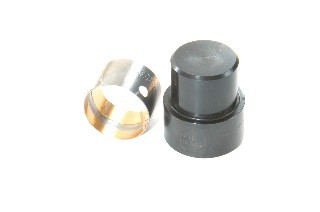
Here's the pump gearset and the pump body once removed

15286Dscn4277-med.jpg


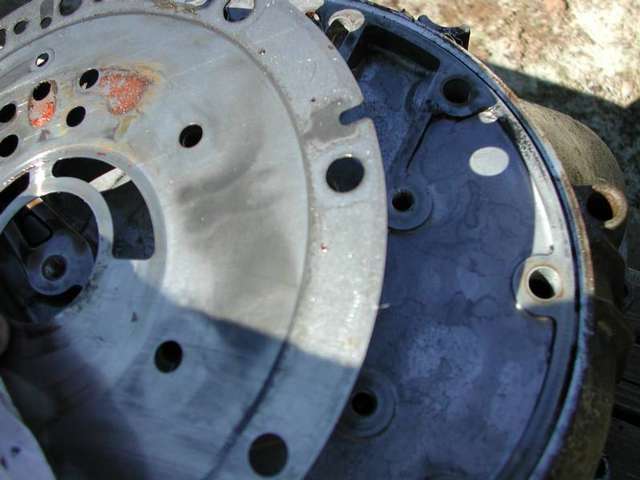
Here's the pump separator plate coming off with the pump removed
15286Dscn4279-med.jpg


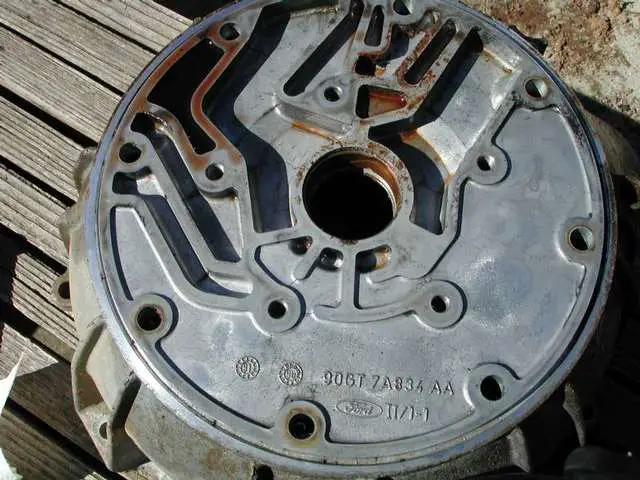
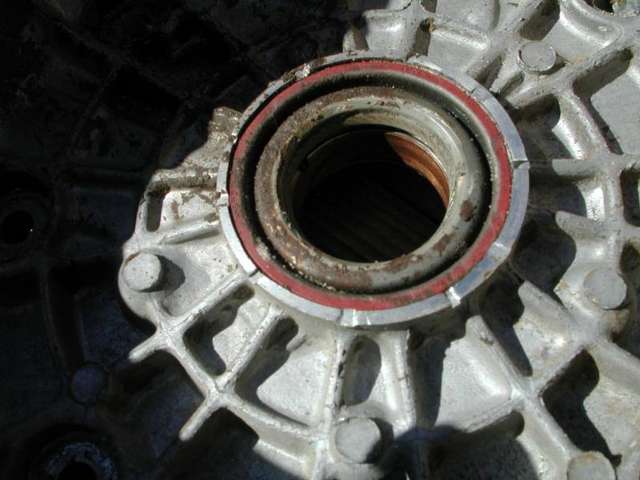
And the end of the bellhousing underneath

15286Dscn4280-med.jpg


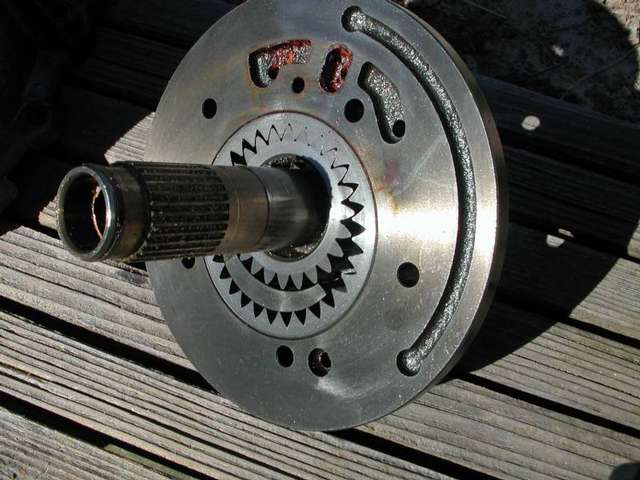
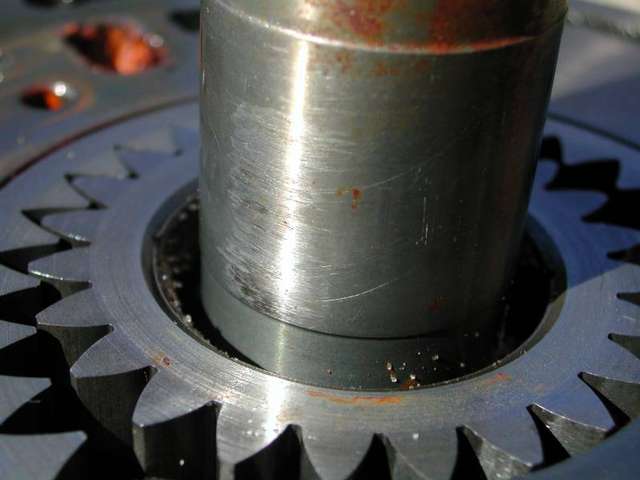
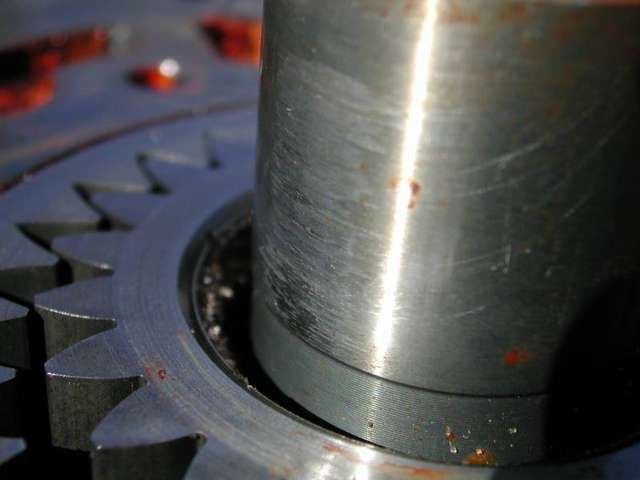
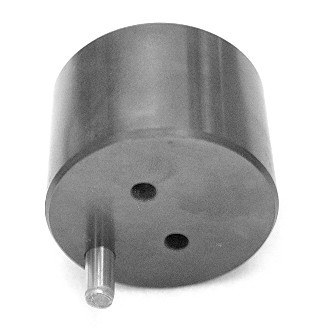
This was a rebuild... I'll show you in a bit how I know.... but the pump shaft showed ascarsof eccentric rotation (eg lack of beng centered)... I'll post a couple pics hoping to show it... here's the first, see the wear ?

15286Dscn4281-med.jpg


heres the 2nd

15286Dscn4282-med.jpg


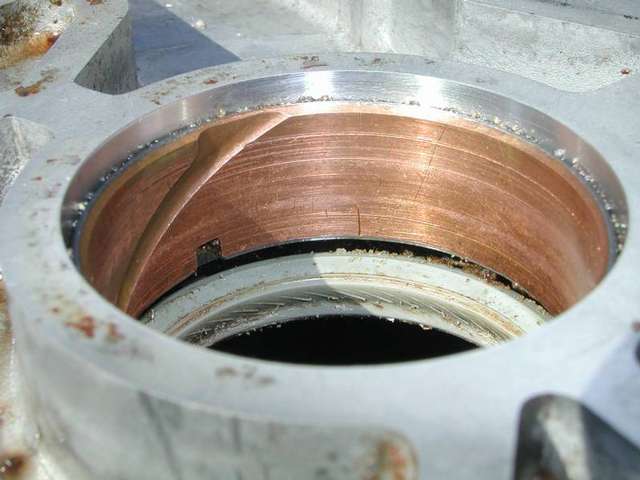
And here is the infamous bushing - this one has had some wars... scarred

15286Dscn4284-med.jpg


ok, I had been told this was rebuilt. But I KNEW it was once I had lookd in the bellhousing.
Like rings on a tree, the number of "stake marks" (4 per build) give it away. This seal shows 10 ...equals at least one rebuild.

15286Dscn4286-med.jpg


We will be exchanging the bellhousing for one with a line bored bushing and a new seal.... so with this, the teardown is complete. On the rebuild I will try and show how to DIY parts of the seal and bushing replacement... BUT ....the only right way is to get it line bored.. on this point I AM resolute. Disgree if you like, but GET IT LINE BORED! Or be sorry.


I'm reminded of the little stickers that came out back in the 70's for the Volkswagon dashboard (with things like "der Glissenflippen" for the wiper controls etc...)


wow chris great job on the explanation, as i've read and keep reading your diaries im amazed at how much confidence ive gained going into my rebuild...hopefully everything will go smooth...lol ya right, but anyway just wanted to let you know this diary is 100% a ok in my book thanx for all your hard work, keep it up :D


ike rings on a tree, the number of "stake marks" (4 per build) give it away. This seal shows 10 ...equals at least one rebuild.

Newb question here:

How do you know that these marks are from a rebuild?

Does a rebuilder stamp 4 slashes here every time he rebuilds a transmission?

I am lost how you got to this 4marks = 1 rebuild.

Thanks.


Generally you will stake evenly around the circumference. The FORD staking tool has, as I recall, 4 prongs on it. Evenly in my mind is 4-5 stakes. Either way around 10 is at least a one rebuild.

Staking is designed to hold the seal in place... it is not like notches on a gun.


Just wanted to say thank you for all the useful information on the A4LD. I had to rebuild the valve body and between your post and TN Explorer plus a little help from the ATSG manual I am up and running again.


Always makes me feel good to hear another success story ! Thanks !


Is this the part number 56600-DJ for the drill jig ?


can not locate these parts

seems they are all out of stock
any one have a source
I checked several on line companies

400-0056600DJ
56600-DJ A4LD Drill Jig for removing the inner sprag race.

400-05621906K
56219-06K A4LD, 4R44E Center Support Tool & Sleeve Kit.

and where does one find that boring tool

thanks


Yea I tired them

said they were out of stock


Join the Elite Explorers for $20 each year.
Elite Explorer members see no advertisements, no banner ads, no double underlined links,.
Add an avatar, upload photo attachments, and more!
.


Ok I decided to wing it

From the web site of the jig maker
It gave instructions on how to do it with out the jig
I followed those and I did get it out along with the thrust washer.
Funny thing is my inner sprag race has splines the full length of the
race, as shown from one of the pictures from Glacier991
So thats done, now I can order the other part
56219-06K A4LD, 4R44E Center Support Tool & Sleeve Kit.
I will post pictures later on my work and also my make shift stand which
works really neat for a wooden cheapy
almost to the point to clean and glass bead the case.
Thanks
post later


Back
Top