Adding Defroster Mirrors | Ford Explorer Forums - Serious Explorations

  • Register Today It's free!

Adding Defroster Mirrors

BonesDT

Elite Explorer
Joined
July 12, 2002
Messages
1,074
Reaction score
8
City, State
Westchester, NY
Year, Model & Trim Level
Red '99 Sport SOHC 4x4
Not sure if anyone still cares about 2nd Gen Ex's, but here's how to add the defroster mirrors to an Ex that didn't come with them. Note, this is my '99 Sport, which came with power mirrors and puddle lamps.

First, go buy yourself some defroster mirrors. You can tell they have the feature by the universal defroster symbol in one of the corners (varies). Mine here are CIPA, which you can score in the $80'ish, but Dorman's are probably just as good in $60'ish. Check out rockauto.com for all your brand options.

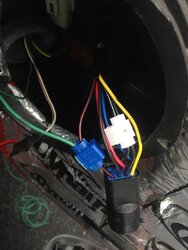
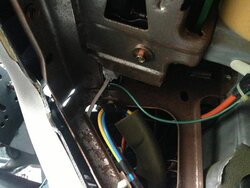
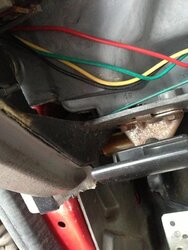
Unfortunately, even though the connectors do fit, this is not plug & play. The Dark Green/Violet wire is missing from all the wiring harnesses, so you have to run a wire directly to the switch, which is exactly how it would be wired if you had the right harnesses.

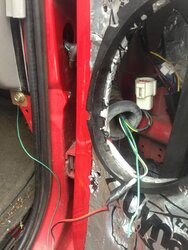
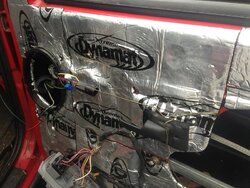
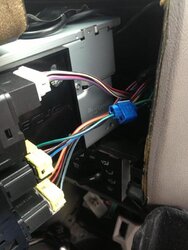
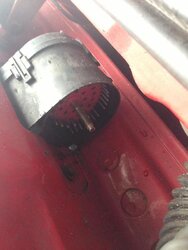
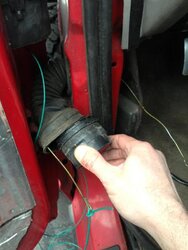
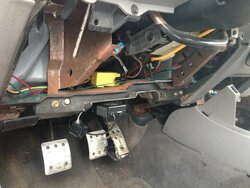
Remove your front door panels, front speakers, plastic door sills, both kick panels, and the driver-side knee panels. Install your mirrors, but leave the wire disconnected.

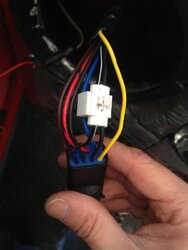
On the Mirror wire only, short circuit the #3 wire the #6 wire. The colors vary by mirror. The #3 wire is the Heater Ground and is the one right next to the only blank slot (assuming the mirror also has puddle lamps). The #6 is the regular ground.
 

Attachments

  • IMG_0532.jpg
    IMG_0532.jpg
    36.3 KB · Views: 328


Join the Elite Explorers for $20 each year.
Elite Explorer members see no advertisements, no banner ads, no double underlined links,.
Add an avatar, upload photo attachments, and more!
.


BTW, I'm starting with the passenger side.

Pull out the kick panel side of the hose and push in the door side. Try to see the light of day through the kick panel and thread a wire through. With the help of a coat hanger, thread it through the hose.
 

Attachments

  • IMG_0533.jpg
    IMG_0533.jpg
    48.5 KB · Views: 289
  • IMG_0534.jpg
    IMG_0534.jpg
    74.4 KB · Views: 284


Splice your wire to the #8 wire on the Mirror. This is the Heater Power.
 

Attachments

  • IMG_0535.jpg
    IMG_0535.jpg
    48.5 KB · Views: 292


Before I start taking up the slack, I tied the mirror wire so it would be fully extended to ensure I leave enough slack in my new green wire so it will be easy to work with I need to, say, replace the mirror in the future.
 

Attachments

  • IMG_0536.jpg
    IMG_0536.jpg
    87.7 KB · Views: 288


Push in the tabs of the glove box to let it drop down then route your wire across, using zip-ties.

Pull out the radio assembly & splice your passenger side wire into the Dark Green/Violet wire on the Defroster Switch.

Plug your mirror wire into the connector behind the door speaker & test to make sure the mirror is warm to touch after a few minutes with the defroster switch on.
 

Attachments

  • IMG_0539.jpg
    IMG_0539.jpg
    57.1 KB · Views: 282
  • IMG_0538.jpg
    IMG_0538.jpg
    63.5 KB · Views: 285
  • IMG_0537.jpg
    IMG_0537.jpg
    48 KB · Views: 280


Moving on to the driver's side. Do the same thing, shorting out the 2 ground wires on the MIRROR-SIDE. Splice in a wire to the Heater Power on the mirror.

The driver side hose has a crazy box on it. Pop the plug off the top & use a 10mm wrench to undo the bottom connector. Peep under neath the female connector attached to the door & you'll see 2 nice holes leading into the inside of the door. Thread your driver's-side wire through one of these holes.
 

Attachments

  • IMG_0540.jpg
    IMG_0540.jpg
    73.7 KB · Views: 275
  • IMG_0541.jpg
    IMG_0541.jpg
    45.6 KB · Views: 288


Peel the rubber hose off the male side of the huge connector & wire-hanger it through the kick panel.

Seal up the hose again, make sure your new wire is sticking out of the flat side of the hose, where there is a natural gap, that way the round part has a tight seal.
 

Attachments

  • IMG_0542.jpg
    IMG_0542.jpg
    51 KB · Views: 277
  • IMG_0543.jpg
    IMG_0543.jpg
    70.8 KB · Views: 278


Here's how I routed my wire through the D-Side dash. Route it around the radio & splice it into the exact same DG/VT wire on the Defroster Switch.

Don't forget to plug the mirror in & test to make sure it gets warm to touch.
 

Attachments

  • IMG_0544.jpg
    IMG_0544.jpg
    66 KB · Views: 272
  • IMG_0545.jpg
    IMG_0545.jpg
    72.7 KB · Views: 287


P.S., the wire in question is the skinnier green wire on the bottom. The fatter Green with the yellow, black & red wires is something else (Superlift Speedo Controller).

Enjoy.


That's a very nice write-up. I did mine by adding pins to the plugs and running the wire along the stock harness, but whatever works best for you. My way is not really a very easy way for hobbyists.


I really wanted to add pins to the plugs, but couldn't think of a good way. I searched junkyards for the 7-pin female (car-side) connector, but couldn't find any. I think you can purchase the Motorcraft pigtail, but it's $$$. I figure I would have to splice a wire anyway. You would have to replace a LOT of wiring harnesses to make it OEM, which is basically impossible.


Yeah, making it like OEM would be stupid difficult. I just got the pins from a bulk bin and put them into the existing harness in the hinge on the driver's door and in the plug that goes to the mirror. Inside the vehicle, I pretty much did the same as you, and ran the single wire tied to existing wire harnesses running behind the dash.

Once again, my way wasn't the easiest, but I'm kind of compulsive.


Good write up. I enjoy the amount of photos you took. very descriptive. But first I need to get on the Puddle lights, considering that I have a '96 with normal mirrors. The only thing I don't like is the Scotch locks, I hate those things all they do is introduce moisture into connections.I might suggest soldering them for a better more solid connection.


I need to get off my but and do mine. Nice write up.


awesome write up always wanted to do this but never though there was mirrors out there that would work properly. more summer projects haha


Back
Top