Cusefan78
Active Member
- Joined
- August 9, 2016
- Messages
- 54
- Reaction score
- 6
- City, State
- Syracuse,ny
- Year, Model & Trim Level
- 2013 base
the morning installing a headunit, maestro and metra kit into my 13 base model. Here is what I did.
Turn on the car and shut off the radio then the car. (Very important step)
The radio comes out by removing the two grey trim pieces on each side of the radio. They pull right out.
Remove 4 screws that hold on the radio panel.
Unplug the antenna, Ac control plug and the panel lifts out.
Remove the 4 screws that hold the 4.5" screen
Remove the 4 screws that hold the 4.5" screen mounts
Remove the 4 screws that hold the CD player then slide that out and unplug it.
Now you will have an empty bay.
If you don't have sat radio and want to add it, you will now remove the existing antenna harness. Trace it back behind the glove box to the passenger kick panel. Unplug the antenna and discard.
Install in its place ford part number bb5z-18812-d. Our antennas include the sat antenna. By replacing the cable you can now use the factory antenna for sat radio. Run that back to the radio cavity and plug all the pushpins into place. Now remove the yellow plastic plug that surrounds the sat plug on the radio side. Plug that into a Sirius receiver and secure it with electrical tape. I wrapped it around lengthwise and it's holding. Did the same thing with my last escape with no problems.
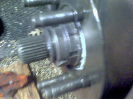
Now grab your radio and your maestro kit plug it into the computer and flash the module. You'll need the radio model and serial numbers.
Back to the suv
Wire the f02 harness from idatalink to the radio harness. Follow the instructions that are online with maestro.
Plug the Sirius receiver into the back of the radio.
This is where you'll install any amps or backup cameras. I just added a backup camera. Run the microphone to where you want it and plug that in. Zips tie all the wires together and push the radio into place With the tabs that come with the metra kit. Use the 4 screws you took out of the CD player and secure the headunit. Now remove the 4 screws that hold the vents to the original dash kit. Then start at one end and push the top four tabs the vent will slide out. Attach the vents to the metra dash kit. Attach the 4.5" screen to the metra kit. Plug the harness into the metra and the 4.5" screen. You are now ready to put the dash together. Goes together in reverse.
Using the kit you will retain heat and Ac controls for front and back, retain steering wheel controls, add Sirius, add Bluetooth, and much better sound.
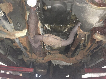
For the backup camera there is a great install write up online.
http://2013explorerdiy.blogspot.com/2013/05/2013-ford-explorer-base-diy-backup.html
only difference is i got a license plate mount and i ran it to the head unit. the install is basically the same though.
Lastly I ran a usb to the glove box for an iPod or hard drive with movies and music
I also ran a lightning cable to the center console flip up storage compartment for my phone and CarPlay.
Very easy install. In all it took me 3 hours and that includes installing the backup camera, an idatalink remote start and the radio. Next I'm going to attempt fog lights and new speakers.