Completed Project - Brian1's Twin Trail Build (Lift, Gears, TTB Mods, Bumpers, Sliders, Cage & More!) | Page 6 | Ford Explorer Forums - Serious Explorations

  • Register Today It's free!

Completed Project Brian1's Twin Trail Build (Lift, Gears, TTB Mods, Bumpers, Sliders, Cage & More!)

Use this prefix for completed projects that are not "How to" articles or threads asking for help.
Brian1's Twin Trail Build

1991 Ford Explorer 4-Door XL 5-Speed Manual 4x4

Project Background and Goals:

I bought this Explorer at a Police auction in August of 2015. I really didn't know what I was going to do with it when I bought it but I couldn't pass up the great deal I got. I stored it away for a bit while deciding to part it out, build it up or just flip it. In the end I decided to build it into a cheap trail truck and use it to R&D some new ideas I had on how to build an Explorer and develop some new parts.

The goal of the build was to do it cheaply while keeping it low, lightweight, and simple. Another goal was to completely transform the Explorer into a trail machine and debut it at the 20th anniversary forum run in Moab (May 2016) while keeping the entire build a secret.

The build has already been completed and made its successful debut in Moab. I will be adding to this thread as time permits of what I did.

Table of Contents - Modifications

to be filled in as the thread progresses for quick access

1" Body Lift
Rear 8.8 Swap and Build
Rear F150 Hybrid Leaf Springs
Front Daystar 2" Coil Spacer & F250 Shock Tower Conversion
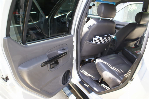
Corbeau Seats Pt1
Corbeau Seats Pt2
Rear Shock Bar Pin Eliminators
Dana 35 TTB Beam Boxing
Hybrid Dana 35 Beams with Dana 44 Outer Conversion
Extended Radius Arms
Dana 35 Diff Build with LockRight Locker
Power Steering Cooler
Cutting the Rocker Panels Off
Rear Bumper Build
Front Fender Cutting
Rock Sliders Pt1
Rock sliders Pt2
Front Winch Bumper Build
Extended Breathers and Fuel Pump Access Panel
Rear Fender Cutting
Cage Building
Fabricated Door Panels/Skins
Doubler Install


IMG_20150820_113129908_HDR.jpg


Join the Elite Explorers for $20 each year.
Elite Explorer members see no advertisements, no banner ads, no double underlined links,.
Add an avatar, upload photo attachments, and more!
.


Join the Elite Explorers for $20 each year.
Elite Explorer members see no advertisements, no banner ads, no double underlined links,.
Add an avatar, upload photo attachments, and more!
.


I thought I updated this thread with my rock slider additions but went back and didnt see it. I made some plates so my feet dont get caught between the tubes getting in/out and they are a good place to stand while accessing the roof.

IMG_20170620_183609522.jpg


IMG_20170620_183617076.jpg


Not yet but I have a thing or two in the works, still... Just waiting for some stuff to show up to use with some other things I've had for 6+ months.. Hows that for being vague? :laugh:

Love it! I am sure whatever it is will be well thought out and way cool. Getting all the ducks to line up just right can take time, and then sometimes they get out of line. :p :confused: I was hoping you might take the rear hatch and make some barn doors out of it for the lower. Sort of like an old willy's style.


Mounted up some 35x12.5R15 Pitbull Rockers on some Allied Beadlocks. I painted the rings bronze to break up the black. They are about the same size as the SXs I took off but the Pitbull & wheel combo is 30lbs heavier than the SX & wheel combo I took off, per corner. I did install some taller bump stops in back. I need to push my beams forward a bit now because I am getting some rubbing up front. Haven't had a chance to take it out yet.

Tech tip: those red, yellow and white dots around new tires actually mean something. When mounting the tires always line up the yellow dot with the valve stem. That is the heavy balance point of the tire and the valve stem helps to cancel it out.

LRM_EXPORT_20170716_094208.jpg


LRM_EXPORT_20170716_094220.jpg


Nice Brian, those are some nice bigass tires. I remember those small yellow and red dots. I've removed hundreds and hundreds of them. They take some rubbing and a cleaner to get them off, or a high pressure spray close up. Thanks for the tip, I don't think I ever heard that before, and I worked around service shops for a couple of years.


Looks great!! Gives me lots of ideas :)


Rear Fenders Cut

I needed to take 2" off the back of the rear fender for tire clearance when stuffed. (I actually needed more in the front too but didn't find that out until the 1st day on the trail :hammer: )

I traced the fender opening on a piece of cardboard and then cut it out. I slid it back 2" and then traced it onto the painters tape so I would get the same factory radius on the fender. I wound up cutting a hole into the inside of the passenger tub and had to patch it with silicone and an aluminum Dr Pepper can :dpchug:. The driver side was different and I only had a small hole to silicone closed.
]

Did you ever cut the front of the rear wheel wells out? How did you manage that part since the door is so close?

Also did you ever put the front inner fenders back in?


Did you ever cut the front of the rear wheel wells out? How did you manage that part since the door is so close?

Also did you ever put the front inner fenders back in?

No on cutting the very front of the rear fender but I did hammer the lip up inside the fender so it isn't sticking out at a 90 bend but more of a 160 now. I never did put my front inner fenders back on, I don't think they would fit any more. I really don't mind that they are gone, I just try and avoid mud!


I haven't had inner fenders since I did my SAS and have not had any excessive mud in the engine compartment issues.o_O


I also don't run inner fenderwells. Unless there is no way around it, I avoid mud. The few times I was in mud it wasn't an issue.
I haven't had inner fenders since I did my SAS and have not had any excessive mud in the engine compartment issues.o_O


Well you all settled it. I will be removing the inner fenders. Thanks!

Take into consideration that we live in dry states compared to Kansas. I don't think they salt the roads in NM, and they sure don't do that here so my Explorer hasn't been exposed to salt or mud that doesn't get washed off in a few days. I still have places on the underbody that have exposed metal after I burned the paint off welding in the cage that are still clean. The only salt it gets exposed to is when I drive it on the beach to go fishing.


Take into consideration that we live in dry states compared to Kansas. I don't think they salt the roads in NM, and they sure don't do that here so my Explorer hasn't been exposed to salt or mud that doesn't get washed off in a few days. I still have places on the underbody that have exposed metal after I burned the paint off welding in the cage that are still clean. The only salt it gets exposed to is when I drive it on the beach to go fishing.
You guys get under the trucks often, I'd clean and spray all of the body seams, to stop any rust from starting in those. Rust is forever when it gets inside a body seam.


Got it, don't want to derail Brian's thread any further here. However good info! I will check all those areas out and probably spray them with something. Just today they were spraying salt everywhere cause there is a 10% chance of snow. However I don't really plan to drive this rig around daily.


Join the Elite Explorers for $20 each year.
Elite Explorer members see no advertisements, no banner ads, no double underlined links,.
Add an avatar, upload photo attachments, and more!
.


Rear Bumper Build

For my rear bumper I wanted something lightweight, simple, high clearance, strong enough for recovery or jacking, and hopefully good looking. I decided to make a bumper using 1.75"x.120 wall tube and 1/4" frame plates. The frame plates were cut on my cnc plasma and then I used laminated construction for the recovery point. That's basically using thick weld washers to increase the thickness of the metal around the shackle hole. The tube is 1 piece and passes through each plate so it is captured. I added side body protection bars so I didn't wind up with a dent and broken light like the ones it came with already. Those tubes are 1.25" and are 1" away from the body at the top - they angle out from the main tube slightly.

Some brackets are easier just to make manually without having to draw them and then program the cnc. I did cheat and used my iron worker to cut them out and shape them. These brackets are the front frame tie-ins to gain extra strength in the bumper. They are also gusseted.

The bumper sticks out maybe 1/2" past the door knob on the hatch so it is tight to the body.

View attachment 90653 View attachment 90654 View attachment 90655 View attachment 90656 View attachment 90657 View attachment 90658 View attachment 90659 View attachment 90660
Would love to have these skills! It's really hard to find someone around here that can do this kind of fab work. Fantastic job Brian


Back
Top