trucku
Explorer Addict
- Joined
- January 25, 2005
- Messages
- 2,015
- Reaction score
- 5
- City, State
- Queens, New York and living in Budd Lake, NJ now.
- Year, Model & Trim Level
- 2002 Explorer XLS 4.0 4x4
A couple days ago I put my truck into drive and noticed the shift lever felt a bit loose. Got home and attempted to put the truck in park, with no luck, because the lever broke free from the bracket.
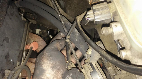
I removed the column cover to get a better look at what happened and this is what I found.
I ordered a column shift repair from ebay. Doorman 905-104
The tools I used for this project were:
Harbor freight snap ring pliers
Dremel tool with sanding drum and cut-off disc
flat and philips tip screw drive
Most important is that you DO NOT have to take the steering wheel off to replace the shift bracket. Just remove the 3 Philips screws holding the column cover. The bottom half is removed and the top have can be moved over to the left, without you having to completely remove it. I disconnected negative cable on battery, out of habit and good practice.
DO NOT REMOVE STEERING WHEEL
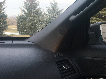
To gain the clearance you will need turn your steering wheel to the left until it is oriented like this
That pressed on retainer is the only thing holding your bracket in.
It pulls right out.On the end of the shaft is this.
It fits on the toothed end of the bracket shaft. It is keyed to fit onto the shaft properly, so don't worry.
Note: The shaft sits in two bushings. You can pull the top one off at the same time.
If you pull the shaft out with the bushing you will have enough room to angle it out and clear the steering wheel.

Here is the old part next to replacement. The new part is beefier.
Assembly was super fast. Just grease the new part, lithium. Put the bushing over the shaft and put it back in.

My fix to get the snap clip to seat was sanding this down until I had enough clearance for it.
I used my dremel tool with a barrel sander on it. I probably took 1/16 of an inch off . . I basically sanded a bit, tested fit and repeated. To test if the c-clip was seated properly I used a flat tip screw driver to pry the between the bracket and the bore it sits in. I didn't want to get crazy sanding, so It took me many tries. Finally the clip seated and I was unable to pry and the bracket didn't move.
Installation of the shifter is easy, but be aware of the micro switch it engages when you are in park. Up to this point the truck has been in park. I was able to get the truck out of park and into drive (don't forget to chock your wheels), so I can install the retaining pin that holds the shift lever in. It slides in fairly easily for most of the way. You need to tap it in so the teeth presses into the bracket lobe. I cycled the shift lever a bunch of times and rechecked to see if the bracket would come loose, but all was well.
My phone battery died, so I don't have the completed pictures, sorry.
I am not sure if the issue I had installing the c-clip was a one off with my part only. Otherwise there really isn't much to this fix. It is very straight forward in my opinion.
Hopes this helps someone.
Thanks
V


I removed the column cover to get a better look at what happened and this is what I found.
I ordered a column shift repair from ebay. Doorman 905-104
The tools I used for this project were:
Harbor freight snap ring pliers
Dremel tool with sanding drum and cut-off disc
flat and philips tip screw drive
Most important is that you DO NOT have to take the steering wheel off to replace the shift bracket. Just remove the 3 Philips screws holding the column cover. The bottom half is removed and the top have can be moved over to the left, without you having to completely remove it. I disconnected negative cable on battery, out of habit and good practice.
DO NOT REMOVE STEERING WHEEL
To gain the clearance you will need turn your steering wheel to the left until it is oriented like this
That pressed on retainer is the only thing holding your bracket in.
It pulls right out.On the end of the shaft is this.
It fits on the toothed end of the bracket shaft. It is keyed to fit onto the shaft properly, so don't worry.
Note: The shaft sits in two bushings. You can pull the top one off at the same time.
If you pull the shaft out with the bushing you will have enough room to angle it out and clear the steering wheel.
Here is the old part next to replacement. The new part is beefier.
Assembly was super fast. Just grease the new part, lithium. Put the bushing over the shaft and put it back in.
My fix to get the snap clip to seat was sanding this down until I had enough clearance for it.
I used my dremel tool with a barrel sander on it. I probably took 1/16 of an inch off . . I basically sanded a bit, tested fit and repeated. To test if the c-clip was seated properly I used a flat tip screw driver to pry the between the bracket and the bore it sits in. I didn't want to get crazy sanding, so It took me many tries. Finally the clip seated and I was unable to pry and the bracket didn't move.
Installation of the shifter is easy, but be aware of the micro switch it engages when you are in park. Up to this point the truck has been in park. I was able to get the truck out of park and into drive (don't forget to chock your wheels), so I can install the retaining pin that holds the shift lever in. It slides in fairly easily for most of the way. You need to tap it in so the teeth presses into the bracket lobe. I cycled the shift lever a bunch of times and rechecked to see if the bracket would come loose, but all was well.
My phone battery died, so I don't have the completed pictures, sorry.
I am not sure if the issue I had installing the c-clip was a one off with my part only. Otherwise there really isn't much to this fix. It is very straight forward in my opinion.
Hopes this helps someone.
Thanks
V