- Joined
- February 2, 2006
- Messages
- 7,476
- Reaction score
- 53
- City, State
- North East Arkansas
- Year, Model & Trim Level
- 2012 F150 4x4
Convert 1996-2001 V8 AWD to Manual Shift BW4406
EDIT: There is a write up on how to connect the indicator lights a few posts down, near the bottom of the page.
AWD is a great method for putting power to all four wheels, but it does it somewhat inefficiently and doesn’t offer low range. A MANUAL SHIFT BW4406 transfer case from a 97-03 F150 can be installed with a few modifications. Pre 1998 vehicles will need some sort of speed sensor set up, I did not need this, but when a solution is found, I will add this to the thread.
EDIT
Speed Sensor issue is this: The 1997 and 1998 Explorers and Mountaineers use a speedo gear on the output shaft of the transfer case. Most of the later model cases do not have this gear, they do have a provision for the sensor, but no gear. I understand a 1997 and possibly a 1998 F150 transfer case has the gear in the case. If you cannot find an older case, all is not lost. 410Fortune figured out how to put a gear on the shaft to convert a later model case for use. http://www.explorerforum.com/forums/showthread.php?t=166605&page=5
I am not the first person to think of this or do this by far. V8boatbuilder did a great write up here.
97V8 did a manual conversion that got me spurred on -click here
These guys did the pioneering and figuring, so I don't mean or want to take the credit for the innovation- I just want to make things clear so that others can do this conversion easily.
Items needed:
- Manual shift BW4406 from 1997-2003 F150, there are three part numbers that I know of and cannot find any appreciable difference between them other than possible speed sensor issues.
- Shift linkage including stick from the same or similar truck as the same transfer case. Edit 10/2012- Be ware the shift linkage from some 5.4 trucks may not work, particularly early (1997 area) vehicles. Thanks to ford99_1979 for this information.
- 1997-200? Expedition/Navigator 4x4 rear driveshaft. Suspension set up makes no difference that I can tell. Must be from a 5.4 V8 equipped vehicle
- 1997-200? F150/Expedition front driveshaft (obviously from a 4x4) Must be from a 4.6 V8 equipped vehicle
- Conversion U Joint Autozone P/N: 185793, PDQ/Brute Force #1-0134.
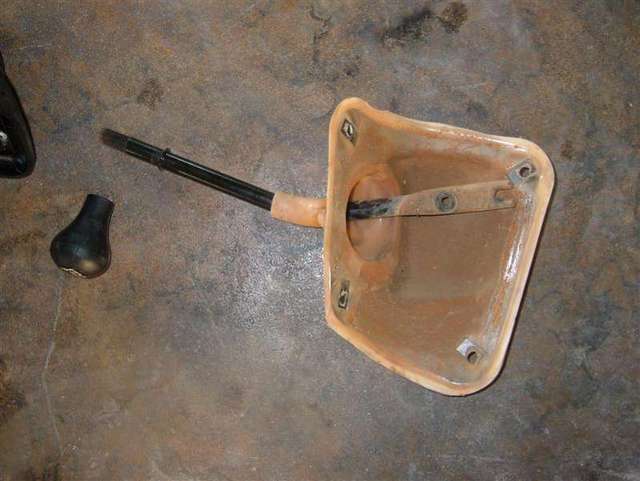
- Shift boot of your preference
- Tube of sealant
The difference in the front Driveshafts:

Thanks to AMMO_HOOHA I now have the Ford part numbers for the shifter, rod and linkage. Some dealers can't seem to find this stuff in their parts system.
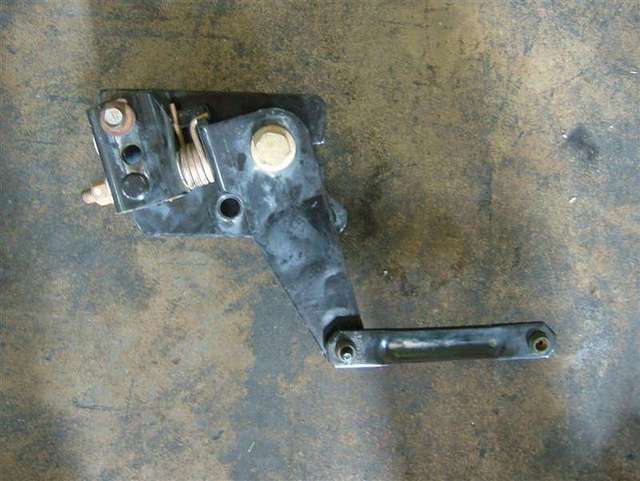
Lower lever (part that bolts to the transmission) F65Z7210BC
Upper lever (the rod in the cab) F65Z7210AB
Rubber boot F75Z7277AA
Linkage (piece that connects to the t/c) XL3Z7B051AA
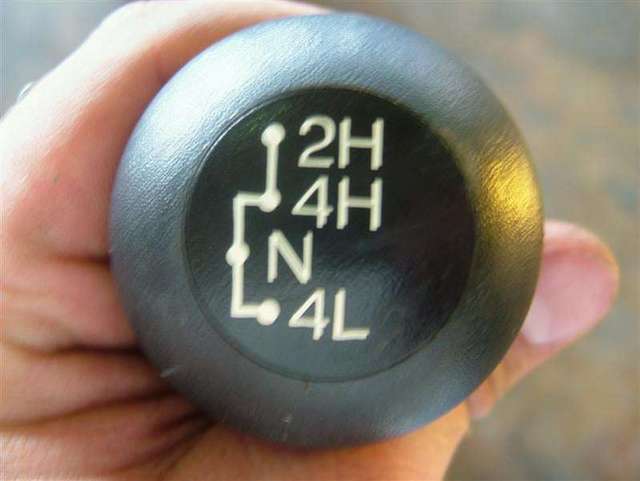
4406 Manual Transfer Knob F2TZ7213A
4406 Lockout Switch (4wd indicator sensor) 4L327E440AB
Best guess is about $100 for the linkage parts, no boot or knob.
--------------------------------------------------------------------------------------------------------------------------
I am going to try to put these instructions in the best order, that isn’t necessarily how I did it, I learned as I went. Revisions or suggestions are welcome. I am assuming some level of mechanical ability and safety common sense when typing this, use your best judgment. I was able to do this with a creeper and four jackstands.
1. Remove center console- remove front piece of console that has the message center or storage pockets, remove cup holder piece that is behind that piece. Near the front of the console, there are two 8mm bolts with large washers that are installed horizontally, take these out. Near the middle of the console on each side there are two more identical bolts that are vertical, use an extension to reach these and a magnet to fish them out. Near the front, there is a wire connector with a 10mm bolt holding the connector together. With the key off, loosen the bolt and disconnect the plug. To remove the console grip it near the back and with a pulling and lifting motion, it should come loose.
2. Remove the trim near the door that holds the edge of the carpet down and fold the carpet back. It is easier and advisable to remove the seats at this time. It is well worth the effort. Fold the carpet back to expose the plate that covers the top of the transmission and remove the cover.
3. Using a 13mm socket remove the top two bolts that hold the transfer case to the transmission. Leave the cover off and the carpet back.
4. Go under the truck and remove the front and rear drive shafts. The rear requires a 12pt 12mm socket for all four bolts. The front needs a torx bit and an 8mm socket or hand wrench at least if you have the CV style front output.
5. Remove the remaining four bolts that hold the transfer case, pull the vent hose off the barb on the front on and remove the case.
6. This is a good time to have less than a half tank of gas. Put a jack under the gas tank with a board to prevent denting it. Loosen the rear strap using a 13mm socket, but do not remove the bolt.
7. The front of the tank is held by a bracket that is bolted to the frame. Remove the two 18mm bolts that hold the tank to the bracket. Remove the four 15mm nuts that hold the bracket to the frame. Two of the nuts are on the bottom of the frame, the other two are on top between the frame and body. Remove the bolt pairs from the frame. You may have to tap them with a hammer.
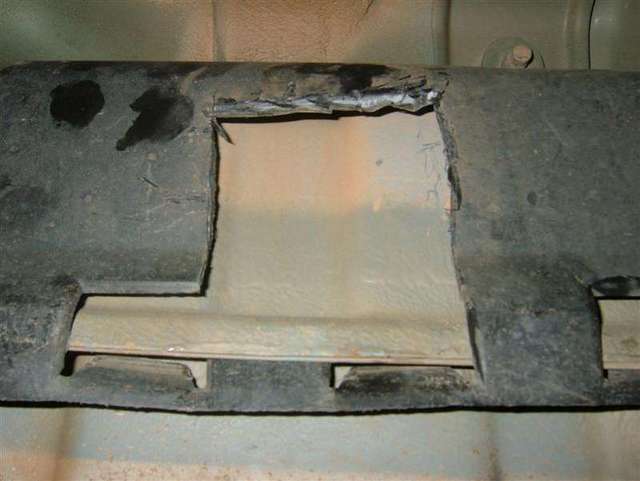
8. Remove the bracket from the truck. The end of the bracket needs to be bent inward to allow for the bigger 4406 case. I don’t really know how to explain how to do it, but it’s easy to see what has to be done when the case is in.
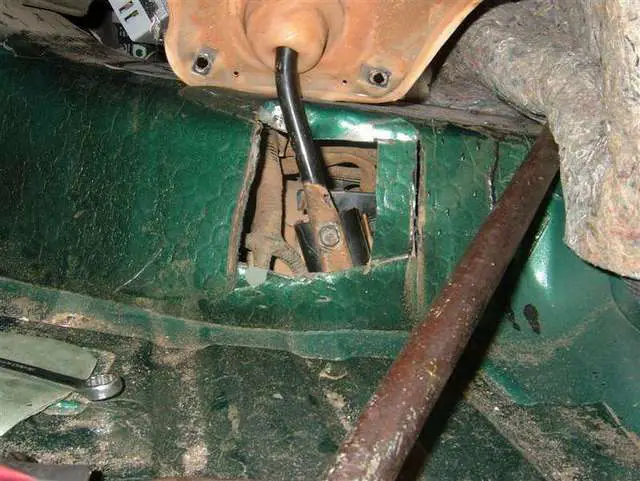
Here is what it looks like with the case in:
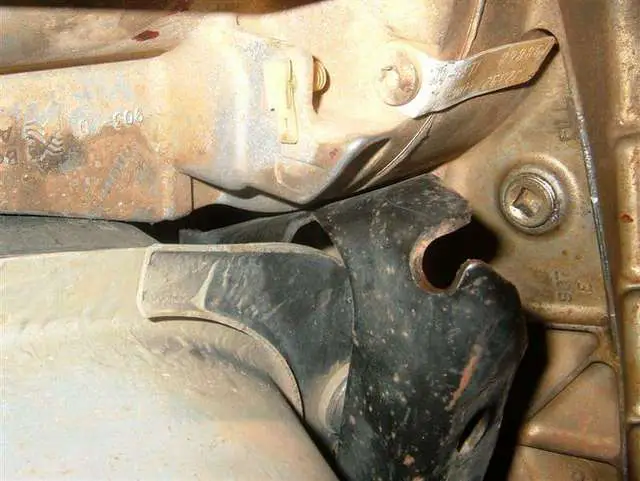
9. On the 4406 case there are two tabs on the top that need to be ground or cut off so they don’t hit the body. Do that now. You need to "clearance" your body to clear the case. Turdle was nice enough to post a picture with where to hit:
Here is a picture of where the non Body lift guys will need to "adjust" for some clearance
red circles are the spots to hit--
Yellow circle is the shift linkage mount--you need additional clearance here
Blue circle shows relocated harness, to first bolt hole.

10. Making sure the alignment pin is in the case or the transmission, put sealant on the transmission flange and put the 4406 case on the output shaft of the transmission and push it up on the alignment pin. Install the lower four bolts.
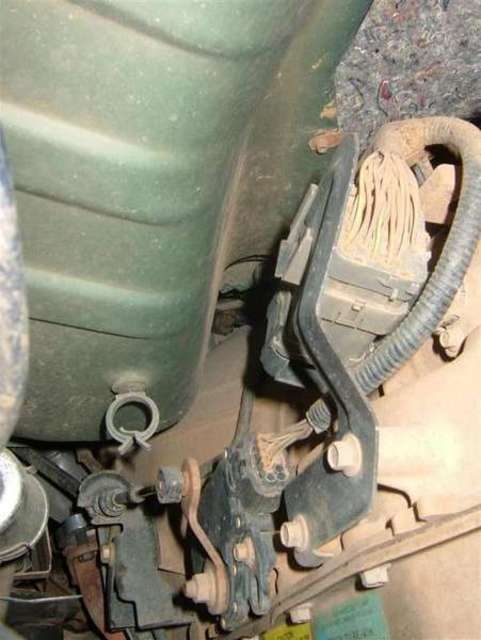
11. Install the shift linkage on the transmission using the two 21mm bolts. Leave the stick off at this point. There is a wiring connector in the way of this linkage held on by two 10mm bolts. Remove both bolts, push the connector forward and hold it on with one bolt in the forward hole. There are two blind holes on the tail shaft housing to bolt the linkage to. Push the link bar over the barbed head on the transfer case.
12. Re install the gas tank bracket, it may take several attempts to make it clear the case, I had to try two or three times. Don't forget to tighten the rear strap bolt.
13. Inside the cab install the upper two bolts in the transfer case.
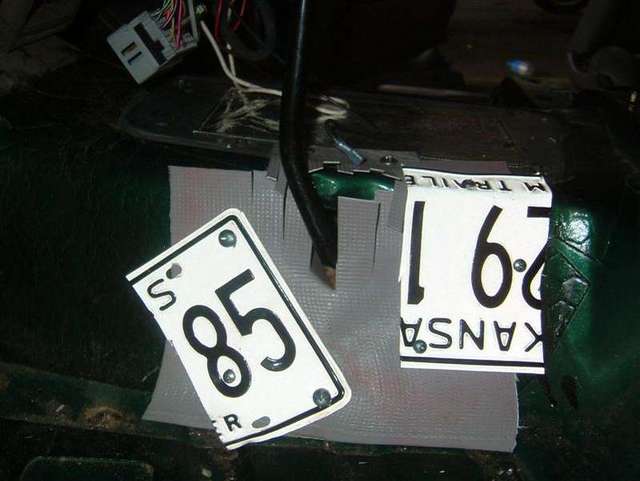
14. Looking inside the transmission hump, through the access panel, decide where to cut to allow for the shift rod. This is a personal preference on how you do so. After the hole is cut, make sure the stick doesn’t hit the body in any position. I used a BFH to finesse my opening.
15. You may want to fashion a cover to limit mud water and air from entering the cabin, just make certain it doesn’t interfere with the shifter function. Yes, that is a license plate I used to make my cover.
16. Remove the stick and lay the carpet back down. Feel for the opening and cut the carpet to allow the shift stick to pass trough the carpet. I made my cut put the stick through the carpet, let the carpet down, and then installed the bolt that holds the stick to the linkage.
17. Install the rear driveshaft- slip the splined end in the rear of the transfer case and bolt the driveshaft to the rear end. I put the case in neutral to allow me to rotate the driveshaft to line up the bolt holes.
18. Put the conversion U Joint in one end of the front driveshaft. Reuse the original clamps to attach the front of the driveshaft to the front axle. Use the bolts leftover from the original rear driveshaft to attach the rear flange to the output of the transfer case. I found it easier to line up the bolt holes by leaving the case in neutral, then putting it in gear to torque the bolts.
19. Jack up all four wheels and have someone start the truck and put it in drive, check for binding or rubbing. I had to trim some of the plastic shield off of my gas tank.
20. Install the shifter boot, knob, trim, console, seats etc.
21. Go Wheelin!


")


