Deathrow Update Log (Discontinued Till Further Notice) | Ford Explorer - Ford Ranger Forums - Serious Explorations
  • Register Today It's free!

Deathrow Update Log (Discontinued Till Further Notice)

DemonMudder

- Performing Redneck Science -
Elite Explorer
Joined
February 21, 2021
Messages
1,336
Reaction score
1,286
City, State
Jacksonville, FL
Year, Model & Trim Level
'95 C1500


Join the Elite Explorers for $20 each year.
Elite Explorer members see no advertisements, no banner ads, no double underlined links,.
Add an avatar, upload photo attachments, and more!
.


DemonMudder

- Performing Redneck Science -
Elite Explorer
Joined
February 21, 2021
Messages
1,336
Reaction score
1,286
City, State
Jacksonville, FL
Year, Model & Trim Level
'95 C1500
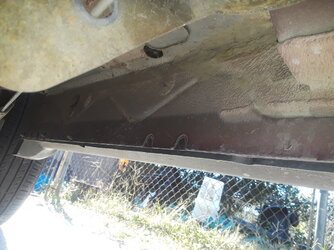
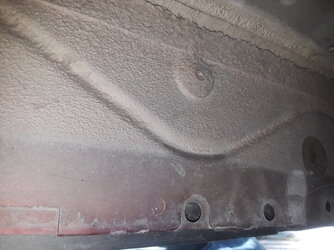
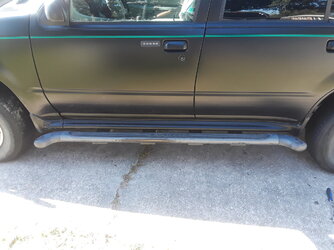
So first and foremost, running boards. I picked up a set from the junkyard from another explorer like six months ago, bolts and all. My exploder, only came with a skirt, but wanted the boards as well as the skirt, any idea if I can add them without taking the skirt off? Or am i just better off getting some that attach to the frame? Prefer the frame option but I mean I already have these ones for cheap

20211108_102119.jpg 20211108_102111.jpg
 

Attachments

  • 20211108_102119.jpg
    20211108_102119.jpg
    232.9 KB · Views: 69


CDW6212R

Hauls the mail.
Elite Explorer
Joined
June 17, 2004
Messages
23,792
Reaction score
4,300
City, State
Knoxville, TN
Year, Model & Trim Level
98 Limited AWD 302
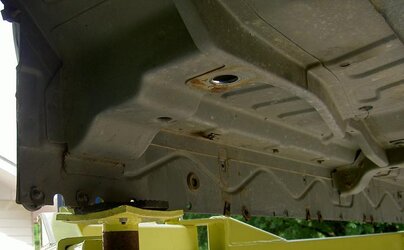
The OEM running boards go on trucks with thread inserts in the body, plus the thread clips which slip onto those holes along the bottom edge of the body. Those thread clips are easy to install, and should be easy to find. The upper thread inserts though are a bigger key, in your picture it looks like there is a hole made where the insert needs to go. There are about four of those sets of three bolts, needed to mount the OEM brackets on each side. If you can work out those upper bolt threads, the inserts, then you can mount the OEM running boards.

Projectthread105.JPG


DemonMudder

- Performing Redneck Science -
Elite Explorer
Joined
February 21, 2021
Messages
1,336
Reaction score
1,286
City, State
Jacksonville, FL
Year, Model & Trim Level
'95 C1500
The OEM running boards go on trucks with thread inserts in the body, plus the thread clips which slip onto those holes along the bottom edge of the body. Those thread clips are easy to install, and should be easy to find. The upper thread inserts though are a bigger key, in your picture it looks like there is a hole made where the insert needs to go. There are three or four of those sets of three bolts, needed to mount the OEM brackets on each side. If you can work out those upper bolt threads, the inserts, then you can mount the OEM running boards.
So pretty much, get that top insert out for the third bolt on each mount, and it should mount fine? Have plenty of clips for the bottom bolts.


CDW6212R

Hauls the mail.
Elite Explorer
Joined
June 17, 2004
Messages
23,792
Reaction score
4,300
City, State
Knoxville, TN
Year, Model & Trim Level
98 Limited AWD 302
See the picture I added above to my post, I found that to show what the OEM insert looks like. If your truck has the hole in the right spot for each of those, you may be able to find a thread insert to install in those locations.

Click on the picture, that makes it a little bigger;

Projectthread105.JPG


DemonMudder

- Performing Redneck Science -
Elite Explorer
Joined
February 21, 2021
Messages
1,336
Reaction score
1,286
City, State
Jacksonville, FL
Year, Model & Trim Level
'95 C1500
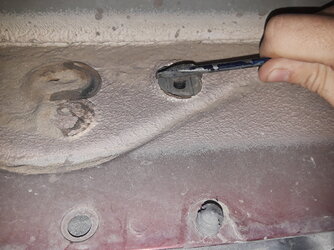
I chipped off whatever coating was on them, to get to one of the rubber inserts, looks identical to your picture.

20211108_111256.jpg


CDW6212R

Hauls the mail.
Elite Explorer
Joined
June 17, 2004
Messages
23,792
Reaction score
4,300
City, State
Knoxville, TN
Year, Model & Trim Level
98 Limited AWD 302
Excellent, I wondered if they would have installed those inserts in all of the trucks. You are set, the inserts are there and were protected from corrosion. You should be able to install the new ones really quickly.

Note that the OEM running boards changed after 1998, the 99-01's have an extra mounting bracket at the rear, which slips into a slot in the side of the body. My 99 I considered trying to match that hole in my 93's body, but didn't do that. The 99-01's are also made to merge with fender flares front and back, so they are shaped a lot differently too. The pre-1999 running boards should all swap among them, through 2001 if you ignore that one rear hole/slot.


DemonMudder

- Performing Redneck Science -
Elite Explorer
Joined
February 21, 2021
Messages
1,336
Reaction score
1,286
City, State
Jacksonville, FL
Year, Model & Trim Level
'95 C1500
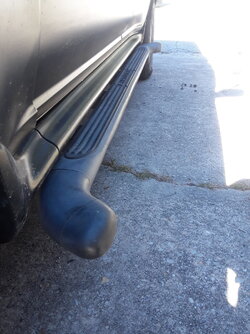
Well that's that, had to switch the ends so that they stick out rather than in thanks to the skirt being in the way, but honestly it's not too horrible looking. Definitely needs a paint job but there's a time for everything, and that is not right now lol

20211109_104723.jpg 20211109_104747.jpg


DemonMudder

- Performing Redneck Science -
Elite Explorer
Joined
February 21, 2021
Messages
1,336
Reaction score
1,286
City, State
Jacksonville, FL
Year, Model & Trim Level
'95 C1500
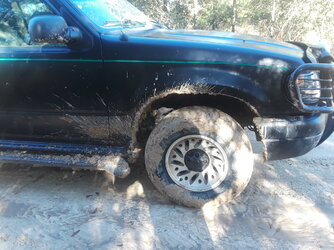
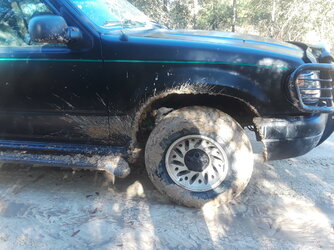
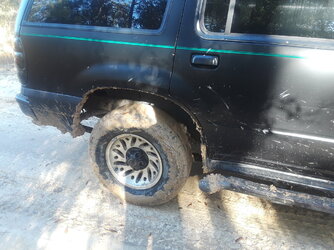
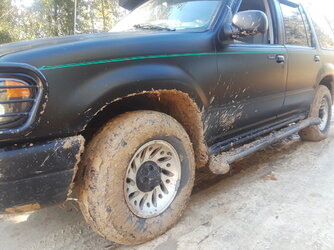
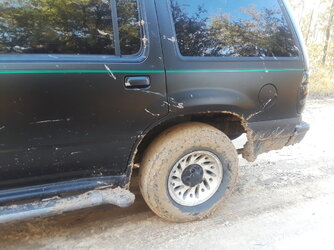
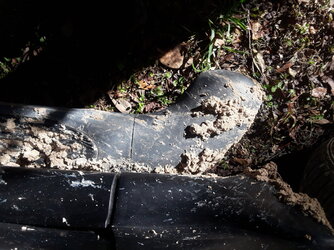
Went out for a bit of mud, first time through this pit I found it to be much softer than anticipated, almost getting myself stuck. So the video only covers the front half of the mud, but I've got a few pics of her. Would've liked some more mud, but most of the pits were too soft to even think about attempting, only the one real decent one


20211114_091620.jpg 20211114_091620.jpg 20211114_091610.jpg 20211114_091553.jpg 20211114_091600.jpg 20211114_090934.jpg
 

Attachments

  • 20211114_091600.jpg
    20211114_091600.jpg
    228.4 KB · Views: 60
  • 20211114_091553.jpg
    20211114_091553.jpg
    235.1 KB · Views: 61
  • 20211114_091610.jpg
    20211114_091610.jpg
    256.2 KB · Views: 62
  • 20211114_091620.jpg
    20211114_091620.jpg
    259.6 KB · Views: 64
  • 20211114_091620.jpg
    20211114_091620.jpg
    259.6 KB · Views: 61


BKennedy

Elite Loser
Staff member
Moderator
Elite Explorer
Joined
November 29, 2000
Messages
9,519
Reaction score
3,087
Location
USA
City, State
San Diego, PRofK
Year, Model & Trim Level
1994 XLT
I think it looks like you put them on backwards. I guess if you run them into a obstacle they will just break off instead of getting hung up. Can't you notch the plastic skirt so they fit the right way?


DemonMudder

- Performing Redneck Science -
Elite Explorer
Joined
February 21, 2021
Messages
1,336
Reaction score
1,286
City, State
Jacksonville, FL
Year, Model & Trim Level
'95 C1500
I think it looks like you put them on backwards. I guess if you run them into a obstacle they will just break off instead of getting hung up. Can't you notch the plastic skirt so they fit the right way?
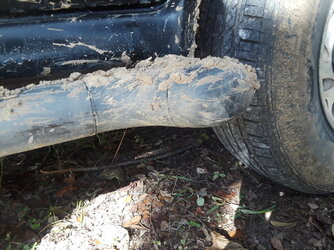
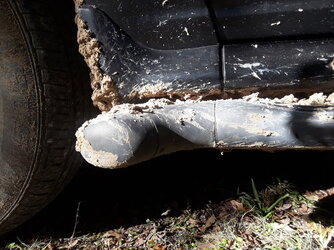
They're not on backwards, the ends are just bolted onto the boards so I just switched the ends they were on. Honestly the plan eventually is to get something more like rock sliders. May just take the current ends off and customize a flat cap so that they don't angle under or out from the truck until then.


BKennedy

Elite Loser
Staff member
Moderator
Elite Explorer
Joined
November 29, 2000
Messages
9,519
Reaction score
3,087
Location
USA
City, State
San Diego, PRofK
Year, Model & Trim Level
1994 XLT
Looking at the pictures again, they do keep the mud off the front doors like that. I know they are not on backwards, since they only bolt on one way. Are the caps smaller diameter than the steps their entire length or just at the ends?


DemonMudder

- Performing Redneck Science -
Elite Explorer
Joined
February 21, 2021
Messages
1,336
Reaction score
1,286
City, State
Jacksonville, FL
Year, Model & Trim Level
'95 C1500
Looking at the pictures again, they do keep the mud off the front doors like that. I know they are not on backwards, since they only bolt on one way. Are the caps smaller diameter than the steps their entire length or just at the ends?
Same diameter all around

20211114_144203.jpg 20211114_144207.jpg 20211114_144338.jpg 20211114_144343.jpg
 

Attachments

  • 20211114_144203.jpg
    20211114_144203.jpg
    285.9 KB · Views: 61
  • 20211114_144207.jpg
    20211114_144207.jpg
    265.1 KB · Views: 60
  • 20211114_144338.jpg
    20211114_144338.jpg
    315.5 KB · Views: 66


BKennedy

Elite Loser
Staff member
Moderator
Elite Explorer
Joined
November 29, 2000
Messages
9,519
Reaction score
3,087
Location
USA
City, State
San Diego, PRofK
Year, Model & Trim Level
1994 XLT
It looks like there is a separate end cap after the curved part. Maybe you could remove the curved part?


DemonMudder

- Performing Redneck Science -
Elite Explorer
Joined
February 21, 2021
Messages
1,336
Reaction score
1,286
City, State
Jacksonville, FL
Year, Model & Trim Level
'95 C1500
It looks like there is a separate end cap after the curved part. Maybe you could remove the curved part?
That last itty bit, maybe, not sure how its attached. But that's definitely something to look into


DemonMudder

- Performing Redneck Science -
Elite Explorer
Joined
February 21, 2021
Messages
1,336
Reaction score
1,286
City, State
Jacksonville, FL
Year, Model & Trim Level
'95 C1500
Okay, so I'm finally doing this, going ahead within the next few weeks with new tires, wheels and some suspension replacements. Have everything for the front end suspension (detroit axle), even getting some new torsion keys. For the rear though, I already have the warrior shackles on her, found via searches that the shackles plus the lifted leaf springs are too much? So, would it be better to get new stock leafs with add a leafs and the current shackles, or go with the 1.5" lifted leafs with stock sized shackles? Working on fitting some 32" tires while also fixing some dying suspension. Anything is appreciated, even other ideas


WormsExplorer

Explorer Addict
Joined
February 14, 2015
Messages
1,415
Reaction score
566
Location
Colorado Springs, CO
City, State
Colorado Springs, co
Year, Model & Trim Level
98 Durango
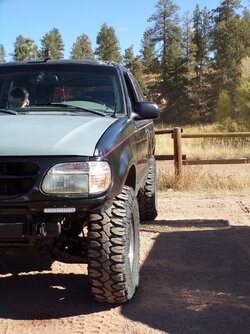
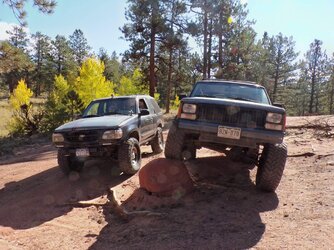
I have Keys and add a leaf and Shackles and I am running 285/75r16 roughly 33's. I also do not have a front bumper and trimmed the rear and have a 3rd gen rear bumper. Not a very good side view but here she is. I am happy with how she rides.

New 97 44.jpg New 97 47.jpg
 

Attachments

  • New 97 44.jpg
    New 97 44.jpg
    276.3 KB · Views: 126


DemonMudder

- Performing Redneck Science -
Elite Explorer
Joined
February 21, 2021
Messages
1,336
Reaction score
1,286
City, State
Jacksonville, FL
Year, Model & Trim Level
'95 C1500
I have Keys and add a leaf and Shackles and I am running 285/75r16 roughly 33's. I also do not have a front bumper and trimmed the rear and have a 3rd gen rear bumper. Not a very good side view but here she is. I am happy with how she rides.

View attachment 423597 View attachment 423598
She looks good! think I'm going to end up with the same lift setup. You can fit a 3rd gen rear bumper, really?


Join the Elite Explorers for $20 each year.
Elite Explorer members see no advertisements, no banner ads, no double underlined links,.
Add an avatar, upload photo attachments, and more!
.


WormsExplorer

Explorer Addict
Joined
February 14, 2015
Messages
1,415
Reaction score
566
Location
Colorado Springs, CO
City, State
Colorado Springs, co
Year, Model & Trim Level
98 Durango
She looks good! think I'm going to end up with the same lift setup. You can fit a 3rd gen rear bumper, really?
Yes you can it takes a little drilling but yes it can fit. Here is a close up ish of it. When I get home tonight I can get a better picture of it and send it to you. This one I had it upside down. I now have it right side up.
New 97 34.jpg


Top