DeRocha's Door Hinge Pin Replacement w/pics | Page 5 | Ford Explorer Forums - Serious Explorations

  • Register Today It's free!

DeRocha's Door Hinge Pin Replacement w/pics

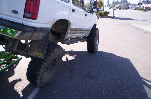
A pair of jack stands helps the bottom and I used my huge city trash can as the rest of the support

Yuppers. I use one big Jackstand and use some wood framing shims to get it snug under the door. I only do one hinge at a time, so it just needs to hold it in place for a few minutes at a time.

Whipple.... Buddy..... dude... My good Sir...

We try are best to keep the thread flowing with relevant posts to the thread topic. It doesn't always work out that way, but we try! LOL!

I wouldn't start a new thread about the brakes, I would find another thread already made covering that topic, and add to it. ;)


Join the Elite Explorers for $20 each year.
Elite Explorer members see no advertisements, no banner ads, no double underlined links,.
Add an avatar, upload photo attachments, and more!
.


Yuppers. I use one big Jackstand and use some wood framing shims to get it snug under the door. I only do one hinge at a time, so it just needs to hold it in place for a few minutes at a time.

Whipple.... Buddy..... dude... My good Sir...

We try are best to keep the thread flowing with relevant posts to the thread topic. It doesn't always work out that way, but we try! LOL!

I wouldn't start a new thread about the brakes, I would find another thread already made covering that topic, and add to it. ;)

I'm new at this site format. I will find an existing thread already covering breaks.


Grinder to the rescue!

I was dealing with this on my brothers 91. I followed this procedure with the top pin (mostly). The bottom one was a PITA! Found my grinder and cut that pin in two. Filed the mess left by the grinder and the two pieces of the pin slid right out. Done it this way with three more doors. Great info here we probably wouldnt have attempted this with out it!


Great original write up; it gave me confidence that I could tackle this project myself. Replaced the upper pin with no problem, following the directions exactly. (Except no air hammer. Once the top of the pin was ground down, I used a punch and hammer to manually muscle it through.) Supporting the door from the top with a ratchet strap was a great suggestion. I did it in my garage and hung the strap from the rafters while using a floor jack to support the door from the bottom.

The bottom pin is much more difficult. It appears the bottom pin was installed upside down. (That is, the fat end it on top, and the mushroomed end is on the bottom.) I tried grinding and cutting the top, but it's just too hard and thick for my tools. I ground out the bottom and tried punching it through, but I just can't get enough momentum with my hammer to make it move. I'm coming up from the bottom, and the running boards limit my range of motion. I worked it for 3 hours or so and ran out of time.

The door works much better with the top pin replaced. I'd just leave it be, but it bugs me that the bottom is "halfway there". Any suggestions for my next day off?


...
The bottom pin is much more difficult. It appears the bottom pin was installed upside down. (That is, the fat end it on top, and the mushroomed end is on the bottom.) I tried grinding and cutting the top, but it's just too hard and thick for my tools. I ground out the bottom and tried punching it through, but I just can't get enough momentum with my hammer to make it move. I'm coming up from the bottom, and the running boards limit my range of motion. I worked it for 3 hours or so and ran out of time.

The door works much better with the top pin replaced. I'd just leave it be, but it bugs me that the bottom is "halfway there". Any suggestions for my next day off?

Hi Ted, Glad my original write up was useful in showing the basics of how to tackle the job. As you already know an air hammer is the key and it will enable you to apply a decent amount of force in a confined area. If you can't get access to an air hammer, or grind off the top head to drive it down, then you'd need to see if a buddy or shop could remove the pin for you. They'll already have the tools and should be able to "bang" this out for you for cheap money. In the long run spending $10-$20 may save you a few hrs of headache trying to wrestle with it.


Great, thanks for the reply. I'll likely take your advice and see if a shop will remove the pin for me. Again, the write up was a big help. Thank you.


DeRocha,
Thanks for the GREAT write up w/pics, it was a HUGE help to me. I did the l/s lower hinge on our 99 Sport & I left the write up on the computer & kept referring back to it as I was doing the repair. The hinge pin looked ok, the bushings were all busted up, so I just replaced the pin & bushings. I used the Dorman pt #- 703-270 door hinge pin kit which has enough parts to do upper & lower door hinges on one door.


Havn't attempted this yet, but am thinking going to use my cherry picker (hoist for pulling engines) to support the door. Havn't used it to pull many engines, but have found many other uses for it. Arne.


Just tackled this job today. Pretty simple. I used an air grinder to take the top off the pin and pounded it through with a large punch and a big hammer.

As for the bottom, I replaced the whole hinge with a good one I bought a few years ago at a pick and pull.

I figure the difficulty was about even for both ways. I'm glad I decided to search this thread out though because I was about to take out the dash and use the entire top hinge assembly I have.

I thought about using my cherry picker to hold the door like posted above but my Explorer was under one of those portable car ports so I just used some rope over one of the pillars and through the window.

Its so much nicer to have a door that closes without the lift and pull technique. I also replaced the broken interior handle in the process. Its like a brand new door.


Someone asked for measurements, so since I've got my digital calipers handy...
The Dorman 38438 is:

*Pin: 0.340 inch diameter / 2.783 inches long / From seat to seat (far side of E-Clip seat) 2.605 (2.571 inner seat to inner seat) <---Hard to measure with calipers. o_O

*Bushings: Insert outside diameter 0.475 inch / Top lip outside diameter 0.597 /
Insert wall thickness 0.061 inch / Top lip thickness 0.044 inch

* E-clip thickness is 0.034 inch


Apologies if someone has asked already, but is there any reason not to just unbolt both hinges and remove the door? I have to replace both pins on my passenger door


If you replace one pin at a time it keeps the door aligned with the striker and body frame.
Its aggravating as f&^% to realign the door when your on your own.


I bought some "Testors" model paint in a bottle, the kind you brush on. I traced around my hinge with white paint, then I traced on top of the paint with a sharpie magic marker. The paint will bleed/run down in between the hinge and the door, but the sharpie leaves a nice clean line. Just don't spray WD-40 on the magic marker or it will run/erase. Last, I took the hinge completely off the door one at a time to chisel the old brass hinge out. Just take your time, you'll get it.


Thank you for posting this write up!
I replaced top drivers hinge pin & bushings, would have done both sides but they only had one in stock. Lower pin has only very slight play, will replace that one soon.
Huge difference, the door closes nice now and is quieter.

Thanks again!


Thanks for a great write up!
View attachment 331752
Note the picture above shows that the flange or wide lip part of the bushing is not inside the the inner hinge part. The wide part of the bushing provides a sort of space between the inner (bolted to door) and outer (bolted to body) hinge "halves".
View attachment 331755

Admittedly I have a 2000 Ford Ranger but same stuff "Dorman 38438". With the door half of the hinge, the inside half, (great photo btw) you see the wide part of the bushing that would fit between the body mounted half and this door part that slides into the body half. I would not know this but I took mine off and had my cranium anally inserted and so I forgot! Your picture helped me so that I did not have to cut the 0assenger side to see, THANKS!
View attachment 331756
This looks like you inserted the top bushing (with the flared/larger diameter) upside down. See the picture where you had removed it where the old bushings are still there. Doing it this way, you miss the extra space provided between the hinge halves. It may work even long term because the weight of the door actually would only push downward on the bottom bushing flange. REGARDLESS of my observation, I know your pictorial helped me and likely hundreds of others over the years and I greatly respect that! Thanks!!!


Back
Top