syn-
Well-Known Member
- Joined
- July 27, 2006
- Messages
- 328
- Reaction score
- 1
- City, State
- orlando, fl
- Year, Model & Trim Level
- 96 xlt - wip
So I have heard how horrible pacesetter headers are and if you cheap like me and feel the pain when you see $600+ for some ceramic coated headers then hey give this a try.
Parts:
Pacesetter Headers: $190 new

Paint Stripper: $8-10 Pepboys / Advanced Auto
VHT Flat black ceramic/silica paint: $6-9 Pepboys / Advanced Auto
100 grit 3M sand sponge: Free
Needed 2 cans of Paint Stripper since I didn't read the instructions.
So, I sprayed it down walked away and came back 30min later and washed everything with a hose. Hit it again with the paint stripper, repeated the last step. Wiped down the headers after washing the paint stripper off. Scuffed the headers, and then painted. First time painting something and 1 one can did the job, with spraying down the headers and y-pipe. Still had some left, so I might do my MAF housing next. Any how, I must stress that you bake the headers if not you will end up like anyone you ask about trying this its pointless. I had access to an oven so I figure let's try it. I am shocked on the results, could be better but I had a short time to make everything happen. I did not read the can and baked them at 205 instead of 250. Though I tried to make up for it by giving an extra 10min @ 400. Just so you get an idea, I have a picture of the smoke that was coming out after I took out the first 2 parts. I would suggest that you be prepared for when your at step 3 of this process and you bake @ 600. I am getting ready to do that now, so will update when that completes.
Update: I didn't get the oven up to 600, mine only went to 500 so I baked the file step for an hour not 30. Believe it or now, the oven was quite small yet all 4 pieces fit. I am going to re-scuff them and go over them again with another coat or 2 of VHT and then re-bake them again. Reason: in my rushing to get this done there are spots that not all the paint I am guessing did not come off when I applied the paint stripper so when I baked them there were spots that were black but you could see the silver under and some of the paint got nicked when I was transporting them to put them on Friday. I will update the thread after this Thursday when I try to do them again.
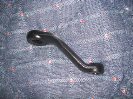
From the Nasty:

To the Ashy:

To the Classy:


Parts:
Pacesetter Headers: $190 new
Paint Stripper: $8-10 Pepboys / Advanced Auto
VHT Flat black ceramic/silica paint: $6-9 Pepboys / Advanced Auto
100 grit 3M sand sponge: Free
Needed 2 cans of Paint Stripper since I didn't read the instructions.
So, I sprayed it down walked away and came back 30min later and washed everything with a hose. Hit it again with the paint stripper, repeated the last step. Wiped down the headers after washing the paint stripper off. Scuffed the headers, and then painted. First time painting something and 1 one can did the job, with spraying down the headers and y-pipe. Still had some left, so I might do my MAF housing next. Any how, I must stress that you bake the headers if not you will end up like anyone you ask about trying this its pointless. I had access to an oven so I figure let's try it. I am shocked on the results, could be better but I had a short time to make everything happen. I did not read the can and baked them at 205 instead of 250. Though I tried to make up for it by giving an extra 10min @ 400. Just so you get an idea, I have a picture of the smoke that was coming out after I took out the first 2 parts. I would suggest that you be prepared for when your at step 3 of this process and you bake @ 600. I am getting ready to do that now, so will update when that completes.
Update: I didn't get the oven up to 600, mine only went to 500 so I baked the file step for an hour not 30. Believe it or now, the oven was quite small yet all 4 pieces fit. I am going to re-scuff them and go over them again with another coat or 2 of VHT and then re-bake them again. Reason: in my rushing to get this done there are spots that not all the paint I am guessing did not come off when I applied the paint stripper so when I baked them there were spots that were black but you could see the silver under and some of the paint got nicked when I was transporting them to put them on Friday. I will update the thread after this Thursday when I try to do them again.
From the Nasty:
To the Ashy:
To the Classy: