- Joined
- October 6, 2008
- Messages
- 755
- Reaction score
- 84
- Location
- Va
- City, State
- chesapeake virginia
- Year, Model & Trim Level
- '96 xlt 4x4
Ever been on the trail for more than a day overlanding/camping and thought about how bad you could use a nice hot shower than this build is for you! ...
Ok so I've been working on this idea for this build for awhile. I entertained many ideas on how to heat water including DC heating elements, exhaust heat exchanger,solar heating,etc... But I came back to fliud to fluid heat exchange being by far the best option and this build cost only about ~$120 total! It's also easy to install. You can save a little and run the water through your in radiator transmission cooler if it is not being used (like if you have bypassed it with a large aux cooler) this build includes a separate heat exchanger for those using your radiator for trans cooling still.
These are the parts it takes to build the system
Parts list
Heat exchanger $34
(I ordered my 14 plate with 1/2" fpt connections exchanger from eBay)I would stay between 10 and ~15 plates more than ~15 the water may be too hot.synergy products sells a 10 plate unit with mounting bracket for $100)
Heater hose 5/8" 6 ft $6.49 AutoZone
Doorman 5/8" heater hose elbows x2 $4.82 advance auto
Hose clamps (small and medium) hardware store
25 ft. 1/4" air hose 12.99 harbor freight
1/4" male air plugs $2.49 x 2 harbor freight
1/4" female air couplers $3.99x2 harbor freight
1/2"x1/4" brass bushings Lowe's
1/2"mpt x 1/2"fpt brass elbows $7.99x2 Lowe's
1/2"mpt x 5/8" barb adapters $4.99x2
Bracket material can be just about any metal thin enough to bend to shape but strong enough to hold plus you'll need some small self tap screws.
Water source can be anything I used a 5 gallon jug but a filter can be attached to pump and ran into any natural water source like a Creek or lake.( Warning! the water flowing through the pump should be less than 60* F )

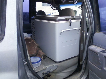
And then you'll need your shower

$18 dollars on eBay or Amazon for this kit it's a 12v dc pump with cigarette lighter plug (sump style) has 6 feet of hose and plenty of power cable to run the to power source. Also has an on/off switch built in that you can place near the adjustable shower head.
Now this is what the build on the heat exchanger looks like.

With my body lift I have more room on the fire wall than most for this mounting location but the unit is fairly small so it can be mounted anywhere
the little green caps on the plugs I found in the drawer section of the hardware aisle at Lowe's(help keeps the mud and dirt out when not being used.) with this design (open plugs on the bottom) the water is aloud to drain out when it's disconnected otherwise you run the risk of freeze damage.
Here is how to connect to the heater hose

Notice I have PVC barb fitting elbows DO NOT USE THEM!!!!! They were not designed for this application and will fail!
I swapped them out for heater hose elbows I got at advance auto.

(Using some silicone grease makes slipping the hose over the Barbs a breeze) This is the return hose so you can further adjust water temp with the fan settings.
Install tips !!! ( Use Teflon tape on all threaded connections!) I originally was going to use a bracket bent out of some thin straight structure tie in the wood section at home Depot but I messed up and ran out of material so I used what I had on hand some aluminum flashing and a flattened copper pipe lol.
When bending metal for the bracket use the exchanger as a sort of mold it's much harder to take measurements and try to bend it that way.
You can substitute 1/4 hose for 3/8 air hose and fittings,I wasn't sure of the ID of the hose that the shower pump uses(hadn't got it in the mail yet) which turns out to actually be 3/8 but the pump will have to move more water mass through the extra 25' of hose (if using all 3/8) added to the pump and may reduce water pressure.
Stay tuned for the pump/hose section of build and demonstration video.!!
Ok so I've been working on this idea for this build for awhile. I entertained many ideas on how to heat water including DC heating elements, exhaust heat exchanger,solar heating,etc... But I came back to fliud to fluid heat exchange being by far the best option and this build cost only about ~$120 total! It's also easy to install. You can save a little and run the water through your in radiator transmission cooler if it is not being used (like if you have bypassed it with a large aux cooler) this build includes a separate heat exchanger for those using your radiator for trans cooling still.
These are the parts it takes to build the system
Parts list
Heat exchanger $34
(I ordered my 14 plate with 1/2" fpt connections exchanger from eBay)I would stay between 10 and ~15 plates more than ~15 the water may be too hot.synergy products sells a 10 plate unit with mounting bracket for $100)
Heater hose 5/8" 6 ft $6.49 AutoZone
Doorman 5/8" heater hose elbows x2 $4.82 advance auto
Hose clamps (small and medium) hardware store
25 ft. 1/4" air hose 12.99 harbor freight
1/4" male air plugs $2.49 x 2 harbor freight
1/4" female air couplers $3.99x2 harbor freight
1/2"x1/4" brass bushings Lowe's
1/2"mpt x 1/2"fpt brass elbows $7.99x2 Lowe's
1/2"mpt x 5/8" barb adapters $4.99x2
Bracket material can be just about any metal thin enough to bend to shape but strong enough to hold plus you'll need some small self tap screws.
Water source can be anything I used a 5 gallon jug but a filter can be attached to pump and ran into any natural water source like a Creek or lake.( Warning! the water flowing through the pump should be less than 60* F )
And then you'll need your shower
$18 dollars on eBay or Amazon for this kit it's a 12v dc pump with cigarette lighter plug (sump style) has 6 feet of hose and plenty of power cable to run the to power source. Also has an on/off switch built in that you can place near the adjustable shower head.
Now this is what the build on the heat exchanger looks like.
With my body lift I have more room on the fire wall than most for this mounting location but the unit is fairly small so it can be mounted anywhere
the little green caps on the plugs I found in the drawer section of the hardware aisle at Lowe's(help keeps the mud and dirt out when not being used.) with this design (open plugs on the bottom) the water is aloud to drain out when it's disconnected otherwise you run the risk of freeze damage.
Here is how to connect to the heater hose
Notice I have PVC barb fitting elbows DO NOT USE THEM!!!!! They were not designed for this application and will fail!
I swapped them out for heater hose elbows I got at advance auto.
(Using some silicone grease makes slipping the hose over the Barbs a breeze) This is the return hose so you can further adjust water temp with the fan settings.
Install tips !!! ( Use Teflon tape on all threaded connections!) I originally was going to use a bracket bent out of some thin straight structure tie in the wood section at home Depot but I messed up and ran out of material so I used what I had on hand some aluminum flashing and a flattened copper pipe lol.
When bending metal for the bracket use the exchanger as a sort of mold it's much harder to take measurements and try to bend it that way.
You can substitute 1/4 hose for 3/8 air hose and fittings,I wasn't sure of the ID of the hose that the shower pump uses(hadn't got it in the mail yet) which turns out to actually be 3/8 but the pump will have to move more water mass through the extra 25' of hose (if using all 3/8) added to the pump and may reduce water pressure.
Stay tuned for the pump/hose section of build and demonstration video.!!