Dreamr's City Car Registry | Page 4 | Ford Explorer Forums - Serious Explorations

  • Register Today It's free!

Dreamr's City Car Registry

:bounce: Hehe Maximum Motorsports sent my girl a new toy. :bounce:

Lert me figure out a way to get the car a foot off the ground in the garage with the suspension fully loaded and I will open the box and take a picture before dragging the welder out. :D


Join the Elite Explorers for $20 each year.
Elite Explorer members see no advertisements, no banner ads, no double underlined links,.
Add an avatar, upload photo attachments, and more!
.


So what did they send the silent room begs to know?

MM Full length subframe connectors...


The last step in finishing the resto-mod of my suspension.......Well for this stage of the build at least. Now I get to move on to step 4 which is the under hood accessories........all of them :( ......then I can start the quest for power. Then again if you have not noticed I bounce from step to step when I get sick of it. Step 4 was originally interior stuff, but it was all done by the end of step 2. Well except the audio, but I'll get around to it :confused:

The guys at Brad's were a little dubious not installing them for me, but how hard can it be to shape and align a couple pieces of tube to the floor pan and sub frame then weld???? I suppose though they get a lot of yuppies and teenagers without access to the tools or the knowledge to use them.....

Damn I can't wait to get them on and get my chassis feeling less floppy. The front and rear suspension are tight and well balanced, but that just makes the chassis twist that much worse! I thought my old Notchback was bad, but this 'vert is something like a beached fish on rough roads
.....flop......flop.....bounce......squueek. All to be gone soon!

Here's a pic before install. And yes I know I should not paint then weld, but Seattle is a damp climate and these were bare steel. Besides how else do you paint the side that rests against the car..

Anyone have any tips or advice.......particularly those of you like SVO :p

100_0607k.jpg


Well I never did report back to tell the silent room what fun welding those subfarme *******s in was! I learned one thing though, whern it comes to welding like this leave it to those with more experience and a lift. Typically I can draw a pretty good bead. but these look like ****!!!! They are strong, but ewww...

Seems I have a hard time laying on my stomach and welding up and over my head while looking into a mirror to figure out exactly where to place the weld. All in all though I was very sore but they are in, and I didn't screw anything up too bad ;)

As to a performance report.......>Damn why did I not do this earlier? I got to drive her part of saturday and all of the last 2 days and I must say I am pleased!

The car drives and handles like an entirely different beast. In day to day city driving she tends to in general take all the bumps and dips a lot betterr, where before she flopped, now the suspension absorbs all the hit rather than the chassis twisting. In the corners :eek: I can hit corners at speeds that before would have caused my car to start shimmying off the road. It is kinda cool. Them ricers always say they can get me in thwe twisty's if I beat them on the starights. Now I don't think so. They may still handle them a bit better, but not enough to make up for the extra pony in the mustang :D


Ever since I added the Underdrive pulleys I have gone nuts watching my lights all dim and my battery gauge drop close to the bottom when I come to a stop in gear. It sucked!!!!!!!!!!!!!

I had actually considered pulling the pulleys and replacing them with the stock units, but...........isn't it better to just upgrade the charging system :D

Since yesterday was my B-day and all of my gifts were backcountry adveture oriented I had to go buy myself a present as well...

I purchased a Powermaster 130 amp alternator to replace my stock 75 amp unit. The powermaster is physicaly quite a bit bigger which required me to modify the brackets a bit to make it fit in there properly......but it eventually fit. In addition the wiring connections had been upgraded to the post style rather than the fire prone ford plug in type. Well I was at it I just ripped out the whole harness and upgraded the wires to a heavier gauge. I did find it interesting that there are two charge wires coming out of the alternator yet ford had spliced them into one further down in the harness. Kinda silly really so I just ran two new heavier gauge wires all the way to the battery connection.

Ya know it is really nice to have a charging system that actually charges the battery below 1100 RPM's :)

100_0608.jpg


Hey Dreamr,
Just curious why you went with MM? I have been wanting subframes for awhile, but haven't really done much research. Some friends of ours, who have their own shop, said they would make me some custom subframes, or I can go with our friend Jason, from JK Customs. Jeff would probably weld them in for Jason though since it would be my car and he is used to working on lifted things with no carpet or much interior to speak of. :confused:


I have been trying to keep my money local, meaning I have been going through a local mustang shop. You may have heard of them as they are very well known in the mustang and corvette world...Brad's Custom Auto.

They are distributors for the majority of the manufacturers out there, but as Brad Siebold put it, MM is the the best for the money. In other words they tend to have a very high quality product due to tight manufacturing specifications, yet they try to keep the cost down. With subframes the brand really does not make as much difference as with other Suspension components. After all it is just a piece of rectangular tube with a couple of gussets and a mild bend. Realistically I could have fabricated my own, but with the cost of steel these days it was easier to just pay a bit more to have them pre-made. They were a ***** to weld in without a lift though!!!!

I do suggest that you go with a full length weld in style over bolt ins or the short ones. You will love the new found stability.


Just a small update......

I was running around on buisiness about a week ago, and suddenly I found that I was unable to get out of my car. The door hinge bushing had finally worn away to a point where I had to lift the door off the striker latch to get it to open :rolleyes:

Needless to say a spent about a week trying to change all of them damn hinge pins and bushings. When I picked up the new hardware they told me it was going to be a *****. I lasughed when I looked at the X because the hinges are bolted on. I though how hard could it be to mark the position, pull the door off, and replace the pins.......

Well Fox Mustang hinges are welded and bolted :confused: What a ***** that was to get the pins out with the door on, then seperate the hinge to replace the bushings andrehang it all....ahhhhh


Well taht said here in the next couple weeks things will be getting busy again for the 'Stang as I have a fair $$ bonus coming in........Untill then


Subscribing....


I am fixing to have to learn how to replace my rear pinion seal. Should be interesting. ;)


Stang Girl said:
Subscribing....


I am fixing to have to learn how to replace my rear pinion seal. Should be interesting. ;)

We'll get there eventually. The next round of goodies will be on the air and exhaust side of things though.


Well as I mentioned earlier late summer is going to bring a small round of engine mods to the game. I had debated re-gearing as I have two small bonuses coming over this paycheck and the next......but I'll wait a while yet as I also want to start getting all of the supporting mods in place before the long block ***** itself in the future. I figuredI could build the bottom end now and live with it as it is,or I can slowly build the top end, and when the bottom goes I will have to buy a long block built to my specs. I prefer the former honestly, but the lady would never accept me spending 4 k on an engine then dumping another couple into it. If I do the top slowly she'll never know, and she can agree to mechanical failures needing fixed in the future :D


That said here is part delivery #1of a few. As I go I may seem to be ovesizing thigs a bit, but it will all make sense next year ;) and even more the year after :p

Starting at the mouth of the pony I felt the need to help her stretch her lips and breath a bit better. I had considered adding a BBK Cold Air Intake, but the design of the 5.0 airbox pretty much covered the aitrflow needs and kept it cool. I have seen dyno testing that suggests the air box is sufficient up to 600 HP and completely eliminates fan wash as well as outside turbulance you find with fenderwell intake kits. There is a flaw though it needed some trimming to suck more air, but already had the K&N panel in there.

The Mass air was the next restriction. The stock unit is a nice big housing with an itty bitty passage way as can be seen below..... I forget what the actual size is, but it's tiny.

100_1005.jpg

100_1006.jpg


Here I decided on adding the C&L 76 mm unit calibrated for my stock injectors. I chose the 76 over the 73 that would have been more fitting for the current apllication to accomodate future plans. The reason for going with the C&L is because calibrating for new injectors is as simple as installing a 25 dollar sample tube upgrade which requires about 5 minutes labor :thumbsup:

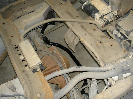
In additioon I also replaced the inlet elbow with the C&L True flow kit. As I examined it vs the stock part I realized that this is realistically just a cosmetic upgrade as the rubber one would have likely deflected heat better, and maintained the same internal diameter. It was also a ***** to make fit in there, requiring a bit of reworking of the MAF bracket to make it all line up smoothly. With the aluminum pipe resting on the strut tower it also transmits the engine vibration to the chassis and body more than it did with the rubber tube. Oh well I shall leave it for now and see how it works out once things get shifted around a bit in there.

100_1002.jpg


I really did not expect to feel or hear any difference in the car as this is just the beginning of supporting mods, not any kind of power adding piece. I am pleased though that she is generally more responsive with a bit quicker throttle response. I would not say that I really gained much of power in the band, but it is hard to tell through you're butt, rather than a chassis dyno. I am happy with the little extra throttle response, and as far as sound she is for some reason a lot more grumbly. When I first started her after install I thought that maybe I had nocked a vacuum line off. Then after checking I went and sat between the tail pipes to listen for a missfire. She was running a lot smoother than normal. Likely due to replacing the IAC and cleaning the MAF sensor elements. And though grumbly there was no miss to be detected.
Hmm almost sounds like the difference in my truck going from the stock box to the K&N FIPK only louder with two extra cylinders.

I suppose that is all for now, and I should go bump my timing a little to test out this here new timing light. Stay tuned I'll have another box delivered in a day or four....... ;)
100_1003.jpg


Well it took about damn long enough , but I finally recieved one more of several parts deliveries coming to the house for my girl.

Sadly it arrives just a few hours before I leave town on a series of adventures that will effectively eliminate the liklihood of install before late August. I am leaving at about midnight for Idaho Falls Idaho, where I will be for 5 days....then to the Tetons for a 3 day backpacking trip....then to Seattle to teach a CPR class for 1 day only. Then off to Mount Baker for 3 days of camping and fly fishing the Nooksack....then back to Seattle for one day to teach a Bloodborne Pathogen class........Then to Crater Lake, Oregon for 4 days of camping and lake fishing
:confused: :confused: :confused:


Damn it I was supposed to get these before I left..... Oh well I should have a pile of parts in the garage by the time I am ready to install them.

So for todays delivery we compliment the slightly opened up air system of a few days back with a bit better exhale. Below are pictured my new goodies. I honestly don't expect to gain more than a dozen ponies, but they will sound great and will further enhance the potential of the next round of upgrades.

Sadly the Mustang comes with un-equal length short headers from the factory, but they are crimped rather than mandrel bent and really restrict the motor. So........I got some new ones...

I ordered from MAC as I was able to get a great discount through a local shop. They are Shorty style ceramic coated headers with 1 5/8th inch primaries..... I was planning on ordering a crossover pipe to go with them, but purchased a new .38 special for carry on the trails as well as putting in for a conceled weapons permit, so that may have to come after I get my next delivery which I ordered today.......I'll tell the rest when the boxes arrive.. hopefully next Monday the day I get back :confused:

I will also post back once I start install to show you them ugly stock headers and let ya knopw how fun the install was and if it was worth the labor.

100_1125forum.jpg


Hmmm

Seems that I failed to post back after the header install.....

All in all the install was not to bad with the exception of getting the header colloectors lined up and connected to the H-Pipe :confused:

Performance wise there is only a bit of improvement, but then again untill I get all the intake stuff done the headers really should not make a lot of difference. She pulls a bit harder above 3k now, but like I said not a lot....I think a dyno would show that I gained maybe 10 ponies in the top end, but that the bottom end remains about the same........ As you can see below though they sure look a lot better than the stockers. The stock units have so many kinks and twists in them that it is disgusting..... :confused: Below are the stockers and a pic of the new ones installed.

While I was at it I also replaced the o2 sensors and cleaned up all the smog stuff which in reality made more of a performance improvement than just installing the headers :rolleyes:

And while she was in the garage I also took the time to replace the convertible top latches as well as the door striker and the door hinge pins on the passenger side.....(driver was done a while back)

100_1319h.jpg


100_1322h.jpg


I should be picking up a stack of parts that have been backordered for the last month this evening so stay tuned for more goodies :D


Nice work on the headers. My neighbor across the street did his a couple months ago and it took him forever. He had a hell of a time getting a couple of the bolts in and getting the holes in the headers to line up with the holes in the head. Maybe it was because he bought cheap ones off of Ebay. LOL


These lined up perfectly, but it was a pain to torque a few of the header bolts due the closeness of the primary tubes and the bolt head.....When they come off one day for new heads I will get a good set of locking alan head bolts :p

The big pain was lining the collector and H-Pipe up and getting it to seal......I had 2 jacks and a pry bar and a come-a-long in action all at one time to seat the pipe and start the bolts........probably wouldn;t have been that bad if the motor mounts were not shot......but that is another story........parts are in the garage, but I am lazy :rolleyes:


Maybe some pics of all my new goodies sitting in the garage with them motor mounts tomorrow or after I return from this weekends 4x4 trip....


Well Now, finally I have the last of the parts which I ordered back in July. Took about long enough :fire:

I picked everything up Friday before leaving for a wheeling adventure......

What did I get you ask??? Well not a lot, but it's the start. Once again I mention that things may seem a bit oversized......remember though that I am trying not to make the same expensive mistakes I made with my truck. I only plan on buying parts once this time around instead of bit by bit replacing upgrades with upgrades to accomodate the new demands on the vehicle. Right now we have set the stage for either a cam and heads in the not too near future.....or a fresh longblock of my choice (please choose a 331 stroker Bryce)....

Anyway on to the parts.....

-PP Typhoon upper and lower intake (ported and "smoothed" ;) )
-PP 70 mm Throttle Body
-PP 70 mm EGR spacer
-C&L 24 lb sample tube
-Accel 24 lb Fuel Injectors
-Motorcraft TFI module
-Energy Suspension motor Mounts
-and a pile of gaskets for well pretty much the whole top end and oil pan

100_1369_1.jpg


Why did I go with PP (Profesional Products)?

Well good question.......First they are cheaper by far then some of the major manufacturers. Second the intake is basically an exact replica of the Edelbrock Performer (for half the price). The concerns with pro products are their rough castings and occasional manufacturing imperfections. This I was not too worried about, as I had already arranged with someone to clean up the intake and I found the rest of their products to be in perfect working condition with no imperfections. Might as well save cash when you can....
P.s. I know porting is expensive, but not for me so they were still cheaper:p

Now comes the moment of idiocy though, There was a issue with a backorder on the TB and I got impatient and had them substitute the satin finish I had ordered for a polished unit..........Now after getting all the parts do you think I could leave well enough alone and have one polished part amidst all satin? Hell No :confused: I am currently in the process of sanding and polishing the intake manifold, EGR Spacer, IAC, Air Inlet Tube (C&L), and the MAF.......perhaps I will also sand down the valve covers and do them and the PS pump shroud cover thingy :p :confused:


Looks like a motor mount and not a body mount! :p

How do you keep hiding this thread? :confused: I can't believe I'm so far behind on it. Everything is lookin good so far. You're about ready for the t-56 swap! :cool:

I think I'm gonna go check out a '93 tomorrow. It's getting more and more difficult finding a good fox. :(


section525 said:
Looks like a motor mount and not a body mount! :p

How do you keep hiding this thread? :confused: I can't believe I'm so far behind on it. Everything is lookin good so far. You're about ready for the t-56 swap! :cool:

I think I'm gonna go check out a '93 tomorrow. It's getting more and more difficult finding a good fox. :(

LOL yes motor mount was what I meant :eek:

As to a t-56...... I think it is staying Auto. Right now it rather sucks being an auto, but living in a city full of steep hills and having a gf that can not drive stick makes me lean toward leaving the AOD. It will however be well built later in the project.

Good luck with the 93....it is getting hard to come by a fox that hasn't been wrecked or hacked up by some kid.


Yeah I finally finished polishing the Upper Intake Manifold and the EGR spacer to match the Throttle Body........I still have the MAF and Air Inlet tube and.... :confused: to do.
But..I decided that polishing is hard work, so I am quitting for a while and heading to the hills......

Here is a picture of the finished products. I suppose they are not perfect, but they turned out pretty good considering all the casting marks I had to remove and the fact that I did it all by hand with various grits of sandpaper.... After I finish the rest of the parts I will start the install, though I kind of want to wait till I can afford a set of heads :D

More later....for now just a pic

100_1426_1.jpg


Join the Elite Explorers for $20 each year.
Elite Explorer members see no advertisements, no banner ads, no double underlined links,.
Add an avatar, upload photo attachments, and more!
.


Well.......not much to update with, but I finally got around to polishing the MAF and Inlet tube so here is a picture......

100_1432.jpg


Stay tuned however, Brenda (the stang) is about to undergo some pretty intensive work......needless to say my pocket book is really hurting after I placed my order for more goodies :eek: :eek:

So when it all arrives I will post up pictures and a description of my new parts ;)

Soon there after the car is getting parked for a month while I tear it apart, clean up the block and engine bay, paint the previously mentioned areas and re-assemble with all my parts :bounce: :burnout:

Now I just hope the tranny can hold together under the added stress as I have absolutely no money to repair it if it does not.


Back
Top