Extended RA with ballistic joints on a 92 | Page 2 | Ford Explorer Forums - Serious Explorations

  • Register Today It's free!

Extended RA with ballistic joints on a 92

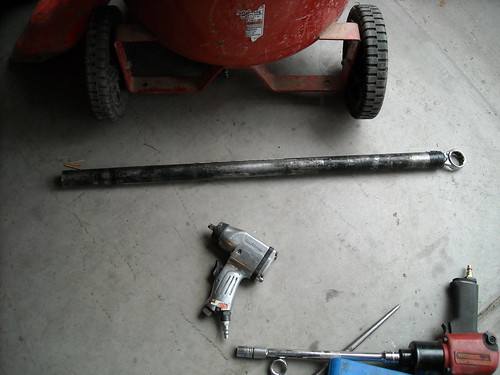
I decided its time to work on the extended arms.. its a small enough project and the kind I can do without taking the X down for a long time...

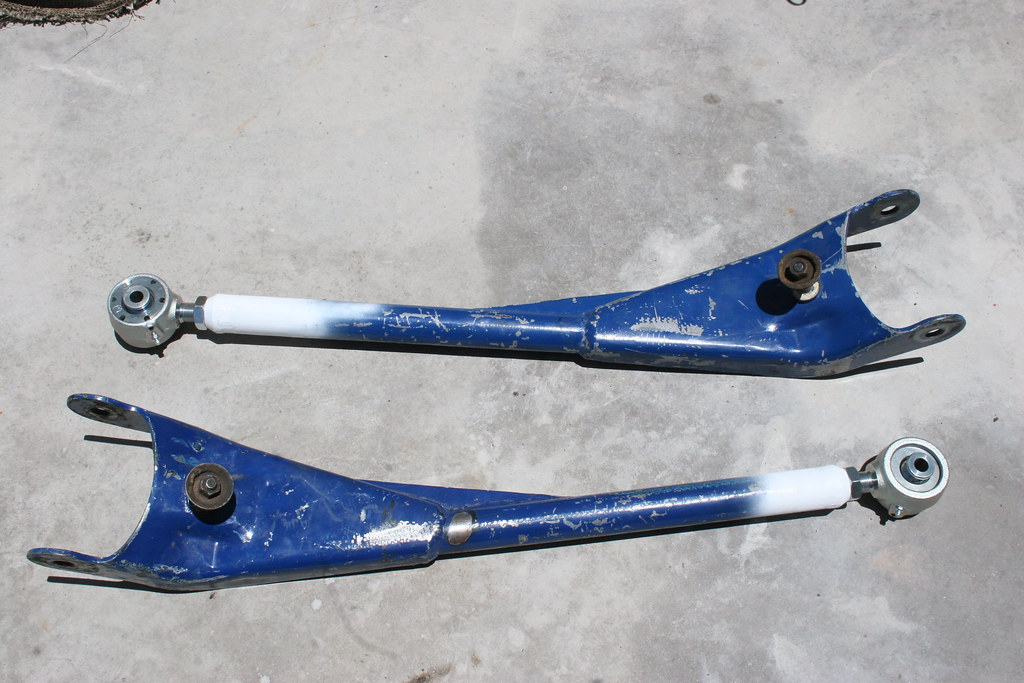
I got these from an EF member a while ago (came with a 5.5" lift and other parts)..

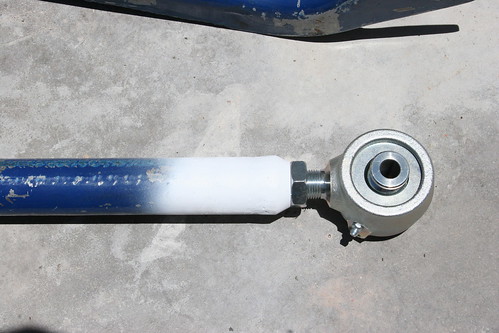
They currently have Heim joints which I don't think would last very long in our dusty climate.. Also, they were female heim joints instead of the normal male ones which means its harder to find good joints...

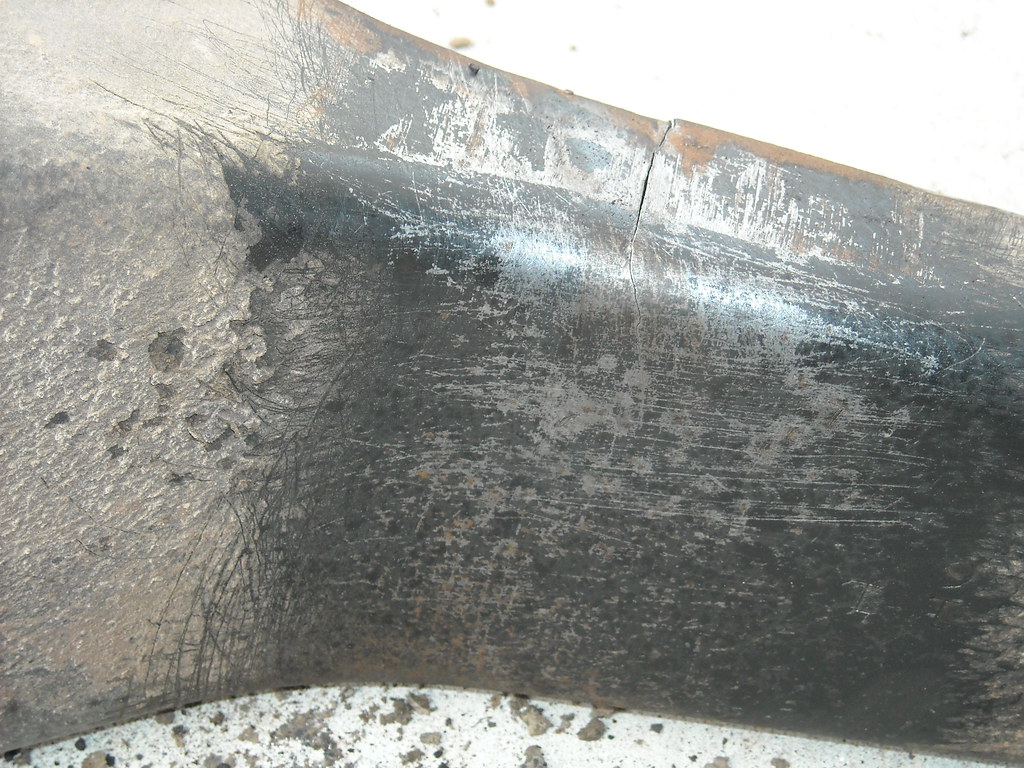
I already cut the ends off, and removed the extra support material that was in the tube..
3586026496_d2cb6da8b4.jpg


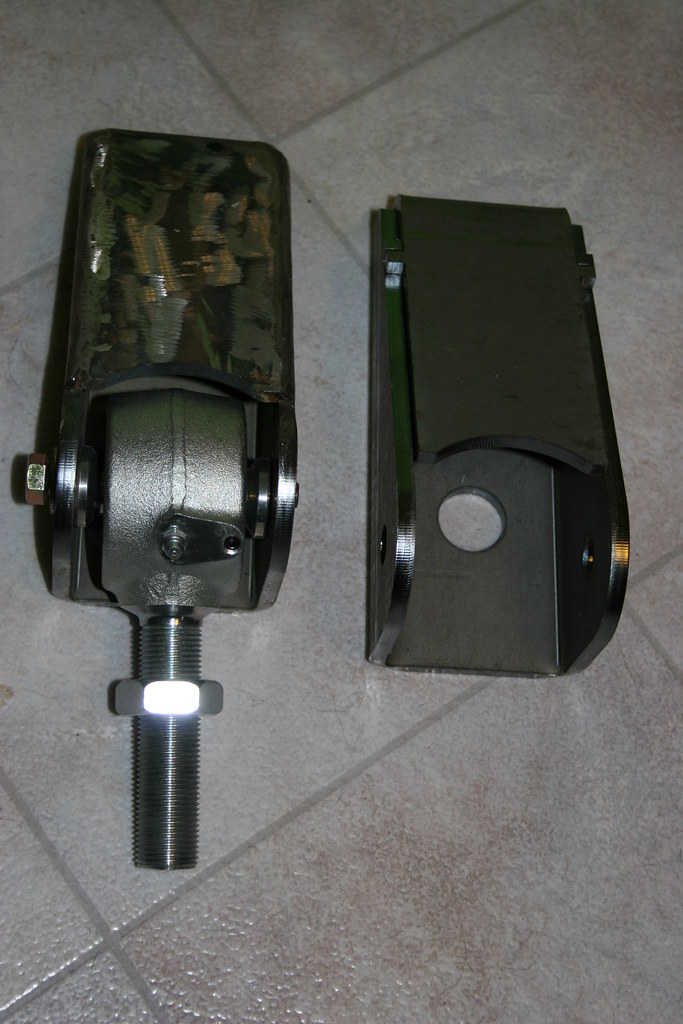
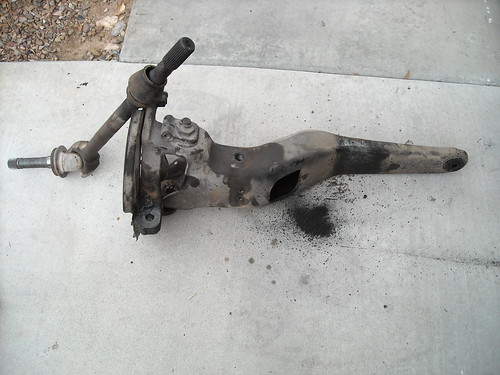
I'm looking to use a set of Ballastic Joints (http://www.ballisticfabrication.com/Forged-Chromoly-263quot-Ballistic-Joint_p_1636.html).

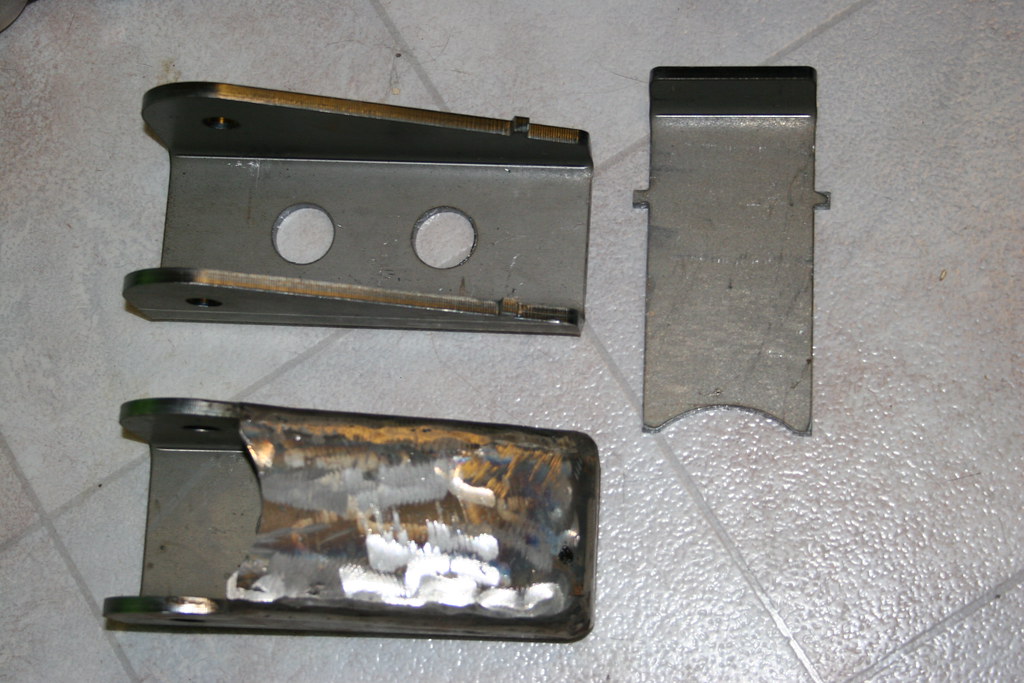
This means I'll need to make new hangers for the joints since the ones for the heim will be too narrow..

I do have two somewhat stupid questions...

Bolt on or Weld on the joint mount to the frame?

Will it really matter if I get get left or right handed threads for the Joints/tube adapters? For my use I can't think of a reason to have either, other than lefty loosy, righty tighty :).

~Mark


Join the Elite Explorers for $20 each year.
Elite Explorer members see no advertisements, no banner ads, no double underlined links,.
Add an avatar, upload photo attachments, and more!
.


Those ought to be some Kicka$$ arms when those Ballistic ends get on there.
Don't do like I did and forget to rotate the Ballistic end so that you can get to the Zerk fitting LOL. Keep us informed on what they say the day you call in sick.


Join the Elite Explorers for $20 each year.
Elite Explorer members see no advertisements, no banner ads, no double underlined links,.
Add an avatar, upload photo attachments, and more!
.


Muhahaha.....

Picked up a few parts today..

3597023584_b860fb2a44_b.jpg


You can really see the diff in size between the heim and the new Ballistic joint.

BTW.. that 7/8" shank and 9/16" cross bolt.

~Mark


Muhahaha.....

Picked up a few parts today..

3597023584_b860fb2a44_b.jpg


You can really see the diff in size between the heim and the new Ballistic joint.

BTW.. that 7/8" shank and 9/16" cross bolt.

~Mark

man those things sure look purdy and hd


Fantastic. Yes they are so much more stout then those others. I know also just how much heavier they are too. I would also try to find bolts that have a clean shank (no threads) where they ride on the bearing.
I like the fact that they're rebuildable.

What kind of service did they give you when you walk in. Did they have them in stock?
I know on phone that they were great but seemed a little behind in all there orders, or at least in the stuff that I ordered from them.


When I walked in.. there is a receptionist type desk where you would expect it.. and 3 workspaces where the "lobby" would be for someone waiting where I saw Nate and a graphic designer/engineering Person working..

The 1st person I talked to was Nate.. I told him needed some joints and tube adapters, but I wanted them to look at the tubes I was using to make sure I got the right one.. Nate was trying to get some PO's done so he handed me off to "David".. I "think" that was his name..

I showed him the RA's. (I had them in the honda).. He measured them and had no issues with the width..

He told Nate what I had and what they were used for... When I asked if I should go with 7/8 shank or 1" shank he said for what I was using them for it wouldn't matter.. And that the 7/8" shank means more material around the tube adapter and you don't have to be as careful with welding.. With a 1" shank tube adapter I would have to be more careful as I don't want to warp the threads..

They had the 7/8" shank 2.63 Ballistic joints in stock, along with the tube adapters and jam nuts. The brackets are scheduled to be built early next week and he will call me when they are done.

I'm going to go with their brackets and weld on an extra piece on the side to grab the frame so I can bolt them on.. Sort of like the ones from K.O.R.E. except the side piece will be bigger so I can get 3 bolts on the side of the frame..

They seemed freindly, but yes.. they also seemed very busy.. looked like they were trying to catch up..

They didn't offer to modify their brackets to be more like what I wanted, but I guess I'm just small potatoes.. I'll weld that other piece on myself. Also, they don't really deal with "bolt on".. they expect people to weld the brackets on..

I heard Nate talking to someone on the phone and he mentioned the pirate discount which is 5%.. I asked if I could get that and Nate said yes... and I "think" I got it.. I forgot to check.. My total cost was about $150 which included the 8% tax (I think its 8%).. that was two 2.63 Ballistic Joints (7/8 shank), two 1.25x7/8 tube adapters, 2 jam nuts and 2 brackets..

~Mark


We got the tube adapters installed.. and I thew a quick coat of paint on the newly welded area so it wouldn't flash rust (haha.. Rust in Arizona)..

Now I need to decide if I really want them powder coated (actually decide if I have the money since I'm working on the Van too).. and then of course, what colors..

3603984949_880de874e1_b.jpg


3604800902_bab6e383fe.jpg


More to come....


~Mark


I have a lot of stuff powder coated on my B2, and even built an oven. But on something like this you may want to just rattle can. A whole lot easier to spray on all those chips and scratches that this will surly get vs. taking off and re-coating. Just my opinion.

One other thing, have you bolted these arms up yet to see how they align up with your frame?
May want to do this before welding up that extra bolting plate on the bracket. On my B2 frame I found that it actually had a little bend in it at the exact point where I mounted to frame. So I had to build that bracket accordingly. I would also have that bolt going through the Ballistic end as close to 90 deg. to the arm as possible. You could put a bolt through the Ballistic end and bracket and then see how it fits to frame before welding up. Plus this would tell you at what height the bracket is on frame and then measure for that extra piece to get welded on.
Lookin Good.


I'm planning on welding my bracket together tomorrow (they come un-asembled).. but I'll leave off the extra plate until I've bolted them on once.. just to make sure things are fitting like I think they are going to (thanks for the tip above...)

Jon sent me pics of my arms coated.. They will match the rear diff cover..

3643145942_fc6f9f0120_o.jpg


~Mark


My arms came in the mail (UPS) today.. Here a pic taken outside, in the setting sun (makes 'em nice and bright)..

3664333154_48697cb376_b.jpg


It turns out my joints will be right where the trans cross member is.. Looks like I'm going to be modifying the ballitic mounts to make them into a transmission mount too.. I should be starting on that in a couple weeks as I'm trying to finish another project up first...

~Mark


EDIT: Late afternoon sun, on a cloudy day made the colors a little brighter than they are in real life.. but they are close...


Not mounted yet.. I had to fix the tail lights on the mustang, crank sensor on the honda.. and then worked on the big project.. the Tow rig.. http://www.explorerforum.com/forums/showthread.php?t=246498&highlight=quadravan

I was hoping to fnish with the tow-rig this week, but its been raining every day after work..

The plan is to combine the RA mounts and the trans mount into a single piece.. I have 2" square tubing and some 1/4" steel plate that I'll use to make the trans mount and cross brace between the Ballistic joint mounts.

~Mark


....I just found this...:biggthump ...

...What is the O.D. of the new joints to fit into what I.D. sice of the new bracket...:scratch:
...I will be looking into doing about the same thing in the near future...


wow mark, those suckers are bright! Better make sure you don't scratch them LOL.

Kinda funny, a guy a few blocks down the street from me just finished building a custom rear bumper on a black XJ and painted it that color. He used to have a red prerunner bumper which was the same color scheme of the Black Goblin that James sold Mounty71.

Once you get that done I might see if you'd be interested in an engine project LOL.


...Do you have any pics of the brackets you picked up???


I'll take some tonight.. Each bracket comes in 2 pieces.. We welded one piece together, then noticed its going to be the trans cross member, so we didnt' weld the other one together yet so we have more control of measuring etc...

We are supposed to get back to working on the Van this week, so in "theory" next weekend (not this weekend) we may be able to start working on the X again.

~Mark


As requested.. here are a few pics for ya Ted.. One we welded together.. the other we are waiting until we get all the measurments for the trans mount that will be made using these mounts..

3725200237_11e8a3d371_b.jpg


3726008516_242ca6eec3_b.jpg


3725200791_a6b5d57f51_b.jpg


~Mark


My arms came in the mail (UPS) today.. Here a pic taken outside, in the setting sun (makes 'em nice and bright)..

3664333154_48697cb376_b.jpg


It turns out my joints will be right where the trans cross member is.. Looks like I'm going to be modifying the ballitic mounts to make them into a transmission mount too.. I should be starting on that in a couple weeks as I'm trying to finish another project up first...

~Mark


EDIT: Late afternoon sun, on a cloudy day made the colors a little brighter than they are in real life.. but they are close...

I'm glad to see you get some use out of those arms. They look great. I've learned a lot abought what is avalable since I built them originaly and would have done it differently now. The addition of Balistic joints and threded bungs is probably the biggest thing i would have done different. The suspension components on this site that get passed around are like that tho. Someone builds it. and the next person makes it better teaches it new tricks, and gives each and every EF member that reads the thread a new idea or a new way to look at an old idea. Any way good job.


Join the Elite Explorers for $20 each year.
Elite Explorer members see no advertisements, no banner ads, no double underlined links,.
Add an avatar, upload photo attachments, and more!
.


Well, back to this project...

Today we pulled the Radius arms off, pulled the axles out, and pulled the front pig off the beam. We didn't intend to do all the extra work today but we ran into a few issues.

To start with, the bolts that hold the RA to the axle beam are really tight. This is an AZ vehicle so there is not rust there, but it was still a fight to get the bolts out. One lower one didn't want to come out with the impact until we got it turned a couple turns by hand. The upper ones needed some extra help. The 1 1/8" wrench didn't give us enough leverage. We finally took my combo wrench and cut off the open end and put it in the high lift handle. That gave us the leverage to get those out of there without killig ourselves.
4164437075_0fdb310c63.jpg


While taking things apart we found what looked like a crack on the passenger side axle beam. We decided it would be easier to work on it if we pulled the axle. To pull that axle we had to pull the pig to pull the c clip (really an e-clip) as the center slip joint was stuck.

That center joint was extremely dry and the splines don't look the best. Once apart, there was a bunch of metal powder looking stuff on the ground. Looks like its time to pick up another set of axle shafts. Since we were this far in, we decided we are going to do the c-clip eliminator while doing the extended radius arms.

Pile o stuff that came from the center joint.
4165185372_e818494441.jpg


Once we had the passenger side beam out we could tell it was definatly cracked. We found 3 cracks total. Two are in the center/thicker part of the beam (one on the top, one on the bottom) and there is a crack near the axle pivot bushing. We welded those today. We are doing to drop the other beam to check it and fix it if it needs it.

Once of the cracks on the passenger beam.
4164433587_10b6881776_b.jpg


While we had the passenger side beam out we noticed that at full stuff the axle was actually hitting the edge of the Axle Window. We decided it was time to clearance that part of the beam. We opened it up at the top and the bottom. We used the torch for that.

Video of my friend Steve clearancing using the torch. For some reason he wasn't wearing gloves this time..


Tomorrow is the start of the RA mounts and the Trans mount. We will "try" to get the spring on the axle shaft to keep it in. If we can't get the spring and collar by Tuesday, I'll put it in later. It won't be a big deal now that the c-clip is out.

~Mark


Back
Top