Time for more teardown. I'm going to start bellhousing backwards to center support, then do the back end and the governor bore. Headed out of town a bit so tonight will just be the front end back to the center support....
We're on the engine support stand, and rotated to put the bellhousing UP. I'm going to remove the bellhousing bolts - FORD says to discard them in favor of new ones... we'll explore that a bit later. For now let's remove the bolts...
and then the bellhousing/pump assembly
with that removed we see a thrust washer atop the OD drum as we finally look into the guts of this beast:
The thrust washer bearing surface is down, so let's turn it over:
I am not some expert, but frankly the bearing surface looked a little scratched to me. Was going to replace it anyway, but lets mark that - thrust washer number 1- as a "bulletproof item number 1" - I wondered if FORD ever put a needle bearing here, but through the 4R55 at least, they hadn't. NEW though - for our rebuild.
Good time to go ahead and loosen the band adjustment screws... not tough to do, although you may just as likely remove the screw as the locknut when you undo it, that's ok...
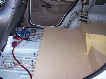
I took this pic to give you an idea where the screw heads to... if you follow the line of the screw, you can see where it hits the anchor strut on the OD band..
Ok, now remove the servos.... OD and intermediate...
Snap ring plier time. Although, no where does it say this, but the snap rings are a not fun aspect of this job. Tough to get a lasting grip with your snap rings pliers, ANY size. The trick is to use a screwdriver and when you have momentarily compressed the ring, insert the screwdriver in the slot for it, and pry the right from there- the snap ring itself isn't going to be easy to get out JUST using pliers.. here a pic...
See the little notch to the left of the pliers (7 O'clock position)? that's where to put the screwdriver.
Once the ring is out the cover does not exactly jump off - even though there is a spring behind it.... first one I used screwdrivers to rocker it up and out, then I tried using large pliers, easier and faster. You CAN use air, but hey, this worked and I didn't have to look where to apply the air - if you DO use air, make sure you limit the pressure to 15 lbs or so - no rocket covers please.
Here is the OD servo cover coming off
Here's the Intermediate servo coming out
and here is it out
The reason we did this was so we can remove the first of the bands - the OD band. With the "binders" removed we can take the band out... first we take out the items which help anchor the band, and which apply the "apply" pressure. Needle nose pliers are handy, though if you drop one of these items, it's not headed far, the center support will catch it and you can retrieve it later. Here is the anchor strut
On the opposite side is a similar "Apply strut"
Now the OD band can come out. This was a '91 - with the double wrap band - and I think I answered my Q about the double wrap bands. I was told by some trannie folks that a double wrap applies more quickly for firmer shifts - but gosh in comparison to the big single wrap - it looks puny. No wonder FORD abandoned it. My advice - empirically? Use the single wrap. (93 up). Here's the band. IF you plan to reuse it, mark the anchor side somehow so it gets put back in the same way.... no reversing one once it's been used please! This one is gonna get replaced with a single wrap new band. Bulletproof tip #2
Ok, band out of the way, we are looking at the top of the OD or Coast clutch drum. This one has a one way clutch in it, try turning it either way and see. One way works, other way locks. When we remove it, we have the drum and the clutch pack inside - drum coming out:
turned over, looking in at the clutch pack - this one has 3 plates in it... (standard 4.0 complement) IF I go to spiral cut friction plates, I'd say leave this one alone, the waffle pattern is ok to my mind- for most driving this one is engaged - I do not expect to find a lot of wear.
Looking above at the OD drum - above -
(It's a crappy photo and I apologize) but do you see the copper colored bushing inside? A wear item. I have a replacement, but not sure how easy it will be to get the old one out and new one in. In my book, especially on a rebuild if metal was found in the pan, a replacement item, either the bushing or a new drum with a replacement bushing in it. Bulletproof item number 3. I'll mike this one and the replacment and show you more in the item by item rebuild.
Time for the notorious OD planetary here it comes:
While in this view, I am not sure if you can make it out, but there is a large "washerlike" disc on the end of the shaft, with outer lugs on it. This one is pristine, but Opera House reported it as a problem area... replace it on rebuild. Bullet proof tip No. 4. Here's the planetary turned over -
This appears to be a HD one. Notice all the little needle bearings in the "nose"? How'd you like to have them contaminated with metal particles? (As small as they are a teensey particle would seem like a boulder in comparison) A "metal in the pan" replacement item if you ask me (e.g if your trannie had metal in the pan on rebuild to any degree, consider this a replacement item. Bulletproof tip item number 5 - new clean OD planetary.) This one was ok and from a trannie that looks ok, so I'll clean it and put on the shelf for the "inexpensve A4LD rebuild. The NEW one only cost $45 though - keep that in mind.
Next out is the OD center shaft assembly...
And here it is out - there is more than meets the eye here -we'l discuss this on item by item rebuild. There is an aftermarket item which "bears" on this, which is interesting. We'll explore that too on the rebuild.
Finally, here we are at the center support - with a thrust washer - No 3. THIS ONE.... FORD did replace with a needle bearing type in 93 - so will we on our rebuild.
Bullet Proof tip no. (what? ) 6?
With everything else out, we can remove the pin and the OD apply lever - it comes out throught the valve body part of the case....
All right, we've completed this part of the teardown - to the case center support - which is a HUGE bullet proof upgrade item in itself... that's where this will stop for now...
Here's what we took out today
more closely...
Recognize the baggies ? (I'm nagging now, right?)
Next up - the extension housing and governor -
Extension Housing:
Looking inside at the governor assembly:
This aspect should prove interesting as a potential DIY repair item you can do with the trannie still in the car (with the tranfer case and extension housing off). We'll resleeve our govenor to steel when we do it (Bulletproof tip No. 7).
That's it for now, will pick up later next week - I'm for a bit of R&R.
By the way: Feel free to chime in with thoughts, ideas, questions we might like answered and helpful criticisms. This is a learning process for me, anyway. Like to try and make it one for as many as can use it as well.
")