has anyone had a happy ending after head gasket job | Ford Explorer Forums - Serious Explorations

  • Register Today It's free!

has anyone had a happy ending after head gasket job

cerberusaardvark

Well-Known Member
Joined
September 7, 2009
Messages
331
Reaction score
2
City, State
San Diego
Year, Model & Trim Level
1994 Explorer xlt
well, the title says it all. ive seen lots of head gasket threads starting with high hopes, but mot of the time they devolve into confusion. not too encouraging. i was wondering if anyone has had a good outcome after a diy head gasket replacement.

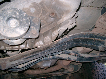
some background. its an old ex, a 94 xlt with 300k + on the engine. owned by my family since it was new. the engine is making all the telltale "old ex" noises and im thinking of doing a bit of restoring.

other things im planning- new heads from alabama cylinder head, i already have a felpro master seal and gasket kit, new radiator, thermometer, and lines. id also like to add additional coolers for the tranny, power steering, and a pusher or puller fan for the radiator.


Join the Elite Explorers for $20 each year.
Elite Explorer members see no advertisements, no banner ads, no double underlined links,.
Add an avatar, upload photo attachments, and more!
.


Its not too bad to do.them. the ex is just old enough to where its pretty straight forward. Get some zip lock bags and lable where the bolts go and take pictures of anything that may confuse you on re assembly.
Make sure you replace the head bolts. They stretch when torqued on and generally not reusable. Also make sure you torque them on right. A common mistake is to torque them to spec one bolt at a time but what you should do is torque them gradually to spec.

For example: if your torquing a bolt that is supposed to be 150in pounds, you start at 100in pounds and gradually torque them up to 150in pounds in increments of +10in pounds. ( i don't have the head bolt torque specs in front of me)

Reassembling is a matter of remembering what goes where. That's why you took pictures and tagged n bagged everything. The more thorough you are the easier it will be.


Inspect your rocker arms for wear n tare, i would recommend replacing all of them if allot of them show wear. ( wear is identified where the rocker arm makes contact with the push rod. ) rocker arms are a common culprit to the knocking our engines make. When they wear down they allow a gap to form between the rocker arm and the push rod thus making the knock.

Make sure your push rods are numbered and labeled individually when you remove them so you know what order they came out. Make sure they have the hole in them that allows oil to flow through them. The debris from deteriorating rocker arms can clog them up. ( if you need to replace one replace them all.

While you have your push rods out inspect your lifters, make sure they are not damaged or falling apart. I reused used mine in both my trucks and they work just fine.

I don't know what your engine sounds like but make sure you have the funds to cover all these just in case there is a worst case scenario. Good luck i learned most of these lessons the hard way. Hopefully they help you out. The only benifit to messing up as many times as i have is knowing exactly how to tear it all apart again.

Ohh yea drain the radiator fluid : )


very good advice. i usually just use rockauto brands for auto repair, unless i know specifically a brand line i want. with replacing rocker arms and lifters, is there a preferred brand that offers a better quality? i have gotten a feeling that rockauto brand parts are very generic. as in, its a good place for odds and ends but for important things like pushrods and lifters get specialized brands. any truth to that, dano?


Honestly i just go to autozone and buy the more expensive one they sell. They always have a cheap one and a expensive one. Sometimes they come with a warrenty as well. I like their rewards program. Rockers were like 25 bucks a pop so i would buy one or two everyday from different stores. Rack up the points.

When buying new push rods make sure you keep the old ones, you can buy push rods at different lengths. Measuring the old ones will make that easier on you and save you a trip to the dumpster for some diving.


a trick I use is two box lids turned upside down I put the rocker arms assembly on top of them with the bolts in there spots and threw the lid this holds them in place then I make a small hole for each push rod next to its rocker arm and as I remove them I put it in the hole for that rocker arm. sounds harder then it is but it helps me keep all the rocker arm assembly parts together in order and marked as to left right front back.

Label label and label and take pictures like mad as if a few days pass it helps even if you’re someone who has done rebuilds before as I have there is always that one time you just have a brain fat and they can bail you out fast.

Another thing I would do is get you full intake cleaned out and I do mean cleaned out so its whistle clean just like the new heads intake ports. and also it can be important replace your freeze plugs with brass ones as they will be right there for you in the open more then they will be later and also replace all your vacuum lines and water hoses.

Side note here there is a 3 Row TOC Performance Racing All Aluminum Radiator I would think about. I know its one I will be changing mine over to just for the extra cooling capacity I think plus to get away from the darn plastic side tanks!


At 300k you really need to check the tolerances on the block and consider an overhaul since you are already changing the heads.


is there a ford factory manual i should be using instead of my chiltons guide?

aluminum toc radiator sounds nice. i would like to get rid of my stock plastic one as well. i cant believe it hasnt burst after this long.


I would also recommend video recording your vacuum lines as to where they go. Wrap some masking tape around each of them and lable them. You wont remember how they go when you put them back together.


Back
Top