rocket 5979
Resident Gearhead
- Joined
- April 22, 2002
- Messages
- 4,017
- Reaction score
- 10
- City, State
- Lake Villa, Illinois
- Year, Model & Trim Level
- '03 XLT 4.6
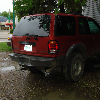
Well I figured since homemade CAI's are extremely easy and cheap to make why not do one up for my 02 Explorer Sport since I was already doing one for the wife's 2007 Envoy. My goal with this truck is more MPG, but a few more ponies under the hood cannot hurt either. It will be getting Gibson shorty headers and a Gibson exhaust here soon as well as a tune. And I have a ASP UDP sitting around that I may just throw on here too.
Onto the CAI pictures. The parts list is as follows:
-Silicone Elbow 45 degree 3.5" x1EA
-Aluminum Pipe 3.5" x1Foot (You need to cut to shorter length)
-Silicone Reducer 3.5" - 3.25" x1EA
-T-Bolt Clamp 3.5" x3EA
-T-Bolt Clamp 3.25" x3EA
-Brass Fitting 5/8" Hose barb - 3/8" MIP x1EA
-Hose, Fuel/Emissions 5.8" x1Foot (You will need to cut to shorter length)
-Hose Clamp 7/8" x2EA
-MAFS Adapter, Aluminum 3.0"(generic Pep Boys one) x1EA
-7mmx1.0 x25mm Bolts with lock washers and nuts x4EA
-Sheet Aluminum from hardware store 24"x24" x1EA (cut to fit obviously)
-Foam, winter pipe insulation from hardware store x1EA
-Air filter, K&N (Short) with 3.0" Flange
-RTV, Black Sensor safe (for sealing the pipe threads on hose barb)
You will need basic tools such as:
-Screwdrivers
-Drill with drill bits of varying sizes
-Tin Snips
-Ratchet set and sockets
-3/8" NPT Pipe Tap (if you decide to thread the hoe barb fitting into the aluminum intake tube)
You do not need to use the T-Bolt clamps like I did. You can use regular worm drive hose clamps to secure your silicone pieces. I only went with T-Bolt because I have so many laying around from building turbo systems and because I may go forced induction with this truck in the eventual future. You will reuse your stock MAFS itself and the MAFS foam gasket too. The total cost will be in the $80 range and you can get most of the silicone parts on the net and the rest of the more basic stuff from your local auto parts store or hardware store. Fabrication and install time will take anywhere from a few hours to half a day depending on your experience level. One item to note is that you will need to drill and thread the aluminum pipe for the hose barb fitting which means you need a 3/8" NPT pipe tap. Another option you can choose is a double sided hose barb fitting and then stop by your local auto parts store and pick up a rubber grommet of proper size that will allow the hose barb to fit snugly into it. Make sure you do not have a leak at the hose barb fitting otherwise your air fuel ratios will be off. When you go to make the aluminum heat shield I suggest having the CAI already completely made and use cardboard as a template. Just measure cut, measure cut, and keep repeating until the pattern fits right. Remember to keep in mind where the hood-liner will rest when the hood is down. You will need to make the heat shield extend up above the engine bay a bit so it conforms to the shape of the hood-liner to get a good seal. Once the cardboard pattern is made just transfer it to the sheet of aluminum. Another suggestion I have, and what I did, is to make a little mounting tab on the shield that will use the windshield washer reservoir mounting bolt to secure it. Then I used the 4 bolts that mounted the MAFS to the aluminum MAFS Flange to anchor the shield to the MAFS too, which is why they are a tad long at 25mm. Doing it this way will secure the shield quite well in the engine bay so it doesn't rattle or move.
Best of luck and if tackled with patience it can be a fun little afternoon project that will save you a bit of money, work just as well as any name brand CAI, and give your truck a little more go while saving some gas.