fast_dave
Explorer Addict
- Joined
- June 6, 2005
- Messages
- 1,369
- Reaction score
- 775
- City, State
- East Bay - Nor Cal / PRK
- Year, Model & Trim Level
- '98 Spt 4.0 OHV 5 spd 4x4
This is the 1st tutorial I am re-submitting due to 2nd Gen Forum. This is due to the sudden decision of Photobucket not allowing 3rd Party photo hosting after 12 plus years. All of the photos linked to the original "sticky" are now DEAD! Hence this re-write to keep all the info out there.
I am thankful for all the info this forum has provided me, and I want the information to stay on the Internet due to the fact that 2nd Gen Explorers are still alive and well and no doubt there are going to be more people that can use this information!
How to refurbish a 1998 Dimmer Switch
For safety, I drive with my headlights on during the day.
The past year I've noticed the dimmer switch in my 1998 Sport wasn't holding on the full power setting.
This was exhibited by both the instrument panel lighting & radio readout going from full strength to dim, without me touching the adjustment on the dimmer wheel. Something was obviously not right inside the switch.
So - I priced the dimmer switch at Rock Auto as well as Amazon, and it was $65!
I felt this was way overpriced because the main light switch was only $20.
Then I went on Ebay and found a vendor that sold a "rebuilt" switch for $35.
That gave me the idea that something inside the dimmer switch was replaceable or able to be refurbished

Here's how I began the process to remove the dimmer switch – follow forum member MustangP51 thread (with GREAT PICS) through Step 7 – You can see the dimmer switch in the picture, to the right of the headlight switch:
Link: http://www.explorerforum.com/forums...cluster-removal-and-led-conversion-v2.240166/
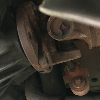
Dimmer Switch Removed
 Dimmer_1 by Fast Dave, on Flickr
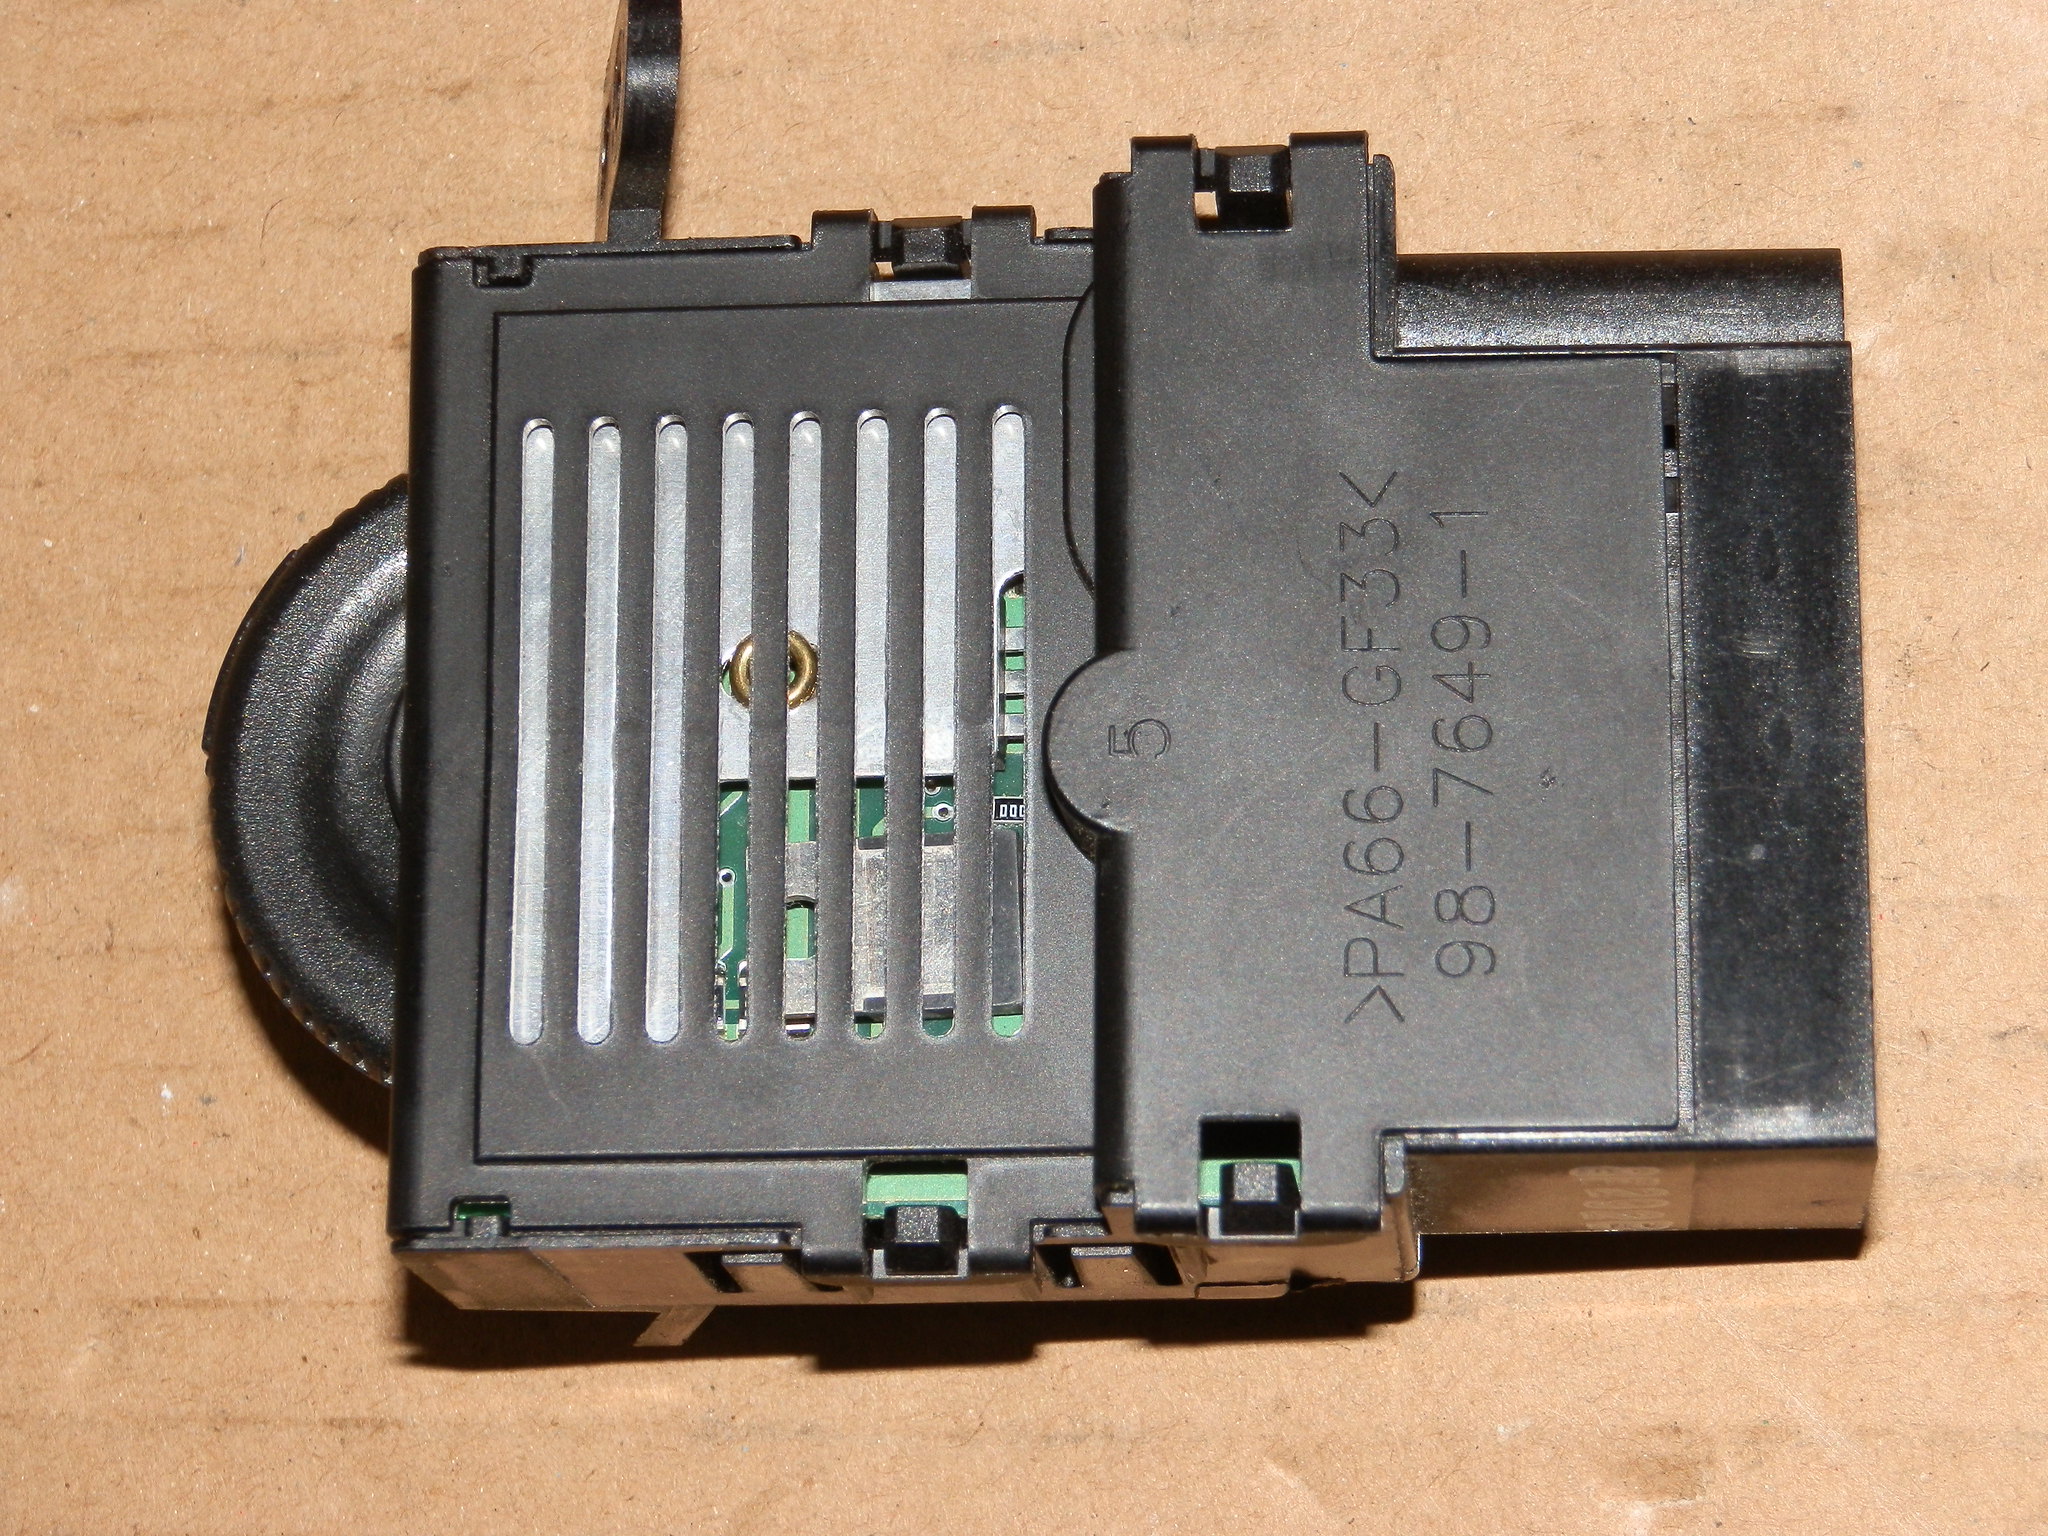
Dimmer Switch Protection Cover Removed
Utilize multiple, small, flat blade screwdrivers to CAREFULLY bend tabs, lifting off the protection cover.
 Dimmer_2 by Fast Dave, on Flickr
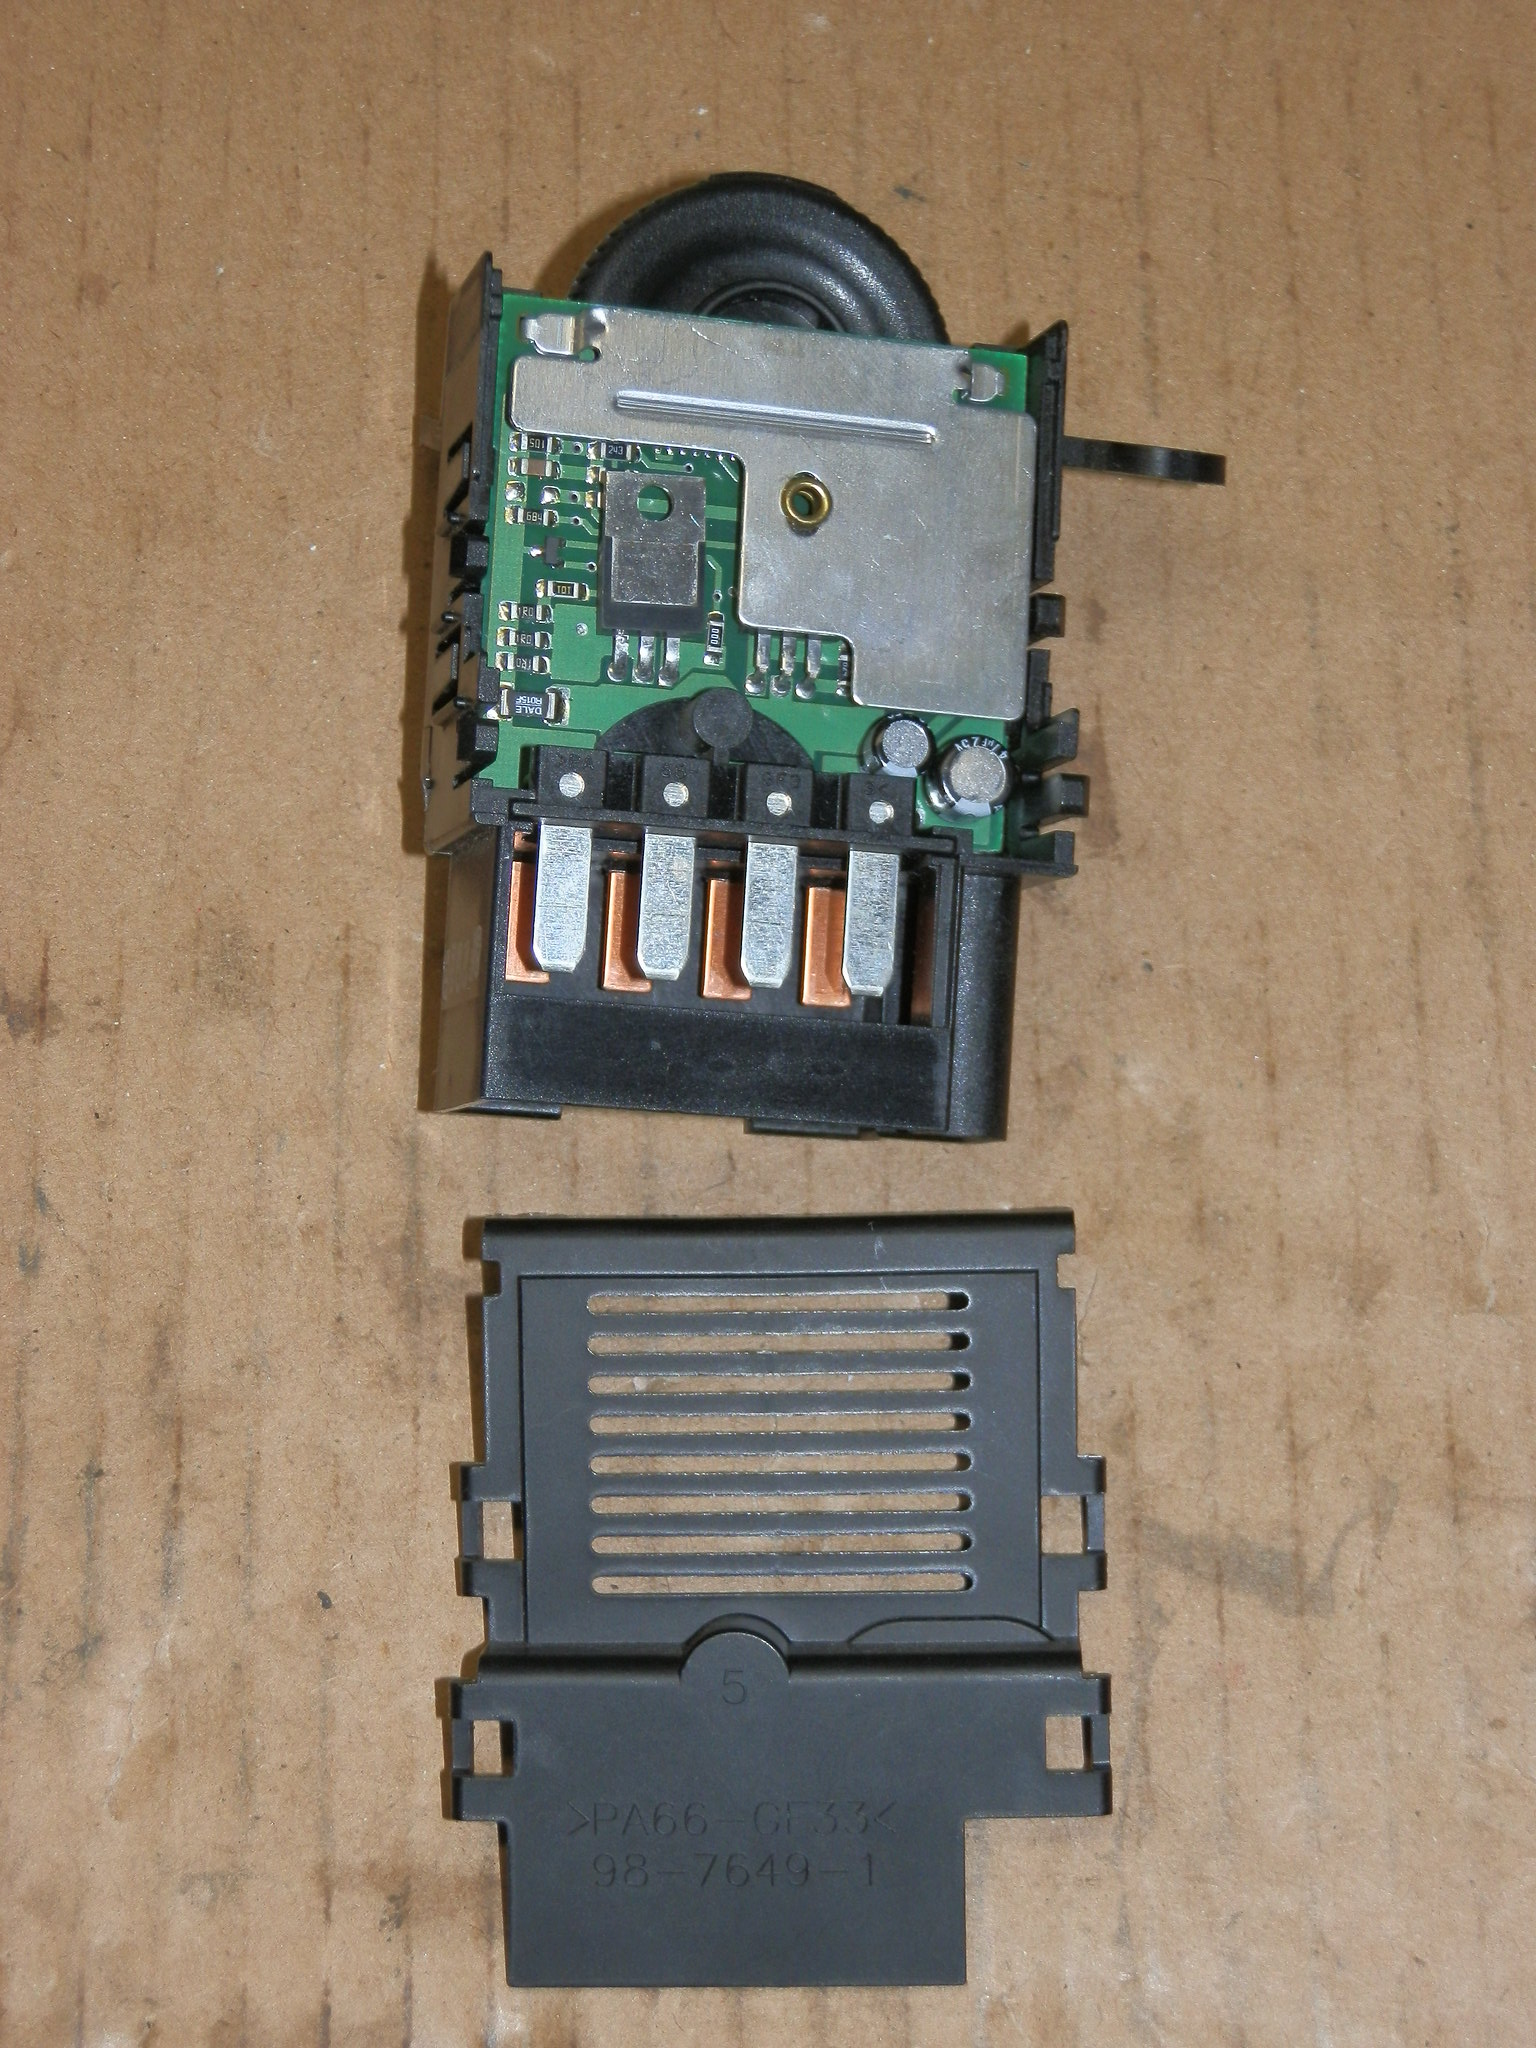
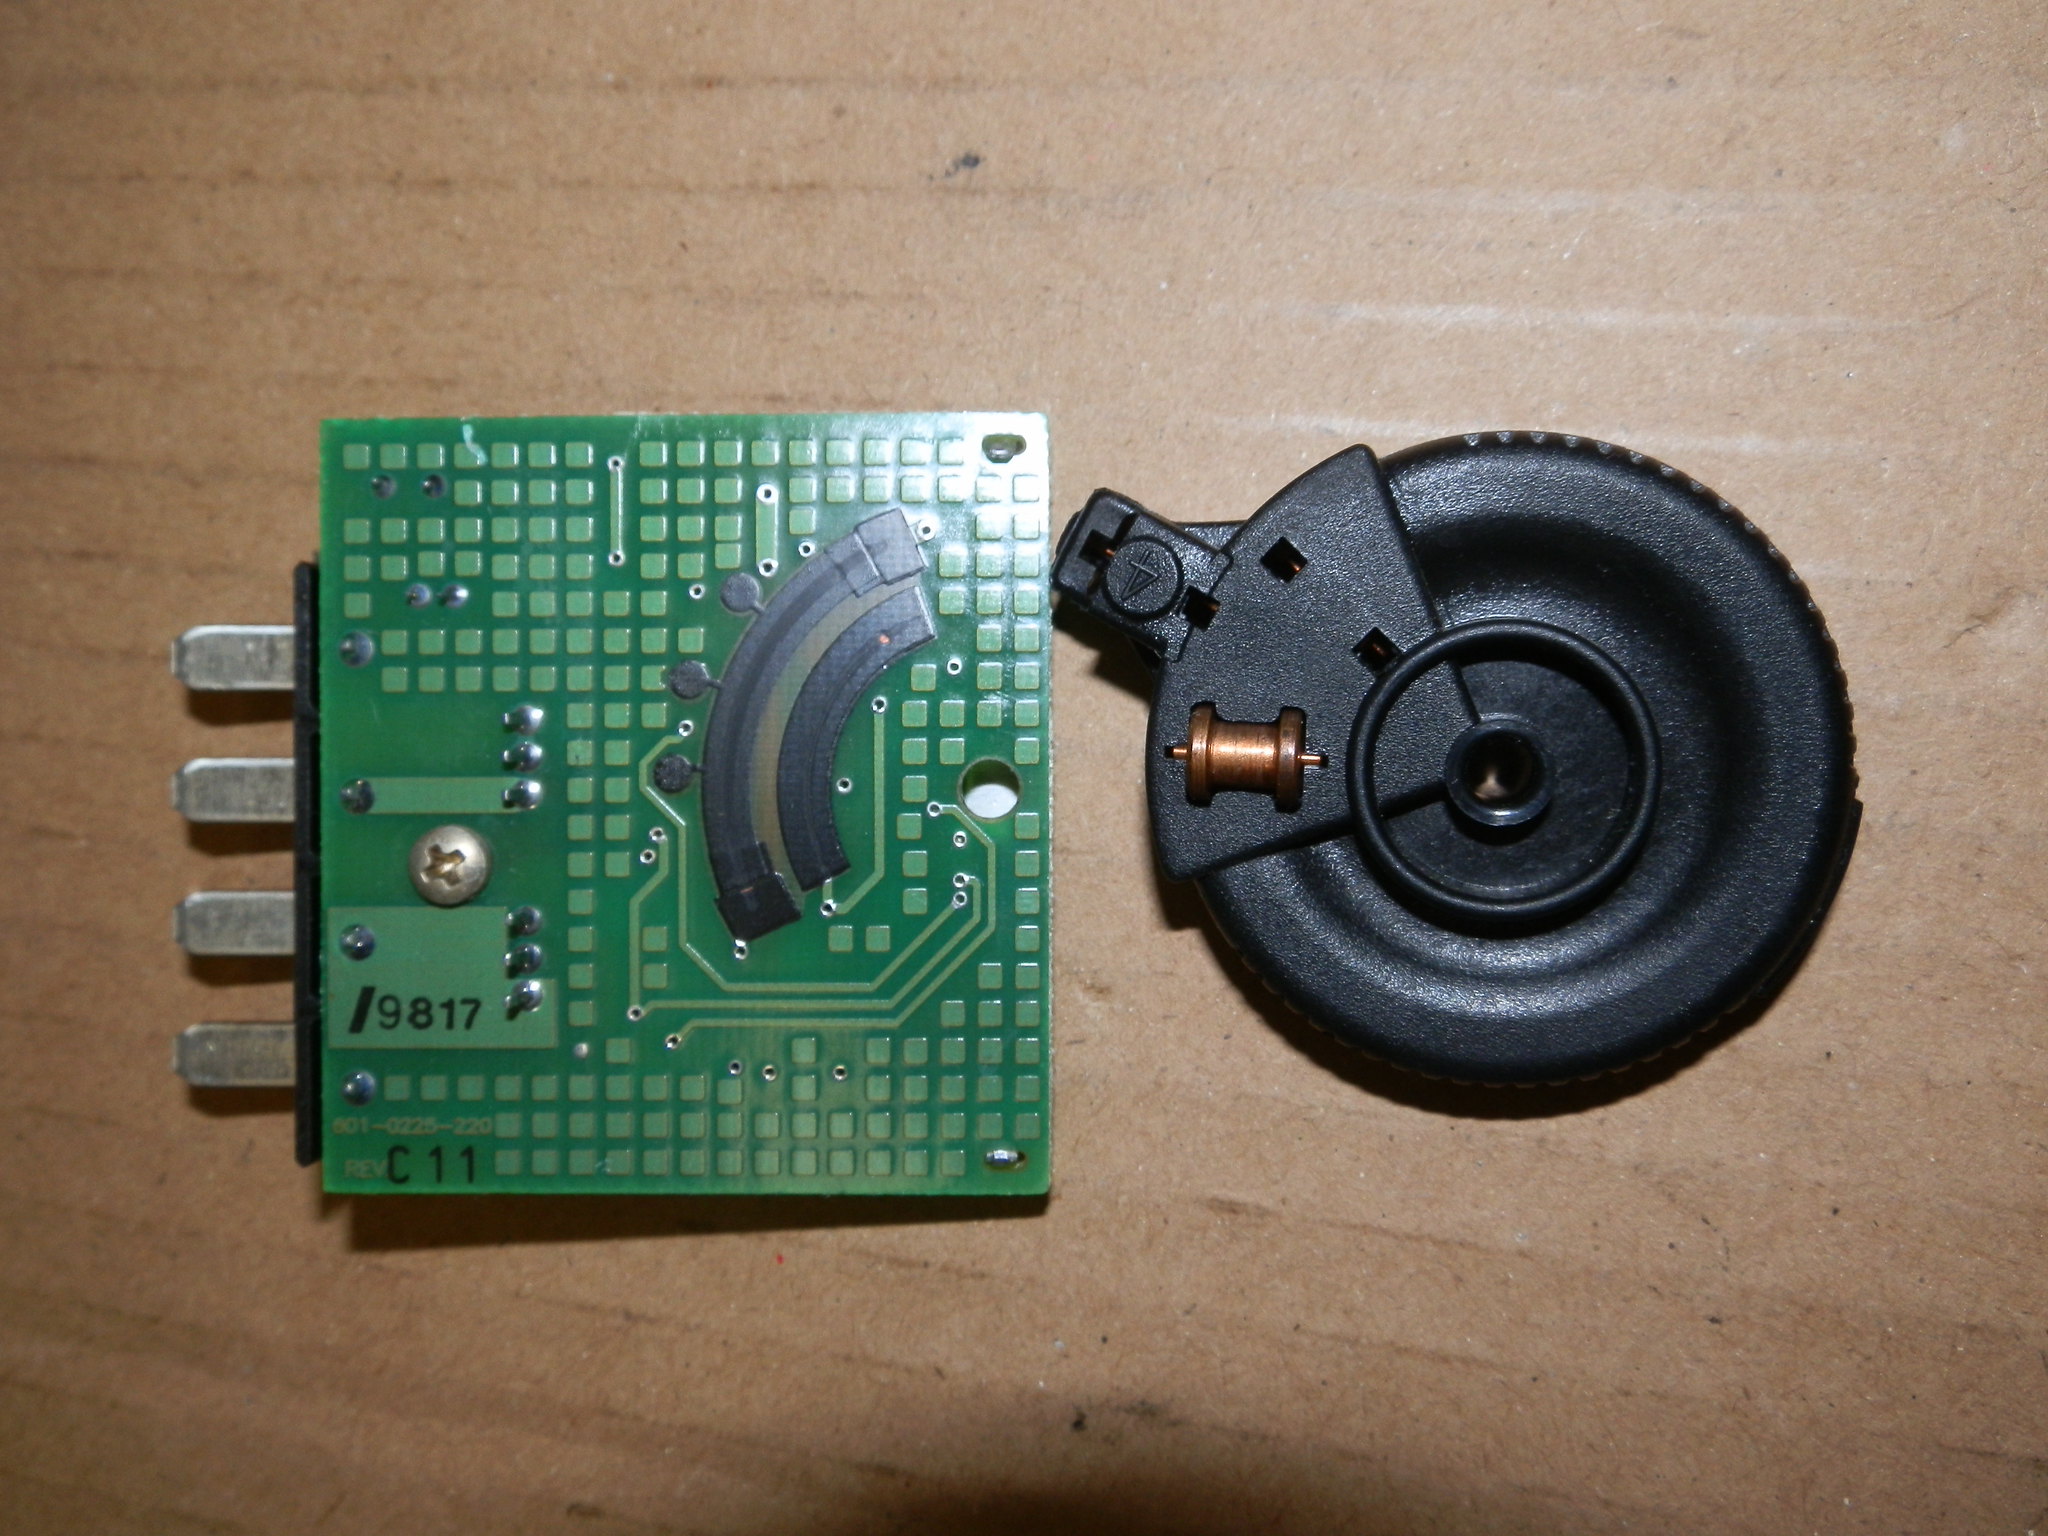
Dimmer Switch Opened Up
Again, utilize your small, flat blade screwdrivers, and carefully lift up the circuit board out of the black plastic case. Go slow as you don't want to break anything!
 Dimmer_3 by Fast Dave, on Flickr
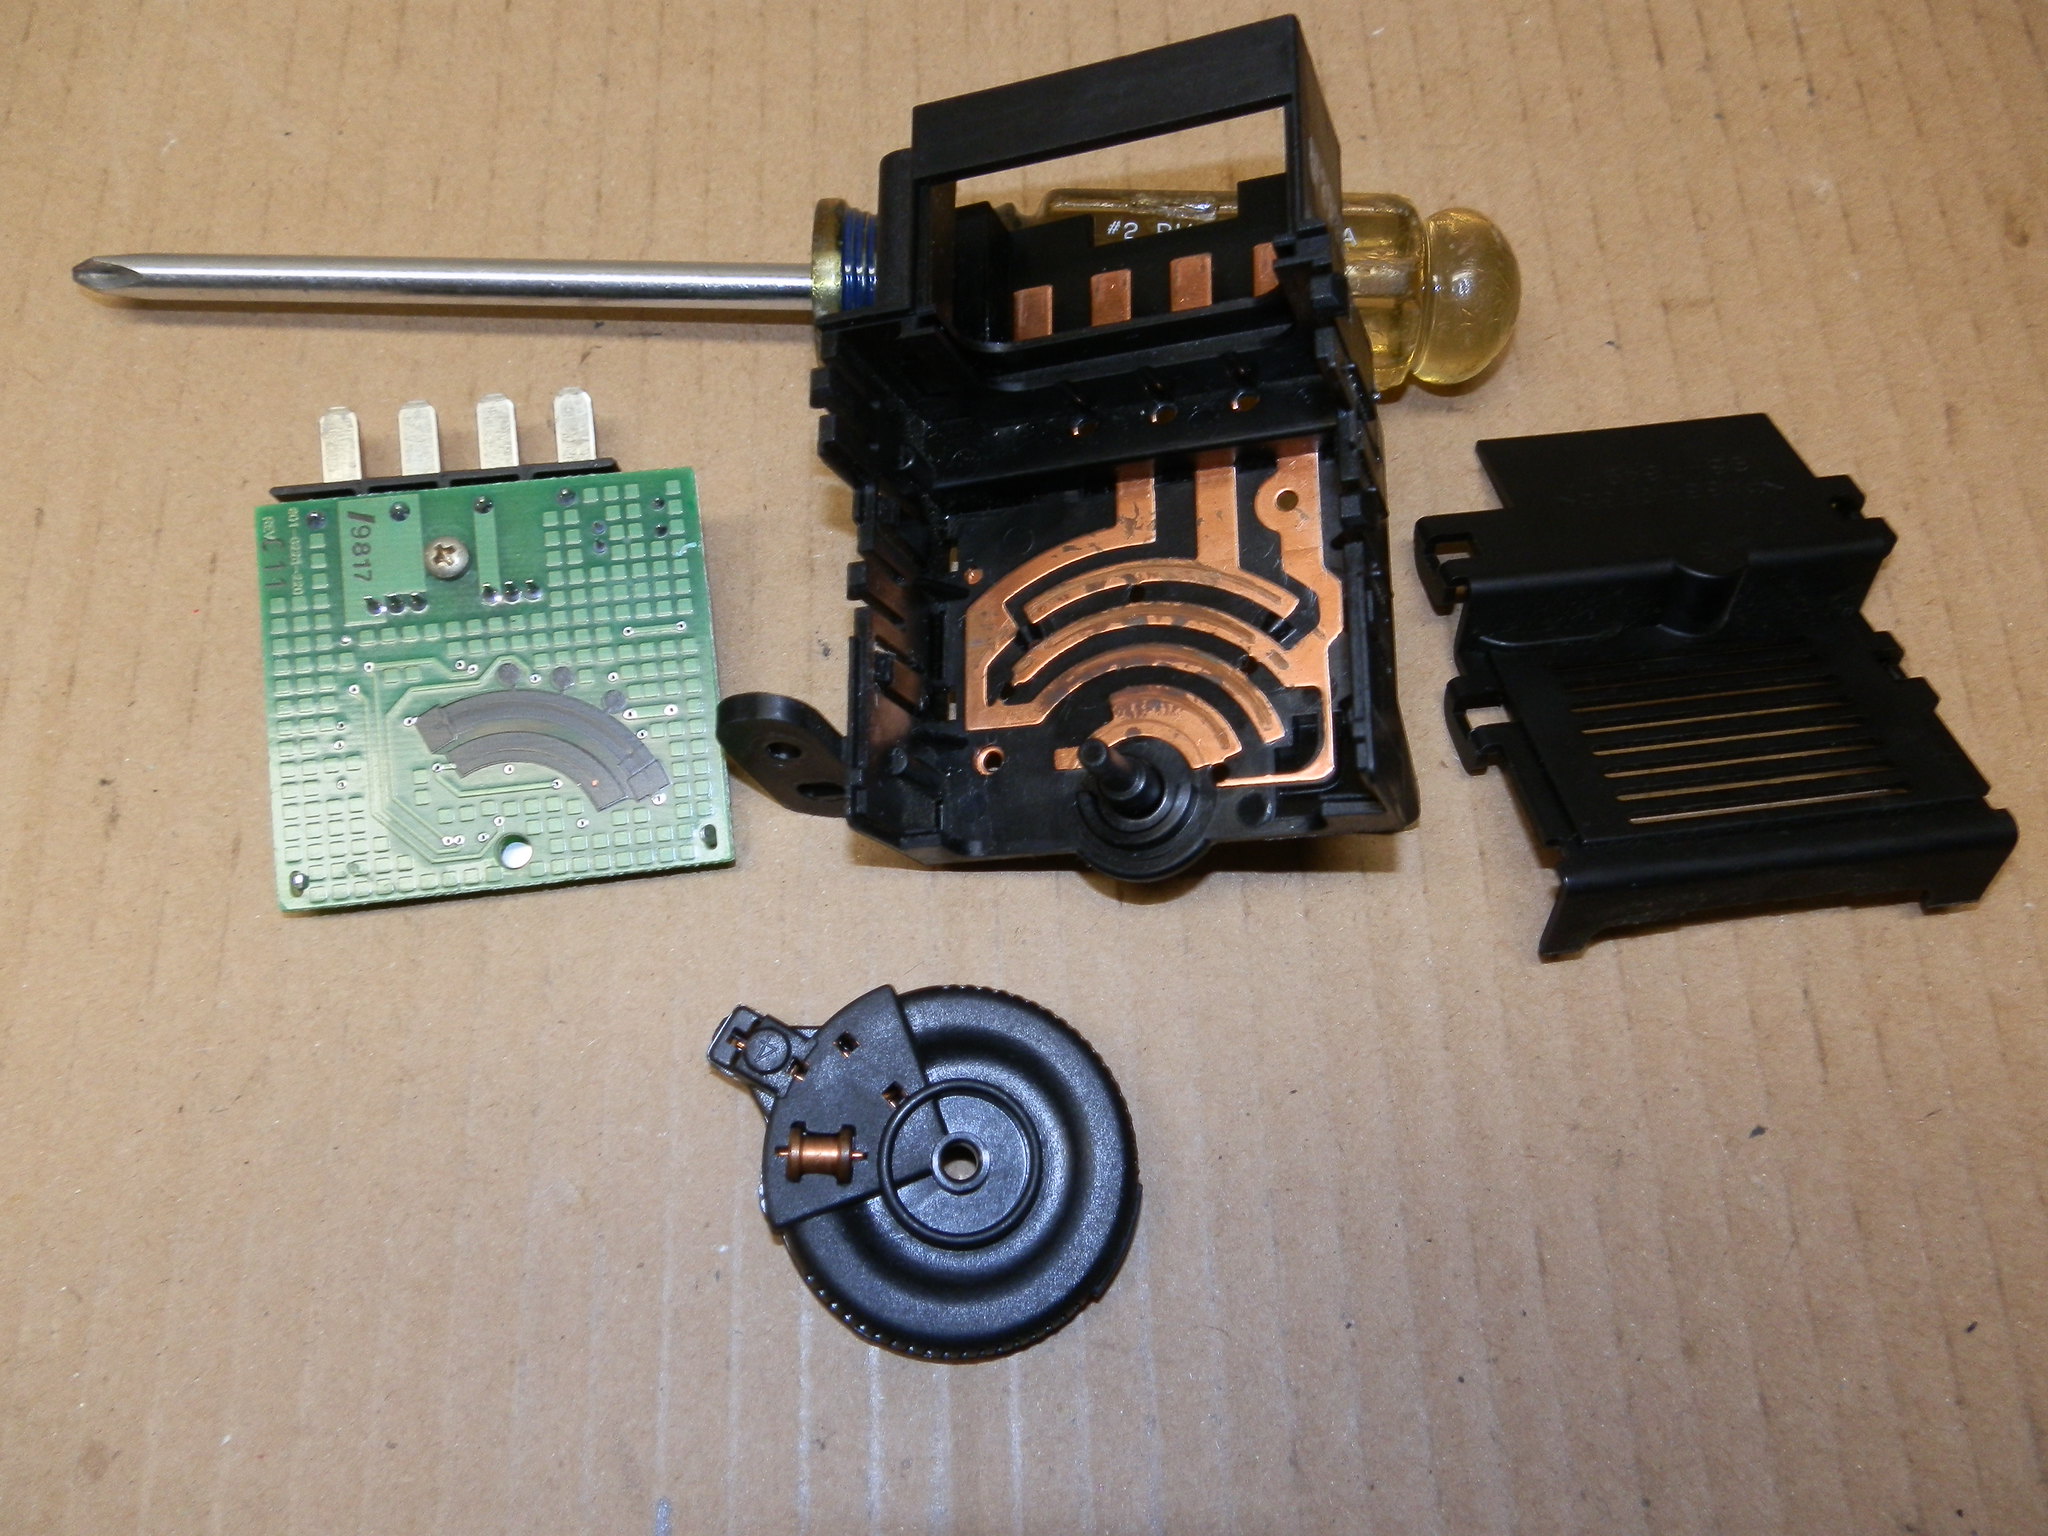
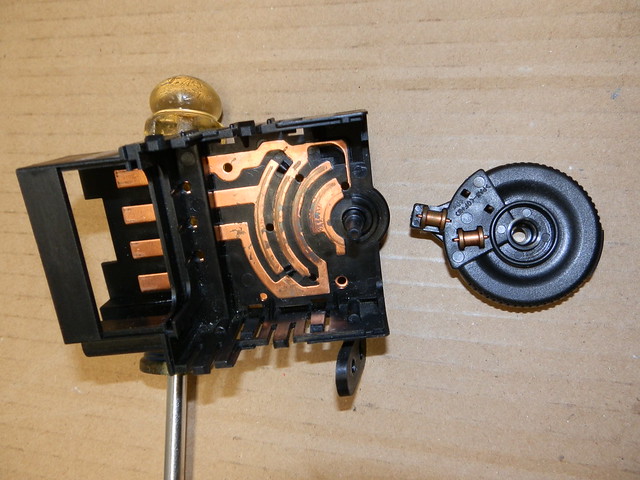
Backside of Protection Cover Circuit Board
This side of the Circuit Board is the backside of what you see through the protection cover. The Dimmer Wheel has a spring loaded "barrel" that correspondingly rides on the two black curved contact strips on the Circuit Board. Covering the two black contact strips was a coat of dried up & dirty dielectric grease that I wiped off before I took this picture. The two contact strips held up quite well.
 Dimmer_4 by Fast Dave, on Flickr
Inside of Black Plastic Case
There is a copper circuit pattern on the inside of the black plastic case. This copper circuit is VERY Heavy Duty. They are actually thick sheets of copper that are cast into the black plastic case. The wear and tear on them was noticeable to the naked eye. The dielectric grease was dried out, and there were wear patterns from the two spring loaded barrels (there are 2 spring loaded barrels on the other side of the dimmer wheel).
 Dimmer_5 by Fast Dave, on Flickr
Begin refurbishing the dimmer switch
Utilize Isopropyl Alcohol (any strength) and a clean rag, and wipe off the dried dielectric grease off of the circuit pattern. Then, obtain a piece of 1500 grit wet/dry sandpaper. We're going to use the sandpaper to clean up the copper circuit pattern strips.
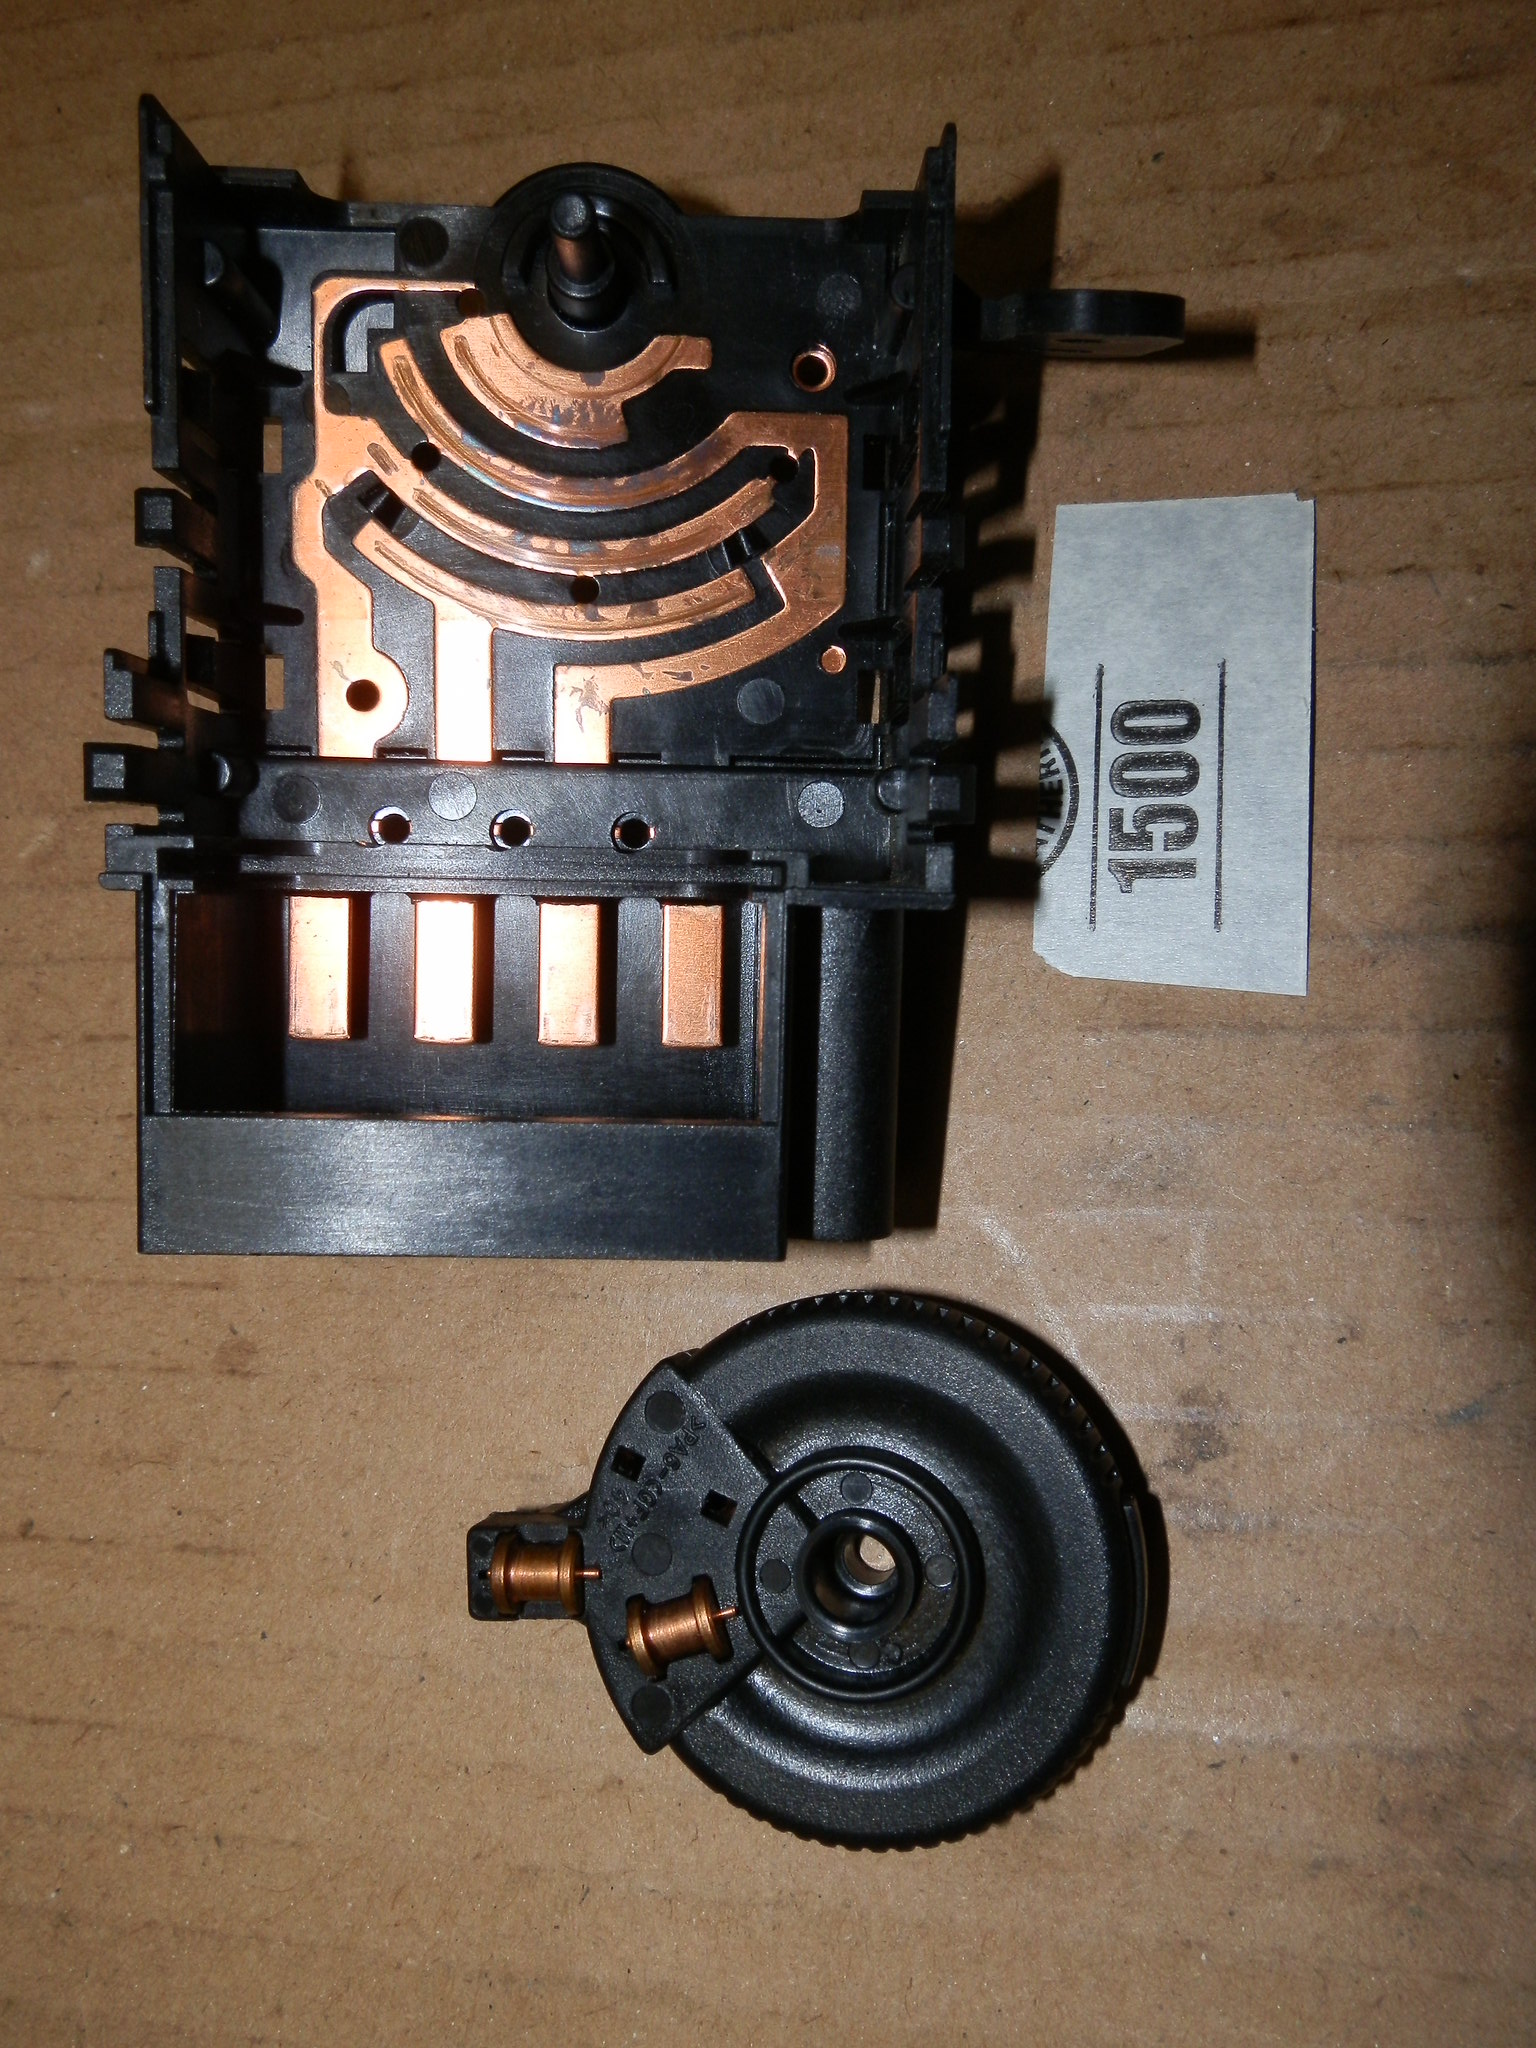 Dimmer_6 by Fast Dave, on Flickr
I am thankful for all the info this forum has provided me, and I want the information to stay on the Internet due to the fact that 2nd Gen Explorers are still alive and well and no doubt there are going to be more people that can use this information!
How to refurbish a 1998 Dimmer Switch
For safety, I drive with my headlights on during the day.
The past year I've noticed the dimmer switch in my 1998 Sport wasn't holding on the full power setting.
This was exhibited by both the instrument panel lighting & radio readout going from full strength to dim, without me touching the adjustment on the dimmer wheel. Something was obviously not right inside the switch.
So - I priced the dimmer switch at Rock Auto as well as Amazon, and it was $65!
I felt this was way overpriced because the main light switch was only $20.
Then I went on Ebay and found a vendor that sold a "rebuilt" switch for $35.
That gave me the idea that something inside the dimmer switch was replaceable or able to be refurbished
Here's how I began the process to remove the dimmer switch – follow forum member MustangP51 thread (with GREAT PICS) through Step 7 – You can see the dimmer switch in the picture, to the right of the headlight switch:
Link: http://www.explorerforum.com/forums...cluster-removal-and-led-conversion-v2.240166/
Dimmer Switch Removed
Dimmer_1 by Fast Dave, on FlickrDimmer Switch Protection Cover Removed
Utilize multiple, small, flat blade screwdrivers to CAREFULLY bend tabs, lifting off the protection cover.
Dimmer_2 by Fast Dave, on FlickrDimmer Switch Opened Up
Again, utilize your small, flat blade screwdrivers, and carefully lift up the circuit board out of the black plastic case. Go slow as you don't want to break anything!
Dimmer_3 by Fast Dave, on FlickrBackside of Protection Cover Circuit Board
This side of the Circuit Board is the backside of what you see through the protection cover. The Dimmer Wheel has a spring loaded "barrel" that correspondingly rides on the two black curved contact strips on the Circuit Board. Covering the two black contact strips was a coat of dried up & dirty dielectric grease that I wiped off before I took this picture. The two contact strips held up quite well.
Dimmer_4 by Fast Dave, on FlickrInside of Black Plastic Case
There is a copper circuit pattern on the inside of the black plastic case. This copper circuit is VERY Heavy Duty. They are actually thick sheets of copper that are cast into the black plastic case. The wear and tear on them was noticeable to the naked eye. The dielectric grease was dried out, and there were wear patterns from the two spring loaded barrels (there are 2 spring loaded barrels on the other side of the dimmer wheel).
Dimmer_5 by Fast Dave, on FlickrBegin refurbishing the dimmer switch
Utilize Isopropyl Alcohol (any strength) and a clean rag, and wipe off the dried dielectric grease off of the circuit pattern. Then, obtain a piece of 1500 grit wet/dry sandpaper. We're going to use the sandpaper to clean up the copper circuit pattern strips.
Dimmer_6 by Fast Dave, on Flickr