Mr. Alligator
Explorer Addict
- Joined
- November 30, 2014
- Messages
- 1,297
- Reaction score
- 1,029
- City, State
- Tampa, Florida
- Year, Model & Trim Level
- 1997 XLT Explorer
Another chance to say thank you to all of the experts and skilled individuals that make this Forum the best ever. Thanks again!
There are other threads on this Forum with information about the rear door main glass, the rear door vent glass, and the rear door seal, but this may help some put it all together and answer a few more questions.
THE PROBLEM:

The rear door of the second generation explorer seems to have a fail point at the back seal... the seal between the two pieces of glass gets rusty inside of the rubber lining, and you can see the rust bulge at the bottom of the trim. Also, the rear door “vent” glass slides inward, and seal opens up. The rust in the seal will eventually cause real trouble, and the parts are hard to find, I located an intact seal at salvage, and bought the whole door for $40. This allowed me to take it home and work comfortably at my home.
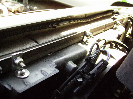
The first step is to remove the interior door panel. Remove the interior door handle trim, the two screws holding the door grip.
A HINT:
When you are working on this project, it is necessary to move the main window up and down to make room for seals and to access rivets, especially rivets for the rear main glass regulator. It is very helpful to have twelve volt power to use the rear window motor for this purpose.
The wires that power the rear window motor are both yellow, one with a blue stripe, and the other with a black stripe. To reverse the motor direction, just reverse the twelve volt polarity by switching the power and ground wires between these yellow wires.
If you are working on your car, you can access the window switch on the bottom of the rear door window switch with probes from a twelve volt source to the yellow wires described above. On a salvage vehicle, you might have to cut the wires nearer to the rear window motor to apply power. Either way, you must be able to move the rear main window up and down to clear room for seals and line up access holes for the removal of rivets and replacement of the rivets with nuts and bolts and lock washers.
If your rear window motor does not work, which would be unusual, you will need to find an alternate way to release the window regulator. You might be able to drill out the three regulator rivets, but the project would be increasingly
more difficult.

Twelve volt power to the rear window motor is very helpful.
There are other threads on this Forum with information about the rear door main glass, the rear door vent glass, and the rear door seal, but this may help some put it all together and answer a few more questions.
THE PROBLEM:
The rear door of the second generation explorer seems to have a fail point at the back seal... the seal between the two pieces of glass gets rusty inside of the rubber lining, and you can see the rust bulge at the bottom of the trim. Also, the rear door “vent” glass slides inward, and seal opens up. The rust in the seal will eventually cause real trouble, and the parts are hard to find, I located an intact seal at salvage, and bought the whole door for $40. This allowed me to take it home and work comfortably at my home.
The first step is to remove the interior door panel. Remove the interior door handle trim, the two screws holding the door grip.
A HINT:
When you are working on this project, it is necessary to move the main window up and down to make room for seals and to access rivets, especially rivets for the rear main glass regulator. It is very helpful to have twelve volt power to use the rear window motor for this purpose.
The wires that power the rear window motor are both yellow, one with a blue stripe, and the other with a black stripe. To reverse the motor direction, just reverse the twelve volt polarity by switching the power and ground wires between these yellow wires.
If you are working on your car, you can access the window switch on the bottom of the rear door window switch with probes from a twelve volt source to the yellow wires described above. On a salvage vehicle, you might have to cut the wires nearer to the rear window motor to apply power. Either way, you must be able to move the rear main window up and down to clear room for seals and line up access holes for the removal of rivets and replacement of the rivets with nuts and bolts and lock washers.
If your rear window motor does not work, which would be unusual, you will need to find an alternate way to release the window regulator. You might be able to drill out the three regulator rivets, but the project would be increasingly
more difficult.
Twelve volt power to the rear window motor is very helpful.