92 4x4 MAKEOVER
I have started the next round of mods to the 92 X with some basic performance parts(I've had the chip for 7 or 8 years).
1. Added the Granatelli MAF sensor... getting the thing to fit in the old gasket was the only real trouble.
Lesson 1. Take the whole intake tube off of the engine makes it much easier to work into the gasket.
Lesson 2. Taking the whole intake tube off let me notice that a hole or crack was there that was allowing unfiltered air in, and this air was on the intake side of the MAF, so this was probably making the engine run lean.
Lesson 3. Taking the whole intake tube off let me notice how much gunk had built up in the throttle body. It was pretty sticky gunk, so I am sure it is fumes from the hose coming from the valve cover. Prep-Sol on a rag cleaned it up rather nicely. I will probably get some Gumout and spray to clean up what I couldn't get with the rag.
2. Added the KKM Conical Air Filter.
Lesson 4. The airbox comes out easier if you disconnect the "Ram" air intake hose and the heat riser hose first.
Lesson 5. The spot where the airbox goes looks awfully inviting for a second battery except the new filter sits right there.
...so now I am visualizing a custom intake tube which would go towards the driver's side and have the intake be over there. I have to consider how to get the wires to the MAF sensor, and how to connect the hose from the valve cover.
Question 1. Has anyone done this?
Question 2. Does anyone know if the distance between the MAF and the throttle body is critical?
Question 3. Does anyone know if the distance between the valve cover vent hose and the throttle body is critical?
I have seen the solution for putting the second battery over on the driver's side by getting a smaller washer tank and relocating the coolant tank, but this seems more sensible. Seems like the second battery would be much easier to integrate if it was right next to the stock battery.
I am thinking of fabbing up a single tray that would replace the stock battery tray and the bottom tray of the airbox. This single tray would hold a red top and a yellow top, connected together with the battery isolation components. I like the yellow top for my winch.
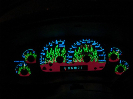
3. I have most of the interior out of the truck.
Lesson 6. Keep all of the screws where you can find them.
Lesson 7. The DIN removal tool for the radio is a nice thing to have... push both of them in hard, and pull the radio out.
Lesson 8. The older trucks have brittle plastic. Most of the pins broke off of the main dash trim piece. Double-sided tape may be the preferred method of reinstallation.
Lesson 9. PVC Cement works really well to repair the cracked center arm rest support. To make it bullet proof, you can rough up the inside with steel wool and fill it with bondo (Make sure you use hardener).
Lesson 10. If you are going to buy a custom center console big enought to hold a CD Changer, don't bother fixing the cracked center armrest.
Well it got dark and cold, so I think I am done for the night. My stereo stuff should show up soon, but I am going to hold off that install until the truck gets back from the shop. I am having them install my 3" body lift kit and my 2 1/2" Rancho Suspension lift kit. I know I can handle the body lift kit myself, but got a little intimidated by the coil spring change out in the suspension kit, so a local body shop is going to handle it for me (And convert the A/C - changing out the valve cover gaskets after 133k miles while they can get at them).
Then when it gets back, the stereo goes in, new carpet from http://www.autostyles.com/ftcarpet.htm#Explorer
goes in, put the seats back in, and I am probably going to paint the whole truck with some brand of Herculiner like material to keep from scuffing the paint in the woods.
Any thoughts, suggestions, comments are welcome.
I have started the next round of mods to the 92 X with some basic performance parts(I've had the chip for 7 or 8 years).
1. Added the Granatelli MAF sensor... getting the thing to fit in the old gasket was the only real trouble.
Lesson 1. Take the whole intake tube off of the engine makes it much easier to work into the gasket.
Lesson 2. Taking the whole intake tube off let me notice that a hole or crack was there that was allowing unfiltered air in, and this air was on the intake side of the MAF, so this was probably making the engine run lean.
Lesson 3. Taking the whole intake tube off let me notice how much gunk had built up in the throttle body. It was pretty sticky gunk, so I am sure it is fumes from the hose coming from the valve cover. Prep-Sol on a rag cleaned it up rather nicely. I will probably get some Gumout and spray to clean up what I couldn't get with the rag.
2. Added the KKM Conical Air Filter.
Lesson 4. The airbox comes out easier if you disconnect the "Ram" air intake hose and the heat riser hose first.
Lesson 5. The spot where the airbox goes looks awfully inviting for a second battery except the new filter sits right there.
...so now I am visualizing a custom intake tube which would go towards the driver's side and have the intake be over there. I have to consider how to get the wires to the MAF sensor, and how to connect the hose from the valve cover.
Question 1. Has anyone done this?
Question 2. Does anyone know if the distance between the MAF and the throttle body is critical?
Question 3. Does anyone know if the distance between the valve cover vent hose and the throttle body is critical?
I have seen the solution for putting the second battery over on the driver's side by getting a smaller washer tank and relocating the coolant tank, but this seems more sensible. Seems like the second battery would be much easier to integrate if it was right next to the stock battery.
I am thinking of fabbing up a single tray that would replace the stock battery tray and the bottom tray of the airbox. This single tray would hold a red top and a yellow top, connected together with the battery isolation components. I like the yellow top for my winch.
3. I have most of the interior out of the truck.
Lesson 6. Keep all of the screws where you can find them.
Lesson 7. The DIN removal tool for the radio is a nice thing to have... push both of them in hard, and pull the radio out.
Lesson 8. The older trucks have brittle plastic. Most of the pins broke off of the main dash trim piece. Double-sided tape may be the preferred method of reinstallation.
Lesson 9. PVC Cement works really well to repair the cracked center arm rest support. To make it bullet proof, you can rough up the inside with steel wool and fill it with bondo (Make sure you use hardener).
Lesson 10. If you are going to buy a custom center console big enought to hold a CD Changer, don't bother fixing the cracked center armrest.
Well it got dark and cold, so I think I am done for the night. My stereo stuff should show up soon, but I am going to hold off that install until the truck gets back from the shop. I am having them install my 3" body lift kit and my 2 1/2" Rancho Suspension lift kit. I know I can handle the body lift kit myself, but got a little intimidated by the coil spring change out in the suspension kit, so a local body shop is going to handle it for me (And convert the A/C - changing out the valve cover gaskets after 133k miles while they can get at them).
Then when it gets back, the stereo goes in, new carpet from http://www.autostyles.com/ftcarpet.htm#Explorer
goes in, put the seats back in, and I am probably going to paint the whole truck with some brand of Herculiner like material to keep from scuffing the paint in the woods.
Any thoughts, suggestions, comments are welcome.

 :fire: