MoabB2's Body Restoration Thread | Page 2 | Ford Explorer Forums - Serious Explorations

  • Register Today It's free!

MoabB2's Body Restoration Thread

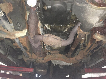
yeah cut it off, get a new BII support, weld it in :)
just like I am doing ont he 96, also makes putting the drivetrain back in and together SO MUCH EASIER. You can also mock up your radiator mounting fitment with the new piece out, they are like $80.

Happy belated B day!

the duff body mounts take some work, oh baby.....but on your truck they will be a snap since hes already got the cab off the frame (lucky) I fought the heck out of my 4 cab mounts, friggin Ford sleeved through the upper and lower bushings so a sawzall was required....

the Duff mounts are nice, but be prepared to buy a bunch of hardware (LARGE washers, longer bolts, nylock nuts, washers, etc. I used grade 8 hardware, just because I could...


Join the Elite Explorers for $20 each year.
Elite Explorer members see no advertisements, no banner ads, no double underlined links,.
Add an avatar, upload photo attachments, and more!
.


Not to much to update on... I'm in the Stripping process on the shell and it is very slow and extremely time consuming.

(June 12th) (Day #16)

Pretty much just the Final Tear down on the Shell. And designing the Front Radiator Support (The whole Support is going to be Cutout and a new Support Custom Fabricated out of Box Steel Stock.)
Every thing was Designed by the book and Double checked by one of the Engineer on base.


(June 13th) (Day #17)
Every thing (Top to Bottom - Inside and out) was Scrubbed and Pressure Washed. Then the Surface was Preped. Then the Paint Stripping began... By this time it was pretty late (Around 9:30 PM) Pretty much all I got done was half of the Driver Bed Side.


(June 14th) (Day #18)
This day was mostly Just stripping paint.
Got the Rest of the Bed Side done, The pillars, and half of the roof.
Then the onwer decided he wanted to change the materials used on the Radiator support. So I had to Figure out how I wanted to Re-Design it. And double check with the Engineer.

(June 15th) (Day #19)
Today I got to pretty much just work on Stripping the paint off.
Got pretty much every thing but the Pillars and the Cowl stripped on the Exterior of the Shell.

Here it is after just over 23 Hours of just stripping paint off:

1989BroncoII68.jpg


1989BroncoII69.jpg


1989BroncoII70.jpg


1989BroncoII71.jpg


I did not have any of the Right Abrasives (To late to get any) so the First day was pretty much just done with the 3M Strip Disc. (Very Slow...)
But once I got my process down it started to go a lot faster.

Pretty much
Step #1: 60 Grit Sanding Disc on the Sander Polisher. Down to about 3/4 of the way through the primer, Trying to hit as little steel as possible. On a low speed (Around 600 RPM). I don't like using anything under 100 Grit on the Sander Polisher to Strip to bare steel on this Modern High Carbon high Gauge steel (Very easy to build to much heat and burn through.


Step #2: Strip the Remaining Primer off with the 3M Strip disc on the Die Grinder.
I like the way the 3M Strip disc works, Strips pretty good, Does not Mar the surface of the steel, Allways a nice even cut around 100 Grit, Does not build up a ton of heat, And it last a long time! (If used right you can Strip half a car with one Disc).

Step #3: Go over and Remove and or smooth every thing out with 100 grit on the DA Sander.

I found this works best for me.


!Warning!

I Recommend that No one use 60 Grit on a Sander Polisher to strip paint without Several hours of experience with a Sander Polisher.
60 Grit on a Sander Polisher is pretty much a Heavy, High Torque Grinder. all it takes is you letting the Sander pull into a edge and instantly that edge is gone. You sit still for a second and you burn through the steel.

So if your new to stripping with a Polisher sander start with at least 100 Grit or higher and work your way down, Learn the easy way where the Burn through point of the steel is.


Richard


Can't use a Factory Radiator Support.
We are putting a Huge Radiator in and Move the Oil Coolers off the Radiator to the side.
I'm going to have to Fabricate the whole Radiator Support out of 1 1/4 11Ga Tube. :)


sweet! Then why keep the inner fenders? Just do tube from the firewall forward, that would be the route I would take.
Also oil coolers on the side will require fans, because the engine fan wont pull air through them.

I am sure you got this covered already though, looks *****in!! Someday I can do this to my poor BII....


WOW! is all I can say. I just read all of this thread. Very professional and informative. It really shows that your taking the time and effort to do it right. Where the Duff body mounts go. How is the integrity of the supports where the mounts go? On mine I had to fab up certain parts cause of rust. Also that Raptor liner that is two parts. Can that be bought at local auto stores?


There is no reason to Tube the inner fenders. It is plenty strong, And if there is ever a front end collision the Inner fenders would collapse, Instead of tearing the Cab up, And transferring more force to the Driver.


Richard


I'm not sure what you mean by local auto stores.
Like AutoZone, Checker, etc.?
No you have to be Certified to carry anything with this high of VOC's

But a Local Paint Jobber may, There are several different brands and many are good, Such as Sem has a two Part Urethane Liner, Gator Guard is a pretty good one, and many others.

There is not much rust on this Vehicle, Only bad rust is just some in the Rear Trunk floor by the Hatch. (Not to bad though.)


Richard


RatStang said:
I'm not sure what you mean by local auto stores.
Like AutoZone, Checker, etc.?
No you have to be Certified to carry anything with this high of VOC's

But a Local Paint Jobber may, There are several different brands and many are good, Such as Sem has a two Part Urethane Liner, Gator Guard is a pretty good one, and many others.

There is not much rust on this Vehicle, Only bad rust is just some in the Rear Trunk floor by the Hatch. (Not to bad though.)


Richard

thanks for that info :thumbsup:


Well not to much more progress. I have finished the Bulk of the Stripping and moved into the Detail Stripping Process. (Door edges, etc.)

I don't really have time to go into detail.

But here it is after about 59 1/2 hours into the Stripping process...

1989BroncoII73.jpg


1989BroncoII72.jpg


I think I have about today and maybe tomorrow and then I should be moving on to Body Work. :)


Richard


Finished up on the Stripping of the body on Friday (june 23rd)
And started on building the Custom Radiator support.

1989BroncoII74.jpg


1989BroncoII75.jpg


Here it is after 2 1/2 days and after 25 Hours of Tearing out the Old Support, Designing, Notching, Grinding, Cutting, Re-Designing and then welding and Re-Designing again...

1989BroncoII76.jpg


1989BroncoII77.jpg


1989BroncoII78.jpg


1989BroncoII79.jpg


Richard


Wow. Just read this whole thread. Looks like you've done a great job on it so far. :thumbsup:


bmxking5 said:
Wow. Just read this whole thread. Looks like you've done a great job on it so far. :thumbsup:
Thanks! I hope it all turns out well, I can't wait to see it.


Looks good. Those 3m strip discs. Are they round and screws into an adapter? Looks more like a ruff fiber then sandpaper? If so that's the same ones I used, and really left a smooth finish on the metal. That radiator. Is the top leaning in a lot towards the engine? Is so do you think the fan will draw down at the bottom of the radiator?


that radiator looks low? could jsut be me and the pic...looks like a nice rad support, good work :)


rookieshooter said:
Looks good. Those 3m strip discs. Are they round and screws into an adapter? Looks more like a ruff fiber then sandpaper? If so that's the same ones I used, and really left a smooth finish on the metal. That radiator. Is the top leaning in a lot towards the engine? Is so do you think the fan will draw down at the bottom of the radiator?


They are 3M Scortch Brite (They are a Scotch Brite Fiber Wheel) Strip disc.
And it is not SandPaper.

I get mine at WalMart because they have the best price (Still pretty expensive at about 6 Bucks each.
I use the household ones instead of the Automotive ones because there cheaper.

This is one on the right

strip3.jpg


The Radiator is not Mounted, It is just sitting in the Holder on the Bottom and leaning against the Radiator Support up top. (Not Mounted)


Richard


nice work! Which rad did he decide on?


410Fortune said:
that radiator looks low? could jsut be me and the pic...looks like a nice rad support, good work :)


Yes the Radiator sits pretty low. He has been having trouble getting to his Filler Cap, And the plan was to put the Radiator in the Center. But it would not Fit between the Frame Rails. So we made it as wide as possible (About 1/8th of an inch gap on each side of the Support from the Frame.)

There is a 3 inch Gap On the Top for easy access to the Cap (With the Cap on there is only about a 2 inch gap), And easy Removal of everything. (The Radiator Support is Bolt on, So it can be removed to pull the engine or body out.)


Richard


410Fortune said:
nice work! Which rad did he decide on?

It is SpeedWay Motors Tru-Kool 2 Row Aluminum Radiator.
24 Inches Wide 19 1/2 inches tall


Specs:
All Aluminum Furnace Brazed construction (No Epoxy),(No Gaskets)

2 Rows of 1" Aluminum Tubes (Out Cools 5 Rows of Copper)

Maximum amount of Fins per inch, Allows greater heat transfer

Billet Filler Neck (Not Stamped)

It is made In the US by Northern Radiator.

But Before it was shipped this Radiator was Dropped and has a small Pinhole. (Thats why it looks so beat up) So Josh Called this morning and they sent out another Radiator today.


Richard


Join the Elite Explorers for $20 each year.
Elite Explorer members see no advertisements, no banner ads, no double underlined links,.
Add an avatar, upload photo attachments, and more!
.


Nothern makes awesome units, they can recommended to me after my Ron Davis 2 core aluminum had header failure....

that sucker will cool that V8 just fine, mine hardly hits 210 even towing the boat, my trans has yet to see 165.

Mine is a similar size, only mine is not as tall, but is wider.
Nice work, again. Having a bolt on support will make it oh so easy to get the engine and trans in as one unit...


Back
Top