MY experience installing an OEM trailer hitch... | Ford Explorer Forums - Serious Explorations

  • Register Today It's free!

MY experience installing an OEM trailer hitch...

Bobs2018ExplorerSport

Elite Explorer
Joined
February 4, 2019
Messages
249
Reaction score
99
Location
USA
City, State
Livermore, CA
Year, Model & Trim Level
2018 Explorer Sport 4WD
Callsign
KD6ANY
Having posted some time ago on my experience installing an aftermarket trailer hitch on a 2018 XLT, I thought I would now share my recent experience in installing a Ford OEM hitch kit (P/N JB5Z-19D520-AA) on the same vehicle vintage.

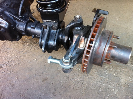
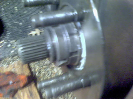
The steps are pretty straight-forward (although a bit labor-intensive)... first, you must remove the rear bumper cover, lower the mufflers a bit (easy), then remove the existing under-the-cover bumper (a hollow steel bar), and replace that with the new steel piece that now also includes the actual hitch receiver. The harder part is figuring-out exactly where to place the cutting template (as the included instructions are simply "pictograms" without much useful detail), and then making the cut-out in the original bumper using a Dremel tool (as the cutting process results in lots of hot, partially-melted chunks of plastic shooting all over the place and making a mess, including burning your arms if not covered). Once that is done, however, it took me more time than it should have to get the included trim piece installed, because the small holes I had drilled for passing the mounting screws through proved to not allow enough leeway to line up with the mounting holes in the trim piece, so I had to enlarge them in tiny increments before I could successfully line up all the holes with their mounting tabs.

Once the project was completed, the install looks OK, and it does eliminate the look of an aftermarket unit hanging down below the rear bumper. The only drawback on these units is that, even though its mounting is extremely stronger than any aftermarket unit (5 attaching points on the aftermarket unit, versus 12 attaching points on the OEM unit), it's still only rated as being up to 2000 lbs tow capacity, only because the vehicle still would not have come with the add-on engine oil cooler, special underbody air duct, and the "tow/haul" button that is included in the factory "tow package", which results in the factory tow-package's 5000-lb. towing rating.

(NOTE: See my other posting regarding adding the Tow/Haul button; it's pretty easy)!

To Ford's benefit, everything you need is included in this kit, except for the 4-way flat wiring kit, of course. No drilling is required, as all the necessary threaded mounting points already exist on the vehicle, plus two threaded holes that were previously taped-off at the factory. In it's basic concept, the whole thing is easy, but of course it takes some time to do it all (about 4 hours for me), but for a basically-clean look, it can be worth it.

NOTE: Since I first posted my experience using this "do your own cut-out in the bumper cover" kit, I eventually decided that I didn't like the looks of it... so I replaced the lower bumper cover valence with the version from Ford that comes with the opening and a cover for it. (See my later post down below). I will, however, leave THIS post up, for anyone who might decide to use this particular version.

1.jpg


2.jpg


3.jpg


4.JPG


Join the Elite Explorers for $20 each year.
Elite Explorer members see no advertisements, no banner ads, no double underlined links,.
Add an avatar, upload photo attachments, and more!
.


Awesome write up! I was just about to purchase the OEM one for my 2014- I have a aftermarket one that came with the vehicle. I really like the cleaner look of the OEM one...Imma pull the trigger!


Glad I could be of help; that's the whole point of my sharing my own recent experience.

BTW, if you wanted to go to all the trouble of "hiding" your newly-installed OEM hitch, there is also the option of replacing your rear bumper's "lower valance" with the one that comes with the cut-out (and a snap-in cover) for the factory-installed hitch. However, and unless you can find one in very good shape at a wrecking yard (which I don't have here where I live), a brand-new lower valance and cover will set you back about $400 on average, via various online sources....


Glad I could be of help; that's the whole point of my sharing my own recent experience.

BTW, if you wanted to go to all the trouble of "hiding" your newly-installed OEM hitch, there is also the option of replacing your rear bumper's "lower valance" with the one that comes with the cut-out (and a snap-in cover) for the factory-installed hitch. However, and unless you can find one in very good shape at a wrecking yard (which I don't have here where I live), a brand-new lower valance and cover will set you back about $400 on average, via various online sources.

As for me, I think I'm just going to leave it alone and let it be visible through the cut-out and panel that came with the kit, as I think it looks kinda cool just the way it is!

For the 2014, it comes with the cover on the kit. Your opening looks way more organized because of our year difference.


Thank you for pointing that out that important difference... because what I should have said (in my original post) was that the kit number I listed is ONLY FOR THE 2018-2019 MODEL YEARS! (It is P/N JB5Z-19D520-AA)

I'm sure the parts included in the various kits that Ford offers are likely different, depending on what model year they apply to.


Hello all... I know this has been asked many times before after looking at the forums, however I am wondering if anyone has any instructions/pictures for the following OEM kit (which is for a 2018 Explorer XLT)

Tow Bracket Kit
Part#: JB5Z19D520AA
Usages: Class I, Use With 2" Receiver Hitch, 71.00 LBS, 10/24/2017 - 03/03/2019, Explorer

I am also picking up the wiring hardness, since I already have the rear sensors in the back.

Tow Bar Electrics Kit
Part#: BB5Z15A416A
Usages: Trailer Tow - 4 pin connector to trailer, 10/24/2017 - 03/03/2019, Explorer

I know you need to cut the bumper, but how does it look in the end? Since this vehicle is a lease I have the next 19 months and now I will need to tow things or haul things, which is why I would like to get this kit.


Welcome to the Forum. :wave:
Since it is a lease, I would check with the dealer first before proceeding. There may also be something in the contract about modifying the vehicle. At worst, they would want you to remove the items and have a new bumper installed. At best, they would give you the go-ahead if plan to leave it on the vehicle at lease end.
I have merged your thread with this one on the same topic. Good luck.

Peter

Thank you @peterk9 I did not see this thread in my search. I already contacted the dealer, and was advised that as long as its a OE product it will not violate the TOS of the lease.


So I ordered the kit with the electric hookup, and had the dealer install it. To save you all the grief of looking at the pictures... it was a really bad install and I dunno what the tech was thinking while he was reading the instructions. So in short they will be replacing the bumping and due to this, I will get be getting the OE version with the trailer hitch hole already there, so there will be no need for cutting.

Since I am having issues with the removal off attachments, I just want to state that Beyer Ford was not the one who did the install (as shown on my plate).

EDIT: I had to become an Elite Explorer in order for me to delete an attachment.


IMG_1882.jpg


InkedIMG_1891_LI.jpg


IMG_1898.jpg


You realize that we still would like to see the pictures.😉

Peter


You realize that we still would like to see the pictures.😉

Peter

Already posted. I had to figure out a webhost since I could not attach them. Not only that, I am also having issues "deleting" attachments too for some odd reason.

EDIT: I had to become an Elite Explorer in order for me to delete an attachment.


Already posted. I had to figure out a webhost since I could not attach them. Not only that, I am also having issues "deleting" attachments too for some odd reason.

EDIT: I had to become an Elite Explorer in order for me to delete an attachment.
Thank you for getting the membership and supporting the site. You can now also 'attach' pictures. You could have asked a moderator to delete the attachments.

Peter


Hey SmoothJ,

While I do have the instructions that came with my kit (P/N JB5Z-19D520-AA), they were relatively useless to me (other than the template for the DIY cut-out in the bumper). I say this because they are your standard "pictogram"-type of instructions, with almost no English verbiage in the instructions to guide the person trying to install this. That made it real tough to figure out a lot of it all.

After installing my kit, I eventually decided to replace the lower bumper valence with the one that comes with the factory cut-out and snap-in cover, to hide it all. Because my 2018 did not originally come with the tow package, I had trouble trying to find a trailer light wiring harness that offered both the standard "4-Way Flat" connector AND the other "7-Way Round" connector... so, I bought a kit from eTrailer.com which offered only the 7-Way connector... then simply "bridged" the harness from my 4-Way Flat connector to the appropriate wires, and voila, now I have both connectors... just like the factory would have installed. Lastly, I did not like the cheap quality of the 7-Way connector that came from eTrailer.com (made in Taiwan), so I opted to instead use an OEM Ford socket (actually made by Pollak, but specially-branded for Ford), to complete my installation.

Here are a couple of photos. The first one shows the actual OEM hitch bar before I installed it. The second one shows my finished installation, once I had converted the lower rear bumper valance to the factory cut-out version.
OEM Hitch Pic1.jpg
OEM Hitch Pic2.jpg


Hey SmoothJ,

While I do have the instructions that came with my kit (P/N JB5Z-19D520-AA), they were relatively useless to me (other than the template for the DIY cut-out in the bumper). I say this because they are your standard "pictogram"-type of instructions, with almost no English verbiage in the instructions to guide the person trying to install this. That made it real tough to figure out a lot of it all.

After installing my kit, I eventually decided to replace the lower bumper valence with the one that comes with the factory cut-out and snap-in cover, to hide it all. Because my 2018 did not originally come with the tow package, I had trouble trying to find a trailer light wiring harness that offered both the standard "4-Way Flat" connector AND the other "7-Way Round" connector... so, I bought a kit from eTrailer.com which offered only the 7-Way connector... then simply "bridged" the harness from my 4-Way Flat connector to the appropriate wires, and voila, now I have both connectors... just like the factory would have installed. Lastly, I did not like the cheap quality of the 7-Way connector that came from eTrailer.com (made in Taiwan), so I opted to instead use an OEM Ford socket (actually made by Pollak, but specially-branded for Ford), to complete my installation.

Here are a couple of photos. The first one shows the actual OEM hitch bar before I installed it. The second one shows my finished installation, once I had converted the lower rear bumper valance to the factory cut-out version.

Looks nice, and mine will look like this as well due to the mix up at the dealership. So you you made connector using the harness that came from eTrailer.com and the OE Ford connector (Part WPT975). Was it just as simple as cut and splice?

Thank you for getting the membership and supporting the site. You can now also 'attach' pictures. You could have asked a moderator to delete the attachments.

Peter

True, but I wanted to support the site anyway. However for those that don't, this seems to me like a bug. I did not mean to sounds annoyed or ungrateful, but if I did - I apologize.


OK, what I did was I installed the Curt #56306 adapter & harness (ordered from eTrailer) that plugs into the existing connector up under the right rear fender area; doing this gave me all the working connections required for the trailer lights. (Note that these harness kits are vehicle-specific for various model years; other years may use a different kit). This kit also came with a cheap, basic aftermarket (Taiwanese-made) 7-Way Socket, that used screw terminals to connect the harness wires to.

Because I wanted mostly genuine Ford parts for this project, I purchased the OEM Ford-labeled 7-Way socket (XL3Z-14489-BA), to use instead of the Taiwanese socket. This socket is actually made by Pollak, and is identical to the Pollak #11-998P socket sold all over, but the OEM one has the Ford logo on it. In any event, instead of utilizing similar screw terminals, both the Ford and the Pollak versions utilize a special weatherproof snap-on connector on the back. You can buy this special connector, that comes with a 4-foot, 7-wire pigtail, which is what I did (Pollak #11-998P), along with a rubber sealing boot if you want (Pollak # 11-761), for added weatherproofing. Since the Ford socket is made for them by Pollak, all of the Pollak-labeled pigtails and plugs are interchangeable, regardless of whose name is showing on the socket.

I then took the 7 wires coming from the just-installed plug-and-play harness unit and added a standard aftermarket (U-Haul) 4-Way Flat connector and harness, and then "bridged" the 4-Way Flat wires to the matching wires coming from the under-fender harness... then also bridged the 7 wires coming from the special snap-in connector & pigtail... and carefully soldered all of the connections together, finally securing them all with shrink tubing and electrical tape, for a truly weatherproof connection.

All this was then plugged-into the back of the 7-Way Socket, finalizing all the wiring into both the 7-Way socket AND the 4-Way Flat connectors.

The photos below kind of show the sequence, of how the project progressed...
1.jpg
2.jpg
3.jpg
4.jpg


Back
Top