My First Explorer, 2000 EB | Page 22 | Ford Explorer Forums - Serious Explorations

  • Register Today It's free!

My First Explorer, 2000 EB

As per the instructions above here's the info:
2000 Explorer Eddie Bauer Edition 5.0
I'm from Parsons KS and you can contact me easily through a PM here.

Well, they aren't good pics. They were provided by the seller using a cell phone. But this is my 2000 Explorer Eddie Bauer Edition. I am going to "visit" it today at the sellers house and pull the radiator. My next day off I get to install a new one (would do them both today, but had to order the radiator). Jon (Turdle) has already provided me with the link to the radiator replacement thread. (Thanks again Jon)

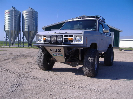
Mods will be slow due to funding and the need to finish putting an engine in my other vehicle (seen below). Probably just go with exhaust and slightly more aggresive tires when funds allow. Any suggestions for basic upgrades? LOL I'm a seasoned Veteran with Thunderbirds, but a newbie with Explorers.

Explorer01.jpg


Explorer02.jpg


Explorer03.jpg


Explorer04.jpg


Explorer05.jpg


Explorer06.jpg


Explorer07.jpg


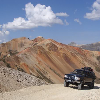
My other vehicle can be seen here:

GT_Touched_SM.jpg


Join the Elite Explorers for $20 each year.
Elite Explorer members see no advertisements, no banner ads, no double underlined links,.
Add an avatar, upload photo attachments, and more!
.


NAPA top of the line "Ultra Premium" brake rotors and pads for the Expedition. The Explorer (Lil Eddie) gets them next but the Expo (Big Ed) needed them more.

The trailer could probably use a new set of brake shoes as well, I just put new wheels and tires on it.

20211121_144449.jpg 20211121_151311.jpg 20211118_173229.jpg
 

Attachments

  • 20211121_144449.jpg
    20211121_144449.jpg
    135.2 KB · Views: 76
  • 20211121_151311.jpg
    20211121_151311.jpg
    162.8 KB · Views: 77


Join the Elite Explorers for $20 each year.
Elite Explorer members see no advertisements, no banner ads, no double underlined links,.
Add an avatar, upload photo attachments, and more!
.


So very excited, my new RLC rear bumper/spare tire mount is supposed to arrive this week. James has been great to talk to, very informative, honest, and forthright. I asked if he could put a hole big enough to mount the 7 pin trailer hookup and he said he'd try but there wasn't a lot of room back there. Also for the LED back up lights I'd like to install. He said a 4 week lead time and when I called him 4 weeks after ordering the bumper he said he had just packed it that day and was shipping tomorrow. (which would have been last Thursday the 2nd) I'm lucky in that I have a commercial address to ship it to (NAPA store near me). I plan to paint it the same Harvest gold as the rest of the trim and the front bumper.

other news, I just installed new LED headlights. They may actually be TOO bright, I'll have to wait til dark to see how the high beams and low beams compare etc. Pics then.


Well, the lights are difficult to figure out. I got them in, and checked them when it was dark. It looks like they are bright when I have them on low beam, and lower when I have them on high beam. Any chance they are in upside down?

Edit: Got the lights working correctly. They weren't upside down, (180*) they were off by 90*. I sat at work wondering, and looked up the lights again on Amazon. Actually watched the video this time. The chips need to be pointing to 3:00 and 9:00, and I had them at 12:00 and 6:00. It took longer to remove the Airbox and the Battery (and put them back in when done) than it did to fix the lights. They are very bright, but still not as bright as those 7" spotlights are! hehe


Yes, turn them 180*.
These can be fun to dial in, but once you do, they are amazing.
I replaced the housings with clear lens when I did mine, to get the most out of them. The stocker's, just robbed them of too much output.


Thanks, I'll give that a shot, hope it works. I replaced the housings shortly after I moved to AZ, they're still in pretty good shape.


Well the spare tire rack arrived today, but the bumper has yet to show up. I'm assuming they were shipped separately. I'd take a pic of it but I'm at work, and Boeing regs don't like cameras. So once I'm home... :)


Yep, the actual bumper arrived today! It is one heavy mutha. He managed to get the holes for the LED back up lights cut, but apparently couldn't find a way to cut a hole for the 7-pin trailer plug. I'll study on it for a bit, might just have to mount one under the rear of the truck.

pictures this weekend


The parts unwrapped and ready for testing.

20211211_122042.jpg 20211211_122147.jpg


Got the OEM bumper off and the new one on. Once I got it lined up the OEM bolts fit right in, easy

The tire/gas rack fit right on easily. I need to remove the worthless rear wiper but that shouldn't be a problem. I still need to head to lowes and get bolts for the gas can holder, but it lines up very well.

20211211_133014.jpg 20211211_134132.jpg


Spare fits on there nicely. 😁
Though I need deeper or open lug nuts to hold it on.

20211211_140131.jpg


Test fitting all done. Now I get to take it all apart again and paint it, then put it all back together again. Fun fun fun.

20211211_140842.jpg 20211211_150626.jpg


Painted and ready to go. Still have to figure out where to best relocate the tag.

20211213_085055.jpg 20211213_085043.jpg 20211213_085036.jpg


One idea:
Use that space on the right near the hinge.
Use the stock tag light harness to power a new light.
Fasten the pigtail to the backside of the tire swing, and run between the bumper and under hatch gap near the hinge.

Lil Ed tag location.jpg


LoL Actually that idea is currently leading all others that have crossed my mind. Good to know we think along similar lines. I'm also wondering if there is a rule about how high a tag can be. Considering mounting it to the back of the roof rack when I get it built, just a thought. But for the time being I will probably mount it in the spot shown. I also need to get those LED Backup lights wired up, and find a more permanent way of securing and locking the Jerry can.


Tag problem solved, lights wired up and good to go.

20211218_160924.jpg


Already working on that. (Well, in my head... lol) There's a little shop around the corner from me that does exhaust work reasonably. They put the Flowmaster in my Expedition. I'm sure they can bend a pipe and weld it in.


I replaced the OEM backup bulbs with LEDs. BIG difference. I replaced one and made a comparison (Shoulda got a pic of that) the OEM was downright yellow.

20211229_215745.jpg


Join the Elite Explorers for $20 each year.
Elite Explorer members see no advertisements, no banner ads, no double underlined links,.
Add an avatar, upload photo attachments, and more!
.


The bright lower lights are built into the new bumper. the upper ones are the OEM locations with LED bulbs.
NAPA carries a full line of LED replacement bulbs. But don't get the Putco branded ones. I don't know if they are better or not but they are VERY expensive.

I got busy yesterday and now the entire exterior of the truck is LED. headlights, Turn signals, brakes, parking lights, everything.


Back
Top