PTU Build Thread | Ford Explorer Forums - Serious Explorations

  • Register Today It's free!

PTU Build Thread

ecoboost_xsport

Mad Scientist
Elite Explorer
Joined
March 29, 2015
Messages
566
Reaction score
291
City, State
Orangevale, California
Year, Model & Trim Level
2015 Ford Explorer Sport
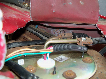
So, this is my attempt at doing what little we can to improve the PTU with what is currently available. I’d also like to make it a resource for those of you looking for detailed photos of the latest version of our PTUs (which has the cooler). I’ve completely torn down the PTU, and sourced all brand-new seals for it. I will keep the photos at max resolution so apologies for their size, but some may find it helpful.

Well, looks like the XSport is beginning to experience some of those dreaded PTU failure symptoms. Last time I was underneath the truck, I saw quite a bit of oil covering the body of the PTU, and soaking the portion of the exhaust that sits underneath it. It hasn’t failed, in that I don’t have any drivability issues yet, but it is coming I’m sure. I will say, that I have NOT been proactive with changing of the fluid. Not because I’m lazy but because I was not aware of the PTU issues until very recently. Call it my ignorance on it, but regardless, I’m glad I caught it when I did. It’s a 2015 with just a hair over 30K miles on it. I don’t drive it much, believe it or not, this is pretty much my dedicated project car.

hefvP0Kj1DS4Q?width=2268&height=4032&cropmode=none.jpg


Anyway, being the consummate prepper that I am, and wanting to keep downtime to a minimum, I went and purchased a brand new one before I am even taking the old one out.

Ford Part Number: DG1Z-7251-F

My punch list for things I want to accomplish with this:
  • Change drain plug to bottom of case in order to ensure complete drainage of fluid when performing oil changes.

  • Extend hose from vent to top of engine bay to facilitate future oil changes and fills.


  • Send all gears, cast components, bearings and case to receive cryogenic treatment (www.nitrofreeze.com).

  • If possible, research possible higher quality bearings to replace existing ones.

  • Apply gold metallic radiant heat reflection material to outside of case.
pLGC4F1K0CTLg?width=1960&height=4032&cropmode=none.jpg


lHlitj35nUmqA?width=1960&height=4032&cropmode=none.jpg


J--Dd5Ogx4tSQ?width=4032&height=1960&cropmode=none.jpg


bzKArMAWuFT2A?width=4032&height=1960&cropmode=none.jpg


wU0uiDqf0KmJA?width=1960&height=4032&cropmode=none.jpg


qeMyn3Wv4aQXw?width=4032&height=1960&cropmode=none.jpg


Bi3z_vZLApfbw?width=1960&height=4032&cropmode=none.jpg


Join the Elite Explorers for $20 each year.
Elite Explorer members see no advertisements, no banner ads, no double underlined links,.
Add an avatar, upload photo attachments, and more!
.


Now I want to say, I truly believe if you have an older SHO/Flex/XSport that doesn’t have this cooler, you COULD make this version with the cooler work. It would take some effort, but I am certain it could be accomplished. You’d have to buy the hose:

Ford Part Number: BB5Z-8A519-G

AOWq21Lm5mDOag?width=1600&height=925&cropmode=none.jpg


Then run your lines through an aftermarket pump and heat exchanger of some sort. It would be a pretty trick setup if done right.

And for those of you wanting to do just that and get REALLY fancy by using the included temperature probe to wire up to the pump or some sort of temp gauge, I think I did some of the legwork for you on giving you some data on the output of that probe and how it correlates to temperature. The following photos are for the hardcore nerds out there. I figured since I have it off and I have the tools to do this, I’d pass this onto you guys. What I did was use two of my Fluke meters, using one that has temp reading capability with a probe end right next to the actual probe itself, and use the other meter to read the resistance output of the probe at various temperatures. I created those various temps using ice water then boiled water. Dipping the ends of each probe into the liquids and taking temp recordings at various intervals. If anyone is interested in compiling a data set and chart this thing, feel free. I haven’t gotten to it yet. I have no idea if this data is useful, but even so, here ya go:

jJ9OoAkJ7_rHGg?width=1024&height=498&cropmode=none.jpg


WOZKtLZzZAUVA?width=1960&height=4032&cropmode=none.jpg


dp_abvkqLRFRQXv45vmqhB9IITRWjDrAjEVg?cropmode=none.jpg


KhinLa5FeuucU5FOCzI8DAUMdHk3AqpCFQLA?cropmode=none.jpg


rfvj8Spx5TvfHKaS3D09pNiFp8igSKTkqmNw?cropmode=none.jpg


miSiwbzWJhZXnpXdl3px_RejS4PQEtK9P4VA?cropmode=none.jpg


As I disassembled it, here is what the cooler actually looks like. It isn’t very complex, I wonder if there is any way to improve it:

CGteaHJE9Gpxw?width=4032&height=1960&cropmode=none.jpg


ATlVTNEuEFESQ?width=1960&height=4032&cropmode=none.jpg


oFn0bUtCt2eGQ?width=4032&height=1960&cropmode=none.jpg


So, before I started complete disassembly, I ordered a replacement for every single seal, gasket or one-time-use part as I wasn’t sure how much I would destroy trying to take them apart. Below is a list of all the Ford Part Numbers you will need as far as seals or seal kits go:

  • 7T4Z-7086-A (Qty: 1)
  • 7E5Z-7H469-C (Qty: 2)
  • DB5Z-7275-E (Qty: 1)
  • GB5Z-7275-A (Qty: 1)
  • 7T4Z-7R284-A (Qty: 1)
This does NOT include replacement of the cooler medium. The edges of it are rubber, but it was in good shape and I couldn’t find the part number anyway.

Here’s a bag of all the old seals after being removed. The stuff in this bag will be thrown away, but not until it’s all done, LOL:

xMeqES5HfRH1g?width=2614&height=1960&cropmode=none.jpg


When you take it apart, make sure you have some sort of catch for the oil that will come out, as it comes filled from Ford. I have a large oil drip cookie sheet that I was working on. Worked great! BTW, I forgot how much I hate the smell of gear oil…

When you finally get it apart, you will find it somewhat difficult to remove the gears from the side of the case. In order to remove them, you will have to basically destroy the white end seal/plastic cover that is pressed onto the end of one of the gears. Make sure you get a new one, but once you do, don’t be afraid to just break it, it’s hard plastic. Once it is off, the gears will all come out one after the other.

20HrKpkCLATmg?width=1960&height=4032&cropmode=none.jpg


LxBiGafkrd8uQ?width=1960&height=4032&cropmode=none.jpg


I just used an air impact to remove the nut off the end of the pinion gear. That nut will be replaced and is included in the new parts kits. Be advised, many of the seals will have to be destroyed when removing them.

I decided to remove all the seals as I wasn’t sure if my disassembly would damage them at all and, more importantly, they may not survive the cryo process. So, when I send all the parts to cryo, they will be disassembled bare metal.

m0U3GugTQ0E_A?width=4032&height=1960&cropmode=none.jpg


E63Sx6MqBY2zQ?width=1960&height=4032&cropmode=none.jpg


lYeLYgNnBThjw?width=1960&height=4032&cropmode=none.jpg


aETqD3brwIqrg?width=1960&height=4032&cropmode=none.jpg


a40or5nKljB0w?width=4032&height=1960&cropmode=none.jpg


jlUVJcvFwrHag?width=1960&height=4032&cropmode=none.jpg


As for the bearings. My goal is to try and source some higher quality ones, if they exist. I imagine Ford made some specifications for bearings they needed, then sent out the contract for the lowest bidder to meet those specs. Most of the bearings are Iljin, whom I’ve never heard of, but looks to be a Korean company. I’ve found some in-depth documentation on some of their bearings but so far, nothing about the ones within the PTU specifically. I’m hoping to find some equivalent or better versions via Timkin or Torrington, maybe some SKFs. I removed as many of the bearings as I could:

G2M09kVjfxyEQ?width=1960&height=4032&cropmode=none.jpg


The only one I cannot remove was the one behind the pinion gear head. It sits in a recessed pocket and no puller can get behind it without destroying the bearing cage. Even though I will begin the process of looking for better grade bearings, I didn’t want to risk destroying this one as it may end up being a unicorn bearing and not easily sourced/replaced.

ASSISTANCE FROM FORUM MEMBERS: If anybody has an old PTU that they replaced laying around and can take it apart and either send me the pinion gear with the bearing on it or feels like removing it (even if it’s destroyed) and tell me what the part number is, I can better research it. For some reason, of all the bearings in this PTU, the parts numbers are not showing on the visible end. I think they are on the backside.

Dg9B5rVMYcYuw?width=1960&height=4032&cropmode=none.jpg


ASSISTANCE FROM FORUM MEMBERS: Although I have some good resources for locating bearings, I am always open to “crowd-sourcing” this task. If any of you guys have a good bearing “guy”, here are some of the bearing numbers:

LlVAruLAwnCOg?width=1960&height=4032&cropmode=none.jpg


XiHU5kt6F3OsA?width=1960&height=4032&cropmode=none.jpg


btek8Hj0jw4Cw?width=1960&height=4032&cropmode=none.jpg


_B-2jcLN7RLdg?width=1960&height=4032&cropmode=none.jpg


ha1nBWzprv7lA?width=1960&height=4032&cropmode=none.jpg


tnfiUrAPOgfPw?width=1960&height=4032&cropmode=none.jpg


Anyway, here are all the parts I’ll be sending to WPC:

-jaIPcs--N9cA?width=1960&height=4032&cropmode=none.jpg


I spoke with one of their reps regarding having parts with bearings still pressed onto shafts. Their response was, although they recommend removal of all roller/ball bearings, they CAN still apply the WPC treatment, but it is absolutely imperative that a very extensive and thorough cleaning job be accomplished on the bearing prior to installation. They do ultrasonic cleaning, so it should be pretty good, but I also have a high-quality industrial grade parts washer I will put all the parts through as well once they come back.

The cryo treatment will be performed after the WPC treatment and I will include every metal component I can for that one. It will be sent over un-assembled except I will re-press all the bearings back onto their respective location. I use a bearing heater prior to pressing them on (it gets pretty damn hot) and don’t want that to cancel out any gain provided by the cryo treatment in doing so. I will do final assembly and seal installation after it all comes back home. There is no case gasket but looks like they used something similar to Yamabond, which I’ve used successfully to seal Harley Davidson Twin Cam cases. It should work fine in this instance as well. Then fill it with some Amsoil Severe Gear Oil:

I5aVemj0cwQ8gw?width=498&height=1024&cropmode=none.jpg


And finally, the piece-de-resistance, the reflective material.

M3nlA_odKgs95g?width=498&height=1024&cropmode=none.jpg


My heart tells me this is snake oil, but my brain tells me that the logic behind it is sound. I figured, what the hell, what harm can it do. It really only works to reflect radiant heat, so not sure how effective it is in the real world, especially where I will be putting it. Anyway, just doing every small thing possible to keep this thing cool, which is really the true killer of this thing.

I know it’s been said that regular oil changes can keep this thing alive, but figured I’d try a few additional steps.

So, right now, I’m getting ready to pack the parts up for the WPC treatment. As I proceed with the PTU build, I’ll post updates…

Thanks!


Excellent thread! I had a leaky PTU :D haha, sounds like an old man problem! Mine thankfully was the vent tube at the top coming off after having my transmission replaced. Be good to see what you need to replace this one.


My PTU actually cracked at around 60k. The oil started dripping on the exhaust filling the cab with the most god awful smell. Took us a week to figure it out. Wish I'd taken pics of it when it was out. You may be onto something if you can get one to last.


I may have missed it, not sure.

Are you planning on heat wrapping the dowpipe and exhaust in that area?


Man you’re going all out. Awesome and good luck with the build.


I may have missed it, not sure.

Are you planning on heat wrapping the dowpipe and exhaust in that area?

No, my exhaust system has down pipes that are made of 321 stainless (not standard 304), which retains and insulated heat better, acting sort of like ceramic coating 304. I cringe when I see or hear people wrap their exhaust pipes. I know it works (I've done it in the past), but it retains moisture and over time will destroy the pipes underneath. I think I've rusted through 4 or 5 heat-wrapped motorcycle pipes in my day. I know stainless doesn't rust or oxidize as bad, but it will still see some damage from the wrap. So, needless to say, I'm no fan of heat-wrapping, but as I mentioned, it DOES work.


Do you know what thread pattern the drain plug uses or could you measure it if yours is still apart? It would be nice to figure out a Fumoto style quick drain plug so changing the oil doesn't make such a mess. I have changed mine twice and the oil clings to the case and drips all over the exhaust and goes all over. A Fumoto style quick drain with a nipple so a hose can attach to it would make changing the PTU oil so easy it could be done every other engine oil change if I wanted.


Do you know what thread pattern the drain plug uses or could you measure it if yours is still apart? It would be nice to figure out a Fumoto style quick drain plug so changing the oil doesn't make such a mess. I have changed mine twice and the oil clings to the case and drips all over the exhaust and goes all over. A Fumoto style quick drain with a nipple so a hose can attach to it would make changing the PTU oil so easy it could be done every other engine oil change if I wanted.

I still have it off, but dont know the measurement off hand. I dont like that side plug for that very reason so I just made my own anyway.

You could always do the conversion and buy a set of these off me:


I've got a bunch of SHO folks interested.

Here it is installed:


Back
Top