Replaced Valve Cover Gasket - Still Leaking ! and still leaking - FIXED | Ford Explorer Forums - Serious Explorations

  • Register Today It's free!

Replaced Valve Cover Gasket - Still Leaking ! and still leaking - FIXED

Watchman

Well-Known Member
Joined
November 11, 2013
Messages
219
Reaction score
19
City, State
Virginia
Year, Model & Trim Level
1993 Explorer Sport-4WD
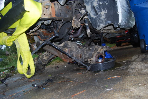
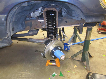
Due to an issue to a leak at the rear side corner (outboard - to the LH tire), I replaced the driver's side valve cover gasket with Fel Pro VS50368C gasket. Both the valve cover surface and the engine surface were cleaned very well. I even made sure that the valve cover surface was flat. I put a very light coat of black Permatex RTV to both the valve cover surface and to the mating surface on the engine. I also put a bead around the holes. Then I placed the gasket on the engine side lining up the holes and then placed the valve cover on top. I also had bought new keepers and used them on under every valve cover bolt. I tightened the bolts until snug (guessing around 7-8 ft-lbs) and then retightened after a few minutes. After putting everything back together and letting it sit for an hour, I took it for a 20 mile drive. This morning I noticed that the two middle bolt areas on the outboard side (closest to the LH tire) had oil around them. None of the other bolts or surfaces had any leaking oil. Maybe I got Permatex into the holes .. I don't know. I would appreciate any help or suggestions here.


Join the Elite Explorers for $20 each year.
Elite Explorer members see no advertisements, no banner ads, no double underlined links,.
Add an avatar, upload photo attachments, and more!
.


By not allowing the permatex to cure before starting the engine the hot oil created a channel and thus your leak.

When using silicon gasket sealers you should let them cure under light pressure first and after it has cured torque the cover. Torquing the cover with the sealer wet puts it under no compression and makes it barely better than no sealer at all.


I believe you are right Centaurious. And it appears to be coming thru the bolt holes. Funny though .. it is only 3 on the lower side that are leaking. The other one is dry and the upper 4 are dry. No leak coming at all from any part of the gasket border itself. Should I try to use a rubber washer and eliminate the triangular keepers ? Or should I pull the cover back off, clean it up and use a different sealant that cures quicker.. any suggestions ? What do they use in the repair shops ? The Permatex Ultra Black takes 24 hours to cure. Thank you for your feedback.


I would be inclined to go the rubber washer with a steel washer on top. Doing all 4 lower bolts as well. That said, if you have the time and a second gasket it never hurts to do it right. I have had great luck with Permatex Ultra Copper.

Best of luck which ever way you choose. :D


And I'd be inclined to retorque them after a couple of days (several heat cycles)


I bought a package of sealing washers from Fastenal. I removed the three bolts and noticed that the triangular keepers were coated with oil on the bottom. So I discarded the keepers and installed the sealing washers tonight and took the Ex for a 15 mile drive. Checked the 3 bolts and looks dry, except the rubber from the sealing washers are braking apart due to the heat, However, these sealing washers are made up of a semi-conical steel washer with a captive rubber washer . It is not leaking ... maybe the steel washer is sealing ... but I am going to check it in the morning and report back. I may have to pull the cover and try using the Permatex Ultra Copper and let it sit for a day as Centaurious recommended before running the engine. I do have a spare gasket. Thanks again for the feedback.


2 stroke dirt bikes use copper washers and flange head bolts to seal coolant in the head. It might do the trick in your case. If you want to replace the gasket, I've used purely RTV in the past and had it seal, however, it is a bear to get off again if you want to work on it. I've never had luck with cork gaskets in any application. They usually seal fine, but rarely last. I use the silicone/plastic "permadryplus" gaskets with no failures to date.


Thanks for the tip 2 stroke. This morning I checked the bolt heads and they are still dry. I will check after a few more days. If there is leakage at the bolts, then I will give your copper washers a try. There is no leak at the mating surfaces anywhere, just these 3 bolts.


After driving an additional 35 miles all bolts, even the upper bolts on the valve cover are beginning to glisten wet with oil. I checked the torques. Nothing has come loose. But, interestingly, the gasket mating surface all around the valve cover is still dry. After thinking about the copper washers, would they possibly cause a dissimilar metal issue ? Will they seal against oil ? Or should I just pull the valve cover ... use the Permatex Ultra Copper, and then let it sit for 24 hrs before starting ? The issue is the leakage thru the bolts. I also believe I shouldn't apply any Permatex on the engine side mating surface. What do you guys think ?


On steel valve covers I make sure that the gasket surface is as flat as possible with a hammer, straightedge and a 1/2" x 2" x 8" steel bar held vertically in my vise. Previously over tightened bolts will dimple the cover and if excessive can cause the cover to bow up between the bolts.

I usually clean the gasket surfaces with a scrapper, scotchbrite pad, and acetone. Threading Q-tips into the valve cover bolt holes in the engine is cheap insurance against running a bolt down against oil and contaminating your work.

On our engines with the intake being part of the cover surface I apply a flat bead, credit card thick and about 1/4" wide, at the join points between intake and head. I put a coating on the side of the gasket I want against the cover that is about as thick as a credit card. Install the gasket on the cover and lightly press all around. Installing the cover is much easier with the gasket self-sticking. Install the cleaned bolts until they touch + 1/2 turn. After your sealer has cured torque the cover bolts and finish your work.

It is annoying to have to wait for the sealer to cure but that is the only way to put the sealer under compression and get a good seal. Without compression you are relying on how well the sealer bonds to the surfaces, which with silicone sealers is all or nothing. Ask anyone who has had to re-seal a tub surround, removing old silicone caulk is a royal pain except where it didn't stick and you have to mechanically scrape,sand, rub, etc, every trace to get the new caulk to seal because silicone will NOT stick to silicone.

Good Luck


Your instructions are very clear ... especially concerning the bolt holes ... hadn't thought about that contamination. 2 stroke brought up an interesting point on cork gaskets. You see I just completed the same job on my wife's 2002 Sienna .. but the gasket was NOT cork but a plastic/silicone material .. and I have no issues with leaks at the bolt holes or the gasket mating surfaces. On the Toyota valve covers there is an recessed groove where the gasket fits in .. you just have to be careful not to let the gasket "roll" on you when you install the valve cover to the engine mating surface. But on the Explorer valve covers it is a flat surface which makes it more challenging to get your gasket to stay put when installing the valve cover back on the engine. I believe your method is sound and I will try it but I am going to try to get a non-cork gasket.

Did you use cork based gaskets ?


I will tell you this use permatex the right stuff & your leak will go away . cures fast & works well . But it will be a pain if you ever have to remove the covers . As for gaskets use the fel pro perma dry plus vs 50368t . they are the best in my opinion .


I have pulled the valve cover, purchased the Fel Pro perma dry plus 50368t, and some permatex right stuff. I cleaned the bolt holes with Q tips. Everything is ready to put back together. The 50368t has a rubber surface that looks like it will keep out the oil. Is it still necessary to put a bead of permatex around the bolt holes ? I am finishing this in the morning so as to get a fresh start. Please advise. Thank you for the help.


just for extra care , yes run a bead around the bolt holes & on the crack between the head & lower intake manifold .Good luck .


Ok ... here are the steps I have done:

1. cleaned the bolt holes with q tips. very careful and cleaned all surfaces on cover and the engine. Made sure valve cover was level.
2. Applied Permatex "right stuff" bead around bolt holes on engine side and on valve cover holes.
3. Applied new Fel Pro perma dry plus 50368t gasket to valve cover.
4. Placed cover with gasket onto engine surface
5. Placed bolts with triangular keepers into cover and threaded bolts into holes.
6. Torqued until snug .. then waited 30 min and checked torque.
7. Let sit for 3 hours ... then started engine and ran for 5 min .. saw leak at outboard lower side corner bolt towards firewall. Bolt was a little loose .. so I tightened another 3/4 turn

So, I then let it sit for another 2 hours and took it on a 20 mile drive. So, now the other 2 bolts next to the corner on the lower side have leaks. Same bolts where I had the problem with the cork gasket. The oil is puddling below the bolts in the lip section area. I did made sure the surface of the valve cover was level after cleaning.

I am at a loss here. Does this "right stuff" need to sit over night ? It says vehicle can be driven right away. Do I need to go back to the cork gasket use the Permatex Ultra Copper and let it sit 24 hrs ?? Need advice please.


I always have let them sit 24 hours. Also, you said a bolt was loose. Are you sure the threads are ok on the cover? I mean you may not be getting proper torque on them (too much or too little), even if your TQ wrench says you are.

I think if the surface is not truly flat, if you have properly cured sealant and a good gasket, it should make up for that low spot. I've had good luck with Fel Pro too. Centarius suggestion about Scotch Brite pads and acetone is a good one, I would do that for sure.


I did use scotch bright pads. I believe I put too much torque on the bolts.


It just hit me that you said threads on the cover. The bolt holes on the cover are not threaded on my valve cover. Are they supposed to be ? Also, I do not have an inch-lb torque wrench. I just tightened until the bolt head was flat to the cover surface.


no the valve covers do NOT have threads , the threads in the head is what Rhett was refering to . I tighten my valve cover bolts with a 1/4" drive . once the bolt draws up I give it about a quarter turn . I have never had that much trouble with a set . If you lived close to Orange Va Id come take a look . Im going to think on this a few houes will get back later .


Join the Elite Explorers for $20 each year.
Elite Explorer members see no advertisements, no banner ads, no double underlined links,.
Add an avatar, upload photo attachments, and more!
.


And I think that you are right gmboy .. I probably have over torque'd the bolts. I plan to remove the cover this am. I live in SW Virginia, about 3 1/5 hrs away from Orange .. I'm in Bland County .. so I don't think I will be able to get up there. My thought is to follow your torque method and get some Permatex Ultra copper .. and let it sit for 24 hrs .. then carefully check the bolts .. then put things back together .. I am also going to carefully check to see if there is any dimpling adound the bolt holes on the cover. Thanks again for the feedback


Back
Top