- Joined
- March 13, 2005
- Messages
- 7,283
- Reaction score
- 21
- City, State
- Martinsburg WV
- Year, Model & Trim Level
- 84 BII "Li'l Samson"
37's Hmmm.
I'm getting it cleaned up

Keeps growing each week

There seems to be a Critic viewing your work or they wanted to share their flu symptoms with the Forum.You owe me a keyboard and screen. I just threw up all over mine.
:thumbdwn: building and will be Wheeling soon. And if I have as good as success with this part of the build as the dozens and dozends other mods well, I'll let history speak for itself.i can tell the difference in wheelbase from that pic, I like the big open wheel wells.. I too was thinking "metal flares??" when you started this... but it came out real nice, not my taste but WTF does that have to do withyour truck? function over form I always vote
the BII is going to feel alot different now!
function over form I always vote
function over form I always vote
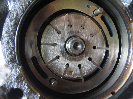
: but as 410 said functional : What a pain it was to get to fuel filter. Now it's just a few minutes. In that box is much much larger fuel filter that was on this truck. Had to modify end to make it work and also kept box for the new better filter part #. This was done while the primer was drying on the fenders.Your design of the flares look good completed and functional. You might have to widen you rocker skid bars to protect that extra width you added with tires and flares. I guess that all depends on how much mother earth and rock you want to get yourself into. There is no doubt that adding the access hatch for the fuel pump was a smart design. Anyone who has changed those flippin pumps out ,wished they could have gotten to it from the top.