Ricks Bronco: 1and 1/2 | Page 113 | Ford Explorer Forums - Serious Explorations

  • Register Today It's free!

Ricks Bronco: 1and 1/2

Sorry to hear about the back burner again.

DSC04807.jpg


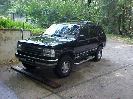
As usual after any drive train mod, a little trek out to the wilderness is in order.
This morning I went out roaming at "Sleepy Creek wildlife management area".
Such a cool place to roam around in the 20,000 + acres.
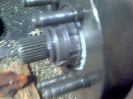
Need to check mainly on the clearance around the new drive shaft connection at transfer case. Yep, a little to close to a gusset on the transfer case support. I'll rearrange that no doubt.
Seems there might be some clearance around the transfer case u-joints also. I'll check that out when I yank the DS.

DSC04808.jpg


Thought I felt a little snag as it was going up. Should have brought some seeds to plant in that ferrow ha ha.
Something to do with departure angle maybe?
I'll see how much more I can move rear axle back. Really need some larger tires.
The approach angle was not bad.

Did some more flexing but batteries went out in camera :mad:


Join the Elite Explorers for $20 each year.
Elite Explorer members see no advertisements, no banner ads, no double underlined links,.
Add an avatar, upload photo attachments, and more!
.


Did find some small issues with cap and yoke clearance as I flexed this truck this morning.
A close examination showed some small rubbing. Nothing a die grinder won't fix.
Going to look into that problem with the rear dragging with those 33s. Like I said it's no big deal to turn some nuts to push the axle back further, do some turns on the coilovers, track bar adjustment and see if I can raise that hitch.
Or just section the complete back by removing a few inches at the rear Hmm.
I like the way that flange works out on the 50 case, just no slop at all. Now I still have plenty of telescoping in the shaft itself.
But got to keep this all in perspective, it's not a rock crawler or even a moderate trail rig. But must admit, it's one hell of a DD and then trail rig.
I'll post up some pics of what I did this morning.
Then back out and hit the same trail and keep my ears open for any metal rubbing ha ha.


DSC04804.jpg


Here's another pic that shows a side view of the conflict with receiver on rear.
May cut it off and weld straight to the side of the horizontal piece that goes from side to side. Now it's welded directly under it.
The gas tank shield is close also.
Just checked out the rear axle and it's no big deal to move back about another 1" to 1.5" further back.
Also next time I may winch the front end down some and see if that helps.

DSC04809.jpg


Found some markings like this that I had to grind down some.


Started working on addressing the departure angle of the rear this morning.
Just unbolted the two bolts that hold the rear radius arms to the frame and now the rear axle can be moved easily by adjusting the joints. I purposely set it up so there is plenty of adjustment left to extend arms to the rear thinking that this might be done later.
Just came in to get some cool air. The humidity is obtrusive in the garage even with both doors open. Might just have to put the window AC back in. Don't want to get too comfortable, I spend too much time in there as it is.
Post pics after the beads of sweat stop pouring off my face.


DSC04816.jpg


Now remember this axle has already been pushed back some. Here is a hold point of where it is located before the shove. The rear is toward the tape.

DSC04821.jpg


This is the side that is wristed. I removed the pin to make adjustments a tad bit easier.

DSC04822.jpg


Might as well check these bushings out for wear. It was just a seat of your pants check. Took the rod, inserted into bolt hole and felt the amount of resistance. Still good and snug. Added some more syn. grease which is the water proof kind.
Called Green Grease, guess their trying to be political correct ha ha.

DSC04824.jpg


Checked the bolt that the bushing rides on for any wear, and it looks like the day I put it in there. Added some more Anti seize to the surface. I'm sure this helped in keeping it from galling.

This is mod is going to also effect shock angle, ride height, track bar and DS among others.


Cant u ever just leave it alone? never mind, dont answer that :)


DSC04501.jpg


DSC04836.jpg


It was really no big deal to shove back an additional 1-1/4". The first pic is of the old location. Notice angle of shock. Then the lower pic you can see that it is more towards vertical.
An extra benefit was the since I did not change shock length it raised the back of the truck up an additional 3/4" as it came more vertical.
The shock angle is 76 deg. I'd like to have 80 as this would give the springs about %100 efficiency. Then I'd like to try an even softer rear spring. Right now they're 150s. Thinking of a little longer spring and around 125#/inch
With some more mods it would be no big deal to even push it back further but I'll wait and see.
Need to do some changes to the hitch and maybe rear bumper itself.
Also a new DS would have to be made if the WB increased any more.
And this is already a custom made DS.
Now if I can get some good numbers on the angles with 33s then imagine what it could do with some real tires ha ha.

DSC04828.jpg


DSC04832.jpg


Brought the bed rail up perfectly level.


DSC04840.jpg


Enter stage 2 of the Departure Angle mod.
Can't have any more days of the bumper and receiver hitch plowing the ground, Well unless this truck really went vertical.

DSC04841-1.jpg


When finished (well almost, I'll explain later) not only will the bumper be up higher and closer to body. The receiver hitch will not be below bumper.
When I first started taking the bumper and hitch off. I was not sure how I was going to do this. But that's nothing new on this build. I rarely go to other sites to get ideas, I just wing it as I go.
This is going to really improve the trail capabilities with this mod. Why go thru all the trouble of shoving the axles when the bumpr is too far out and hitch too low :rolleyes:


DSC04839.jpg


DSC04844.jpg


Now for the fun part...trimming departure angle eating crap off this truck.

DSC04845.jpg


Going to start with cutting off the last few inches of the frame. Poor poor Bronco.

One other thing, back to the rear stretch. I can start feeling the diffeference in the ride now with the front and back moved outbound. Just smoother. Turninig radius went down a tad.


DSC04849.jpg


Installing the back up lights to the relocated bumper. It is now hinged down to get to the lights.

DSC04852.jpg


Not that's about as close as I want.
Keep in mind the angle of the gas tank skid plate.

DSC04856.jpg


Drive toward the Light ha ha

Now to explain what I meant earlier when I said "almost".
Even though it's up slightly higher and moved back by Bobtailing the frame.
This is not the bumper I'm going to use...What?
It was used to mock up for the new 2x2" built bumper/receiver hitch.
Many moons ago someone posted why in the world do I have a Smittybuilt bumper when everything else was built.
Well nows the time to change.
Now that I know that it can be done I'm going to make it similar to the above one. The main difference is the space between the two parallel tubes will be the same 3" that the receiver snout is. Then it will be mounted directly between both square tubes.
Plus it will be heavy enough to weld on some of those D-rings or hooks.

Also I don't think that I should raise it up much more.
Notice the angle of the gas tank skid plate. I want to keep the bumper as high as that. My thinking is, why have the bumper any higher when the truck can't go past that angle. Now the bumper will act as a cushion if in fact the angled part of the skid plate does smack the ground.
I'll call that the interference angle height of bumper. Or the event horizon. That is, once the event of angularity reached the bumper, the affect can not cause damage to the tank. :D

The angle from the bottom of the old receiver mount was 35 deg. Now to the lowest point it is 53 deg. with 33s. May go a little higher, but we'll see. And still have to have room for tailgate in the lowered position.


While I'm waiting for more money to fall off the money tree. And I'm working on the rear part of the truck. Might as well do something about the overly heavy 98 Ranger tailgate that I have to man handle to get off and on, should take a crash course in some weight reduction.
That thing feels like it weighs 60 to 70#s. Not to mention that it robs from the low COG that this truck enjoys.
The bottom hinge pin is at the same elevation as the front seats...as if it has back seats ha ha. But one day I'll put some removable comfy lawn mower seats back there that will click in and out. Too many kids just want to ride some easy slow trails. Including this guy.
Not to mention each and every time I've taken some weight out it has strengthened the drive train considerably. Does Kinetics come into play?
And that weight hanging over the rear bumper wants to shove the rear around during turns.


DSC04857.jpg


You've probably wondered like my self while staring up into the Cosmos...Why is that dang tail gate so heavy, by looks alone it should not weight that much?
Well in the last hour I've found out. And it was not a pretty site.
That inspection plate alone feels like armor plate.

DSC04859.jpg


Getting past the point of no return.

DSC04860.jpg


Ford did not skimp on that black rubber covering. It's about 1/8" thick.
The top preliminary cut ate up two cut-off wheels. Sure some of it was due to the rubber but it was slow going for just thin sheet metal I thought.
Had to resort to the old sawz all.

DSC04865.jpg


My exploratory cut reveled 3 layers of rather heavy guage sheet metal not including the heavy rubber covering. Obviously there was more here then first met the eye.
The 1/4" tape is where my final cut will be.

DSC04862.jpg


With back panel removed. You can see the added structural supports.
I don't need any structural supports back there so out the whole mess goes.
Nobody's going to walk on it any way or ever carry a heavy load when in the dropped position.
In fact I really do not even drive around with a tailgate anyway, except during the hunting season.

DSC04864.jpg


You can even see the lightness :cool:

DSC04870.jpg


Just moved from Heavy weight to Bantam weight class in less then an hour.
Might, cover with a light guage aluminum around .030 with some horizontal beading, but then again may not. If it was covered some one would surely step on it, and that some one would be me.
It's surprisingly rigid given the weight of it. those breaks in the metal is what gives it it's rigidity.
When getting into the bed, stepping up on the tire is the way to go.

One could write a book on how weight affects the drive train including longevity and the way handling is affected not by just the weight but sometimes more important where is the weight located at.
Just think in the area of shocks alone. If the weight is high up on the truck it will put more strain on shocks trying to control lateral forces then if it was lower. Now that shock has to convert that lateral force coupled with vertical force to heat and then dissipate it.
I even remember many years ago taking parts to get acid dipped just to remove some more weight from some of my race cars.

Bottom line is it went to about 10#s and just lowered the imaginary COG spot a little lower to the driveline.

DSC04872.jpg


And the bed extender still sets on the top 1/2" of tail gate.
You may just be looking at the lightest Ranger tailgate ever...I know, so what ha ha

DSC04871.jpg


Like it never happend.


DSC04873.jpg


DSC04874.jpg


With all the geometry changing of the front and rear suspension upgrades for a better trail riding rig, I rechecked the angles of the front and rear coilovers.
The front which is the top pic shows an almost 98% efficiency of the springs@ an 88 degree angle. Pleased with this.
Now the back, not so pleased @ 76 degrees and that equates to about an 88% efficiency.
the more angled rear shock is going to have less dampening capabilities due to less internal movement of shock compared to the vertical travel of the suspension. Right now I'm more interested in dampening in the rear then more articulation. Now the front I may even increase the angle a bit to give it some more articulation.
But this will be most likely and on going changing thing. Never reaching a perfect state.
Darn, just love working with a linked coilover suspension system, just so many variables that can be played around with, and who knows I might just make a mistake and get it right.
Think I'll be ordering some more tabs and spring rates.


START PAINTING IT BLACK!!!! Really, I do like everyhthing and obviously do what you want. Might as well use up the blue you already have!!

IMG_5132.jpg


I do miss it.
But once some more body mods are done...look out :p:
Then paint on the side with a fine brush in small letters the title of this song which came out 2 years after she rolled out of production in 84.
But might have to spell differently due to copyrighted stuff.

http://www.youtube.com/watch?v=WxBx0nfRp9s


DSC04884.jpg


Just tying down some loose ends sort to speak. Finished up the remote windshield reservoir install. This is looking directly behind driver seat at the space between seat and the fold down rear bulkhead. The bulkhead is down due to some really nice weather.
I just used a piece of 1" nylon strap. Shoved it up against the bulkhead and drilled in two aluminum angle clips.

DSC04883.jpg


This is looking directly down at the door jamb on the floor. It is a recessed area that is not touched by my feet while driving or getting in or out.
The power wire is coming down from dash inside the wire loom and then just the wire itself is under the door molding and runs to the back where the pump is located.

DSC04885.jpg


The fluid hose is run on top and secured with those nylon clamps along side the molding. Like I said earlier there is no foot contact in this area. The main reason is the cage itself runs above the floor and the seats are bolted to that instead of the floor.

DSC04882.jpg


And here is the hose coming up through the area just below the modified window cowl that I did for better air flow around engine.


DSC04886.jpg

Come along for a ride.
Now it's time to walk the walk, I talked enough about shoving the rear back more and moving bumper closer to body and up slightly for more departure angle.
See that mountain in the distance, going to do some trail rides and test the new departure angle on the same exact spot and conditions up there.

DSC04889.jpg


Nice looking out the back with hardly any obstructions.

DSC04887.jpg


And out the side as far as that goes.
Never know when Bambi will hop out or even catch a glimpse of Mr Black bear.

DSC04888.jpg


Miles and miles of dirts roads. It will let you know if you got any rattles ha ha .
It really tested out my idea of using Disc brake quite stuff on my rattles that I posted on another thread.
Only thing that I can hear now is the whine of the 8.8 pinion bearing :mad:
Climbing up to around 3000 feet. Ears starting to pop.

DSC04804.jpg


Now here is a few days ago with the receiver and bumper hitting.

DSC04890.jpg


So the work did pay off.
Look about two feet behind the bumper and the plow mark is still in the dirt, glad it hadn't rained.
But it's about to take out my tag light ha ha.
When I make my new bumper I'll raise it up a little more.
Right now the bumper to tire is 53 deg. So it's close to that now.

DSC04901.jpg


When getting out had to step on rear tire. Might note that the Holley Off-road carb never missed a beat. The truck is still running.
Front and rear locker and some new tires sure would be nice about now in this loose shale rock.
The rear limited slip is limited to not working at all.
The front is wiched down cause that torque arm rear suspension is not wristed when doing this. Give it too much gas and the front 4 link can un load right over the top ha ha .

DSC04903.jpg


You can really see the ditch it dug a few days ago. This is where it snagged up. Also you can see how much closer the bumper is to the body compared to a few days ago. Including the rear axle is moved closer to the rear.

DSC04906.jpg


The really nice thing that I like about the rear suspension is that I can wrist it for parts of the trail like the one above or leave the pin in when climbing.
When climbing there is no wheel hop at all. Now if I left the pin out, there could be some wheel hop due to less torque being transfered to frame and then all hell breaks loose with the drive train components.
Also again I had the winch hooked to the D-ring on the diff cover on the hill but removed afterwards.


DSC04916.jpg


A few days ago I was at the shale pit checking the new lengthened WB and bumper relocation to improve departure angle.
Today doing some rocks to further evaluate the latest Mods and any thing else that may be addressed.
Plus getting a lot of hands on experience that you just can't get surfing all the 4x4 sites.
And given enough experience with the D44 4link and rear radius linked I'll have first person knowledge to pass along.
In this pic the rear axle still has the pin installed in the pass side upper link. It is the only one with a removable pin, thus wristed.
It is a little steeper then the pic shows, but the rear driver side tire is about an inch off the ground.

DSC04919.jpg


Every thing the same, except the pin is now removed. Tire planted solidly on ground. You can see the different attitude of the truck also.

DSC04951.jpg


DSC04947.jpg


DSC04939.jpg


Moving on up. I was easy on gas and had no wheel hop or spin with the pin removed.

Hope to have one of my kids with me next time to take some better shots.
Hard to find a spot to get in and out of truck to take pic.

I'm doing a lot of testing and really like the extended WB. I need to know if I want to stretch a little more.
Just riding down the paved road is a lot smoother now.
The problem is that much further I'll need a new rear DS.

DSC04925.jpg


Of coarse checking on all drive train parts is a must. Here is my modified output shaft on my 1350 case. Now it only has one slip joint and has worked flawlessly and also reduced the vibration from having two slip joints.


DSC04955.jpg


DSC04961.jpg


DSC04960.jpg


DSC04963.jpg


DSC04962.jpg


All the above with associated documented angles comes down to that mark on the floor?

You might call this part of the build... Bronco ii on ExtenZe ;)
You know it's that wheelbase natural enhancement stuff.
If I had to pick one modification that I've done as number one pertaining to trail worthiness the extension of the wheelbase has to rank right up there with the weight reduction and lowering of COG.
The longer wheelbase fits intrinsically with the other two mods.
Nothing I've done so far has changed the feel. It's just so smooth, like when going over road joints not nearly as much of that washboard affect and trail worthiness like when going up or down hills. And I've only just begun.
But I'm going to go for a triple digit length.
Now I will give up some break over benefits, but no big deal here.
And it still has to be a DD foremost so no radical stuff now.
It will greatly affect several of the most important elements of a trail rig.
That being, approach and departure angle, drive line angularities including u-joint binding and some degree to the coilover springs themselves. Not to mention that ever feeling of the back wanting to come over the front on steep declines.
On the front drive shaft I'll probably make my own longer slip connection, nothing I have not done years ago. Just like I made the slip yoke eliminator coming out of the transfer case.
The back DS will have to be custom made to be perfectly balanced.
So I might just take the rear axle back a little further for right now.
To go all out shove,some of the links might have to be made longer, like the front.
But hey, I'll just turn around and use them on a possible 4link rear, although I really like the radius arm for street driving.


DSC04969.jpg


Ok, got the shove thing going on now. Front axle was moved out by adjusting joints.
Not taking them no further. I have to have enough thread left in the joint for obvious reasons.
The approach angle changed from 59 deg to 65.

The WB now is just fractions of an inch from 100. Next the rear.

DSC04967.jpg


The angle of the front shock went from 80 to 78 deg. Which I wanted anyway to soften the ride.

DSC04966.jpg


As the front axle was having an enhancement thing, the trak bar was pulling the axle over...

DSC04964.jpg


Which naturally turned the steering wheel. You turn one of these links and it affects more then what you may think.

Getting a lot of hands on feel about tunning this linked suspension. Just moving the axle out on one side means two links have to be moved and one is at a different angle which means tow different lengths. But you kinda of get a feel for it...literally.

DSC04974.jpg


That's a 99+" WB. Even though the back has already been shoved back.
It just don't look right. Definitely needs to be shoved further.
This is clearly a case of longer is better HA HA
On the rear it's no big deal to move back, just un bolt one bracket on each side and shove away, that is drive shaft allowing. If not, new DS.


Join the Elite Explorers for $20 each year.
Elite Explorer members see no advertisements, no banner ads, no double underlined links,.
Add an avatar, upload photo attachments, and more!
.


I know you're going with 35's one day, and 100-104" is just about perfect for them IMHO. Long enough to be a stable hillclimber yet still short enough to work good on the tight trails and not have a horrible breakover.


Back
Top