FireZapper
Well-Known Member
- Joined
- January 17, 2005
- Messages
- 546
- Reaction score
- 2
- City, State
- Columbia Pa.
- Year, Model & Trim Level
- 93 Sport
Looks great.
Yeah, that really made the rear bumper nice. Before I was thinking it was just adequate, now it has a more custom and function. Awesome.

you got it.
Or this kind of Clevis.


 :
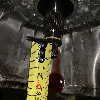
:its funny how a lot of people write stick arc welders off, mig is really nice but i had a year of shop class devoted to stick arc welding. it crazy what you can do, ive cut with them before but i had never thought of using a 6013 rod like that, nice job, makes those bad a mudflaps even better.
When I go to the Mig sometimes I forget and start moving my hand towards the work as if I'm allowing for the burning of the stick LOL.
Ive caught myself doing that from time to time as well, actually last weekend we were welding in mounts for a new floor in my old mans yeep (complete rust bucket) and i did that, funny how it gets ingrained haha
 right on man, I really want to go wheelin