Ricks Bronco: 1and 1/2 | Page 121 | Ford Explorer Forums - Serious Explorations

  • Register Today It's free!

Ricks Bronco: 1and 1/2


Join the Elite Explorers for $20 each year.
Elite Explorer members see no advertisements, no banner ads, no double underlined links,.
Add an avatar, upload photo attachments, and more!
.


Thanks Guys, but all the honors go to the Big man upstairs who gave me any wisdom and the desire.
This is not a religious site and I fully understand that, but what the truck does is open up a dialog with the hundreds and hundreds of people that come up to the truck, not to me, but the truck and start talking.
That's when I start telling them about Him and how He can turn your life around like He did mine.
Plus the fact that two years ago I was as close to death as a man can be. I was rushed to the hospital, my chest was cut completely open, veins were taken from my right leg and upper chest and Dr Stam reconnected my Heart with those good veins in 4 places.
I had one Artery that was %100 closed, one %98 and two others that were %85 closed.
Coupled with Child hood diabetes all my life.
My doctors do not even know why I'm alive even to this day.
My Heart doctor called me the Miracle Kid (63) cause I healed so fast. 4 days later I was released even though the left side of my heart is damaged. Two weeks after that I was working on the truck, 3 weeks after the operation and I was out Hunting.
The only thing was that my Doctor told me Do not use a 12 gauge shotgun, only a 22 rifle.
The stainless steel bailing wire that was holding my chest together was still in the healing mode.
But after all that I found the reason I'm still hear and that was to preach to anyone about the evils of alcohol and drugs.
In fact something that is a whole lot more important then the truck is the book I'm writing about how you do not need any Doctors or any other group of people to help you rid yourself of an addiction.
You just have to Humble yourself and ask the Right Person upstairs.

OK, I'm done :D
Need to make a new transmission mount incorporating the lowered height today.
I do not have all the material yet, but may be able to get the square tubing today.
It's the bushings or some kind of vibrator isolator material that will have to be ordered.
The other reason I'm going to make a new one is the fact that after I made the Slip yoke eliminator, the round flange during extreme flex has come in contact, not much, just enough to remove a layer of paint ha ha.
All the vibration is now gone. I like the feel of the solid tranny mount, but worried about when flexing that it could do some real damage to the case if it was not allowed to flex. This V8 is a real torque monster.


DSC05681.jpg


Well I'm past the point of no return on the new lower tranny mount. That's the old one cut in half ha ha.

DSC05683.jpg


Just going to use stuff I have around the shop instead of ordering material.
Was going to order those rubber round bushings like you see on the end of leaf springs and slip them into a piece of 2" DOM tubing and then have the tranny solid to the cross member, but this will work fine.

Now that I have the right height for the tranny I'm going to re-use the Energy suspension mount.
I have it bolted to the tranny and now I'm going to build the cross member using some 2" square tubing. One leg of the cross member will go low under the front driveshaft and the other side of tranny will go up and bolt to inside of frame....I think.
Now the long side you see will be cut off at an angle with a corrosponding angle piece going over to frame.
You can also see the two bolts that pass through the square tubing and threaded into the mount.
Also the pic makes it look like the piece that goes under is further down the drive shaft. It's not, it's right in front of the flange and will be low enough not to interfer with the driveshaft.

Not to mention a whole lot easier to remove once completed.
Laying out the angles is the time consuming part.


DSC05684.jpg


Getting closer :) The left side is cut off flush with outside of frame. I'll make brackets for either side of the tubing then have 1/2 or 9/16" bolt passing through the tubing.
Now the other side is a little more involved. At this point I still need to get an exact measurement from the angled piece on the far right to inside of the frame. The frame end will have a plate welded to the extreme right hand side that will fit flush to inside of frame. Then two 1/2" bolts will pass through the plate, through frame and bolt to outside of frame.


DSC05689.jpg


Went with one massive 3/4" nut & bolt for the end that goes under frame.
Was going to use a bracket on either side. But I want a little flexibility built into the crossmember so when the frame twists and flexes it can move just a little. The other end has a bracket that has one bolt hole on each side of the crossmember and bolted to frame.

DSC05690.jpg


Next let the paint dry and then install.
Of course a little trail testing will follow next.


Hey Rookie, I like what you have done with the Bronc. I just wish I was mechanically inclined as you. How about I just send you my "88" for you to customize.


Hey Rookie, I like what you have done with the Bronc. I just wish I was mechanically inclined as you. How about I just send you my "88" for you to customize.

I think my wife would shoot me if I took on another project ;)

DSC05706.jpg


Now for the fun part to see how it does on the trails with the different DS angles, engine height, and the new Tranny mount.
I wanted to make sure there was no problem with the new cross member/Slip yoke eliminator, which there was none

DSC05558.jpg


Also going to check on how much better it flexes with the shock brace removed. The above pic was taken when I thought that the wristed radius arm was hitting the brace during droop.

DSC05702.jpg


Just as I thought, it was hitting which interfered with the flexing. Note now that there is no brace and the radius arm has slid further back. And this was on the exact same hill. Even followed my old tracks.

DSC05703.jpg


Which made for a noticeable lengthening in droop :eek:
And no interference with diff cover/gas tank skid plate after modifying the plate and the diff. cover due to lengthening of WB.
You can clearly see how far back the diff. cover is pushed to the skid plate. Just enough to get a frog hair between it. And this is after I sectioned the plate.
DSC05695.jpg

Plenty more mods to come, just gotta wait for some more of the Green Stuff.


haha i was just looking at our latest masterpeice in flexology and my 4yr old son was like that big truck has really small tires. hahahaha time for an upgrade or what?


DSC05695.jpg


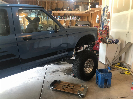
This pic was taken before the new front Coilover mount modification was done today.
Need to concentrate on the front CO mounts. With all the changing of geometry of the drive train the one thing that has remained constant is the front Coilover mounts.
These were designed when I still had the D35 in the stock location.
It's literally holding back the flex or more specifically the droop.
Why have all the time and money in this SAS/4link and then have something so simple as a shock mount holding it back.
Not to mention, the Dallas Redskins game don't come on untill Sun night and I'm gettin bored.
I gave some thought to the above pic and figured there is still more droop to be had with out going to a longer travel shock.
And sometimes that's not the answer. Your not going to get something for nothing. Meaning there's a trade off in a longer travel shock and that is the tube has to be increased also, so now you have to worry about the opposite end of the spectrum and that is the you can loose some Stuff in the trade off and have to think about that in making the mounts.
DSC05719.jpg


Here is the old shock location and needs some tweaking to get some more droop with the shock that I have.

DSC05727-1.jpg


So some new shock mounts need to be fabricated. To make one pair of brackets I'll need two different tabs due to where I have to mount it on the hoop.
This one side has to be 2 and 1/16" from apex of bolt hole to apex of hoop mounting end.
Keeping the the Green thing I'm using some well seasoned 1/4" steel that was on the Bronco for over 20 some years. It's what's left of an old Reese rear hitch. Most of it has already been used on this truck as you'll see in the next pic. LOL

DSC05728-1.jpg


Now here is the modified coilover hoop. The ends that bolt to the frame are the actual ends of the Reese hitch that I did over 4 years ago ha ha.
But what I did was to move the mounting point of the shock to the right for a more Droop friendly location and also made it longer.
I'll have to re-adjust the spring height also. Cause if I don't the ride height will be higher.
The bracket is now 1.5" longer and coupled with the more vertical spring angle will give me a higher spring rate which means I'll need to lower the adjusting nuts which will give me more droop :confused:
The more I thrash around with these CO angles and spring rates the better I appreciate just how fine they are.

DSC05719.jpg


DSC05731-1.jpg


And here is a good comparison of the modification to shock mount between the top pic and the newly modified length and positioning of the mount.
Easy to see that if you look at the links that it has gained some droop.
Plus the angle is less at full droop.
Also now at full droop the shock angle is more vertical.
At ride height the top of shock is 7 deg leaning to left.
I also got the top of the shock leaning straight back toward engine.
One reason for this is that it's not on a 1 to 1 ratio. Meaning as the axle goes down 1" the shock goes down less. If it was perfectly vertical in both planes then it would be 1 to 1.
Of coarse you loose shock efficiency and coil rate, but not enough to hurt anything.
But if you do have to lean the shock, that's where the right spring rate comes into play when buying the springs.

DSC05739.jpg


Now for some more playing and seeing how it does.
If you look at the shock you can see that there is still plenty of droop left in the shock by the relation of the shock housing to the piston rod.
But not so much that it hurts the stuff.

DSC05756.jpg


These little piles of shale put here by a front end loader that are only a few miles from my house are a great little testing ground. They're piled one right next to each other.

DSC05751-1.jpg


DSC05752.jpg


DSC05764.jpg


Newlarger diameter tires will be here during the Winter months. Could use them here as this pic shows LOL.

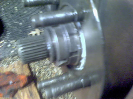
Just added: I've noticed the whine from the 8.8 rear has decreased since I lowered the pinion angle by relocating the radius arms to a lower position. Hmmm, must be a lubrication thing.
Well it was fun again doing this and hope you enjoyed it.


I love this bronco II .Looking good cant wait for the new bigger tires on it :p


Thanks Mudy, may have to go with only 35s since my state has a 31" bumper height requirment. I'm pushing that now with my recent suspension mods. But we'll see.

DSC05765.jpg


Finished up the driver side shock mount mod. Just welded on another tab to the existing tab, but longer then added another tab to the left of that.

DSC05721-1.jpg


This shows why I added an engine cage to the coil hoops. I disconnected the engine cage so I could remove the pass. side hoop to weld up.
The axle is at full droop and you can see the gap between hoop and cage.
At ride height there is no gap, just a tight fit.
So this shows how the frame twists, would have never notice this if there was no engine cage.

Also for the guys that have not followed this thread, the reason the Brake booster and Master cylinder look different then a B2 is because it's off a 97 X.
May relocate the Top rear shock tabs also for more flex in the rear also.


inspiration thread of what can be done if you look around your garage


Thanks Shawn.
Looks like you got yourself a nice B2 there?

DSC05768.jpg


Well today was my Day of Reckoning, as far as my yearly Special Modified Inspection goes.
Only thing was a blown Rt. turn bulb.
It was kinda cool when the Mechanic said "that truck takes the cake as far as modifications go, there ain't another on like it in the state" LOL.

After it passed he placed what he called "The Commemorative Inspection Sticker" on the window.
At first I did not know what he meant untill I looked at it ha ha.
This Modified sticker is shaped differently then our standard inspection sticker.


Great build :thumbsup:
Glad to add you to the list of Guys that I and others can learn from.
And just to think that your B2 is used in search and rescue and could save someones life is fantastic :salute:

Hope to hear more on your build, keep us posted.


Rookie you have done quite a bit on your bronco in its lifespan and I had fun reading almost all 121 pages of your build over the last week. (lots of time being unemployed:rolleyes:_) I really respect your methodical approach to building. It may not be always orthodox but it is always fun to watch:thumbsup:


I do have to ask why you have not put in the front hoop bars from your internal roll cage through the firewall to your coil over mounts? You would gain more rigidity and make the whole vehicle safer. plus you could tie it into your fender strut bars. It really seems like the logical step. http://www.cachassisworks.com/ has the front hoop bars for only $120 pre bent plus shipping.

plus it would give you a opportunity to redo your front grill and make it lighter ;)

You must have read my mind. And especially from a guy that (that be me) who has installed them on at least one roundy round car (Dirt Track).
And yes when I do it will penetrate the firewall.
I have even took a Laser pointer and marked different spots on the firewall that I could penetrate.
The reason so far...just so lazy to relocate some heater ducts and other associated stuff on the cabin side of firewall.
I checked out those strut bars on that site that have them mounted to a plate that bolts to the firewall. Looks good but I'm with you on penetrating firewall with tube.
Now if I do a plate it will be in association with a plate on the cabin side that it's bolted to, then a tube to the interior cage.
I've already figured that I could come up into and out the driver side far left heat vent Hmm, without going outside and looking it might have been the blower motor or plenum that there was a problem with on pass. side.
Like the idea of tying into fender strut bars also.
But, I like your way of thinking and this has reignited the need to get it done ;)
I would still have have the lateral supporting engine cage intact though just to control that movement better.
Is this what your referring to about lighter removing engine cage?


Join the Elite Explorers for $20 each year.
Elite Explorer members see no advertisements, no banner ads, no double underlined links,.
Add an avatar, upload photo attachments, and more!
.


DSC05776.jpg


May be able to take the strut above heater blower and then through glove box area.
Be cool to tie into the area around the hoop where the engine cage is also.
But what ever which way I want some incline going down from inside cage to hoops. Plus if it has to be bolted to a removable plate at hoops or engine cage.
I'm going to stay with the built hoops that I have.

See ya, I need to go to Anderson's Race Cars in Winchester Va.
I just got off phone and he said come on down.
He builds some of the best Late Model dirt cars in the country.

DSC05775.jpg


DSC05774.jpg


The larger 97 X booster and MC make for a tight fit on this side.
The tape is just an approximate position of tube. Further down would almost be impossible without a lot of bending and I don't like bends on a cage.

Gotta go.


Back
Top