Stripped Throttle Body Bolts -- how to repair | Ford Explorer Forums - Serious Explorations

  • Register Today It's free!

Stripped Throttle Body Bolts -- how to repair

brukshut

Member
Joined
January 28, 2010
Messages
23
Reaction score
0
City, State
Brooklyn, NY
Year, Model & Trim Level
1998 XLT 4.0 V6
Greetings all,

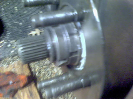
Owner of 98 Explorer V6 OHV, recently did upper intake gaskets and all vacuum hoses to fix lean codes. When I was reassembling the plenum, I fear I may have stripped one of the throttle body bolts. These are a set of four bolts, identical to the ones that hold down the coil pack. They are self-threading with a course (deep vee) thread.

They screw into plastic holes on the plenum. I'm not sure why Ford didn't put thread inserts into these holes; I failed to observer proper torque for these bolts as I discovered in my Chilton manual.

Anyone repair these? There are three different repair approaches:

1.) Heli coil, They sell sets. Anyone do this? How hard is it? Do the
springs hold well in plastic? What size bolt, and what kit do I need?

2.) Fill holes with epoxy compound, re-drill and use same screws.

3.) retap to next size bolt.

...you could also drill these out to next larger size and put in screw inserts...

Anyone have a suggestion?


Join the Elite Explorers for $20 each year.
Elite Explorer members see no advertisements, no banner ads, no double underlined links,.
Add an avatar, upload photo attachments, and more!
.


Odd thread

If your bolts are like mine there is a high and low profile thread. I agree with scucci to fill it with an epoxy. With the odd thread I would fill the hole then screw in the bolt before the epoxy sets. Maybe lightly coat the bolt with penetrating oil to keep it from bonding to the epoxy.


First off, thanks for the replies. After thinking about this for a bit, it would appear the loktite solution should be appropriate for several reasons:

1.) If done correctly, it will allow the screw to be removed and reinserted cleanly (as long as you follow directions and make sure to coat screw with anti-seize that comes with kit)

2.) It seems much easier to use this than to take off Plenum entirely, stick it in a vise, fill holes with epoxy, drill with press, then re-thread with screws.

3.) Helicoil is a nice solution; however, if you screw up the spring, you will most likely need a new plenum...not sure if you can drill it out or remove it.

With the loktite solution, should you strip it again, you at least have all the options presented above --

Thanks much. Anyone have any experience with helicoil in plastic?


Get a used one from the wrecker for $20


Greetings all, I followed scucci's advice, bought the Loctite Form-A-Thread repair kit. I did the repair last night, it worked great. Anyone doing this repair (plastic thread repair) this is a great product. Here's what I did:

1.) Removed air intake tube, removed throttle body cover and detached throttle cable with flathead screwdriver. Unscrewed bolts on throttle body. Then I counted, roughly, the number of quarter turns (90 degrees) on my ratchet (around 23-24) it took to screw the bolt down flush with the throttle body on. These bolts are aggressively self-threading and you can screw them through the back of the plastic plenum if you are not careful.

2.) Removed all throttle body bolts, placed throttle body aside (carefully with TPS and evap vac tube still attached). Using electronics cleaner Q-tips and alcohol, I cleaned out stripped hole, good thing too as I removed several coils of stripped plastic. Make sure surrounding hole to be repaired is flush, sand down very lightly with fine sandpaper (300+) if need be.

3.) Take this time to replace your throttle body gasket if necessary. I used a BBK "paper" style gasket which I bought from JEGS for $10 which is vastly superior to the thin rubber stock gasket which was flattened and rock hard. I used a little pick tool (like a dental pick) to remove the old gasket, this is an essential tool. Carefully clean the whole mounting surface while you are at it.

4.) Clean the screw from the damaged hole with a wirebrush, remove dirt and grease. Then shake the small bottle of anti-seize (blue stuff) and brush on enough to coat the threads of the screw. Set this screw aside someplace handy. You will need it shortly.

5.) Mix up the activator/hardener in equal amounts in the mixing cups. Easy enough to do this by holding both syringes side by side and depressing the plungers on each an equal amount. From experience with epoxy, a 50/50 mix is crucial so try to get it right. Do small batches and eyeball it so you don't waste the epoxy.

FYI this stuff sets *insanely* fast. They say working time is 3-5 minutes...my first batch hardened much quicker than that. Mixing is also crucial with epoxy to get a good cure, but with the short setting time (which can be accidentally increased by adding too much activator, etc.) you can't spent too much time on this, maybe about 30 seconds. Once you've got a good paste, apply a dab into the hole to be repaired. How much depends on how damaged the hole is, but you don't fill the entire hole...remember the threads of the screw will work the dab into the damaged threads to be repaired.

6.) Before you insert the screw into the hole, take the time to clean the gasket mounting surface of any stray epoxy with a towel and some alcohol. Then carefully screw the bolt in, turning it 23-24 times with your ratchet (quarter turns).

7.) Wait 5-10 minutes, then back out screw. Wait more than 30 minutes, then reassemble the throttle body. Carefully torque the screws this time to less than 80 inch/lbs. (About 7.5 foot/lbs). I torqued mine to 50 inch/pounds to be on the safe side...


Helicoil would definitely be overkill for this. Heli-coil or anything similar is really only required for aluminum threads (such as intake manifolds or spark plug threads) or any application that requires high temperatures.

Loctite makes different versions of this stuff as well that is rated to different temps. Can be torqued to 100 foot/lbs when fully cured (in two hours I believe).

Hope this helps.


Back
Top