I finally completed the repair and I can say that by far the most difficult part involves obtaining the right tools for the removal and installation of the harmonic balancer. The bolts on the OEM brand puller available at Pep Boys are too short. The bolts supplied with that kit are M8 x 1.25 x 80mm and you need bolts that are M8 x 1.25 x 90mm. Harbor Freight sells a Bolt Puller Set - 46 (Pittsburgh Item #37824) that has the correct size bolts. I was never able to find an installer that would fit the harmonic balancer. I purchased a decent quality universal installer and found the bolt hole in the harmonic balancer is smaller than the thrust screw so it would not work (and it seems that most universal installers would have the same problem unless the kit includes a smaller size thrust screw). If anyone locates the proper tool please share that information. I ultimately had to purchase a longer bolt that was the same diameter and thread pitch as the pulley bolt in order to get it installed. The pulley bolt is m12 x 1.50 x 75mm and I purchased a bolt that was 120mm long which is way too long (I could not find this bolt at a hardware or auto parts store so I ended up ording it from Bolt Depot online and with shipping it cost more than $12). You could probably get away with using a bolt that is 90mm - 100mm long. I wasted a lot of time looking for the right tools so do yourself a favor and get the right tools lined up in advance.
Here are the steps I took to complete the repair:
1. Disconnect the battery.
2. Remove the air intake hose.
3. Drain the radiator.
4. Remove the fan and radiator shroud.
5. Remove the serpetine belt.
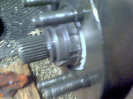
6. Remove the bolt on the harmonic balancer. I used the technique described by Aldive to loosen the bolt because I have an automatic. I used a breaker bar and a 19mm impact wrench socket. I placed the socket on the bolt and then rotated the harmonic balancer until the breaker bar was resting on top of the frame on the driver's side of the engine bay. I then popped the starter a few times and the bolt came loose.
7. Remove the radiator (I was replacing it but even if you are not it is nice to have the extra room to work).
8. Attach the pulley puller to the harmonic balancer. The Haynes manual recommends you insert a longer bolt that has a smaller diameter in the bolt hole for the harmonic balancer so the puller has something to push against. There is a bracket that is attached to the front of the timing cover by two studs and by two bolts to the ac/power steering pump bracket that has to be removed to remove the timing cover. The bolts are the perfect size for this job.
9. Remove the water pump (I replaced mine because it was original and had 160,000 miles on it but if your pump is in good shape you might be able to leave it in place when doing this repair).
10. Remove the bolts from the timing cover. The Haynes manual says to mark all of the stud and bolt locations but I relied on the diagram in the manual. The studs are all the same size and all the bolts are the same size except for one which is installed at the bottom of the timing cover on the driver's side. Don't forget to remove the bolts that go through the oil pan into the bottom of the cover. Once all the bolts are out pull the cover off.
11. Remove any gasket material attached to the timing cover and the engine block. I found quite a bit of black ATV on the oil pan which I needed to remove. Clean the gasket mating surfaces with a solvent. Install a new seal in the cover. Put RTV on the gasket mating surfaces (I used blue RTV here) and at the locations where the block, oil pan and timing cover meet (I used black RTV here) and at the corners seal cover (black again). Place the gasket on the block, install the cover with the bolts and studs hand tight then torque to spec.
12. Install the harmonic balancer. I used the longer bolt I purchased, a stack of washers and the thrust bearing from my useless universal installer and it actually went on very easily. Once I had it started I removed the longer bolt and used the old harmonic balancer bolt to seat the balancer the rest of the way. I then pulled that out and installed the new bolt. Of course when you get down to toqueing the bolt the cranksahft wants to turn. I used a strap wrench to hold the harmonic balancer in place while torqueing down the bolt.
13. The remainder of the installation is the reverse of the removal steps.
So far no oil or coolant leaks. I hope this helps.