anony
Member
- Joined
- July 12, 2019
- Messages
- 14
- Reaction score
- 2
- City, State
- Los Angeles, CA
- Year, Model & Trim Level
- 2000 Ford Explorer XLT
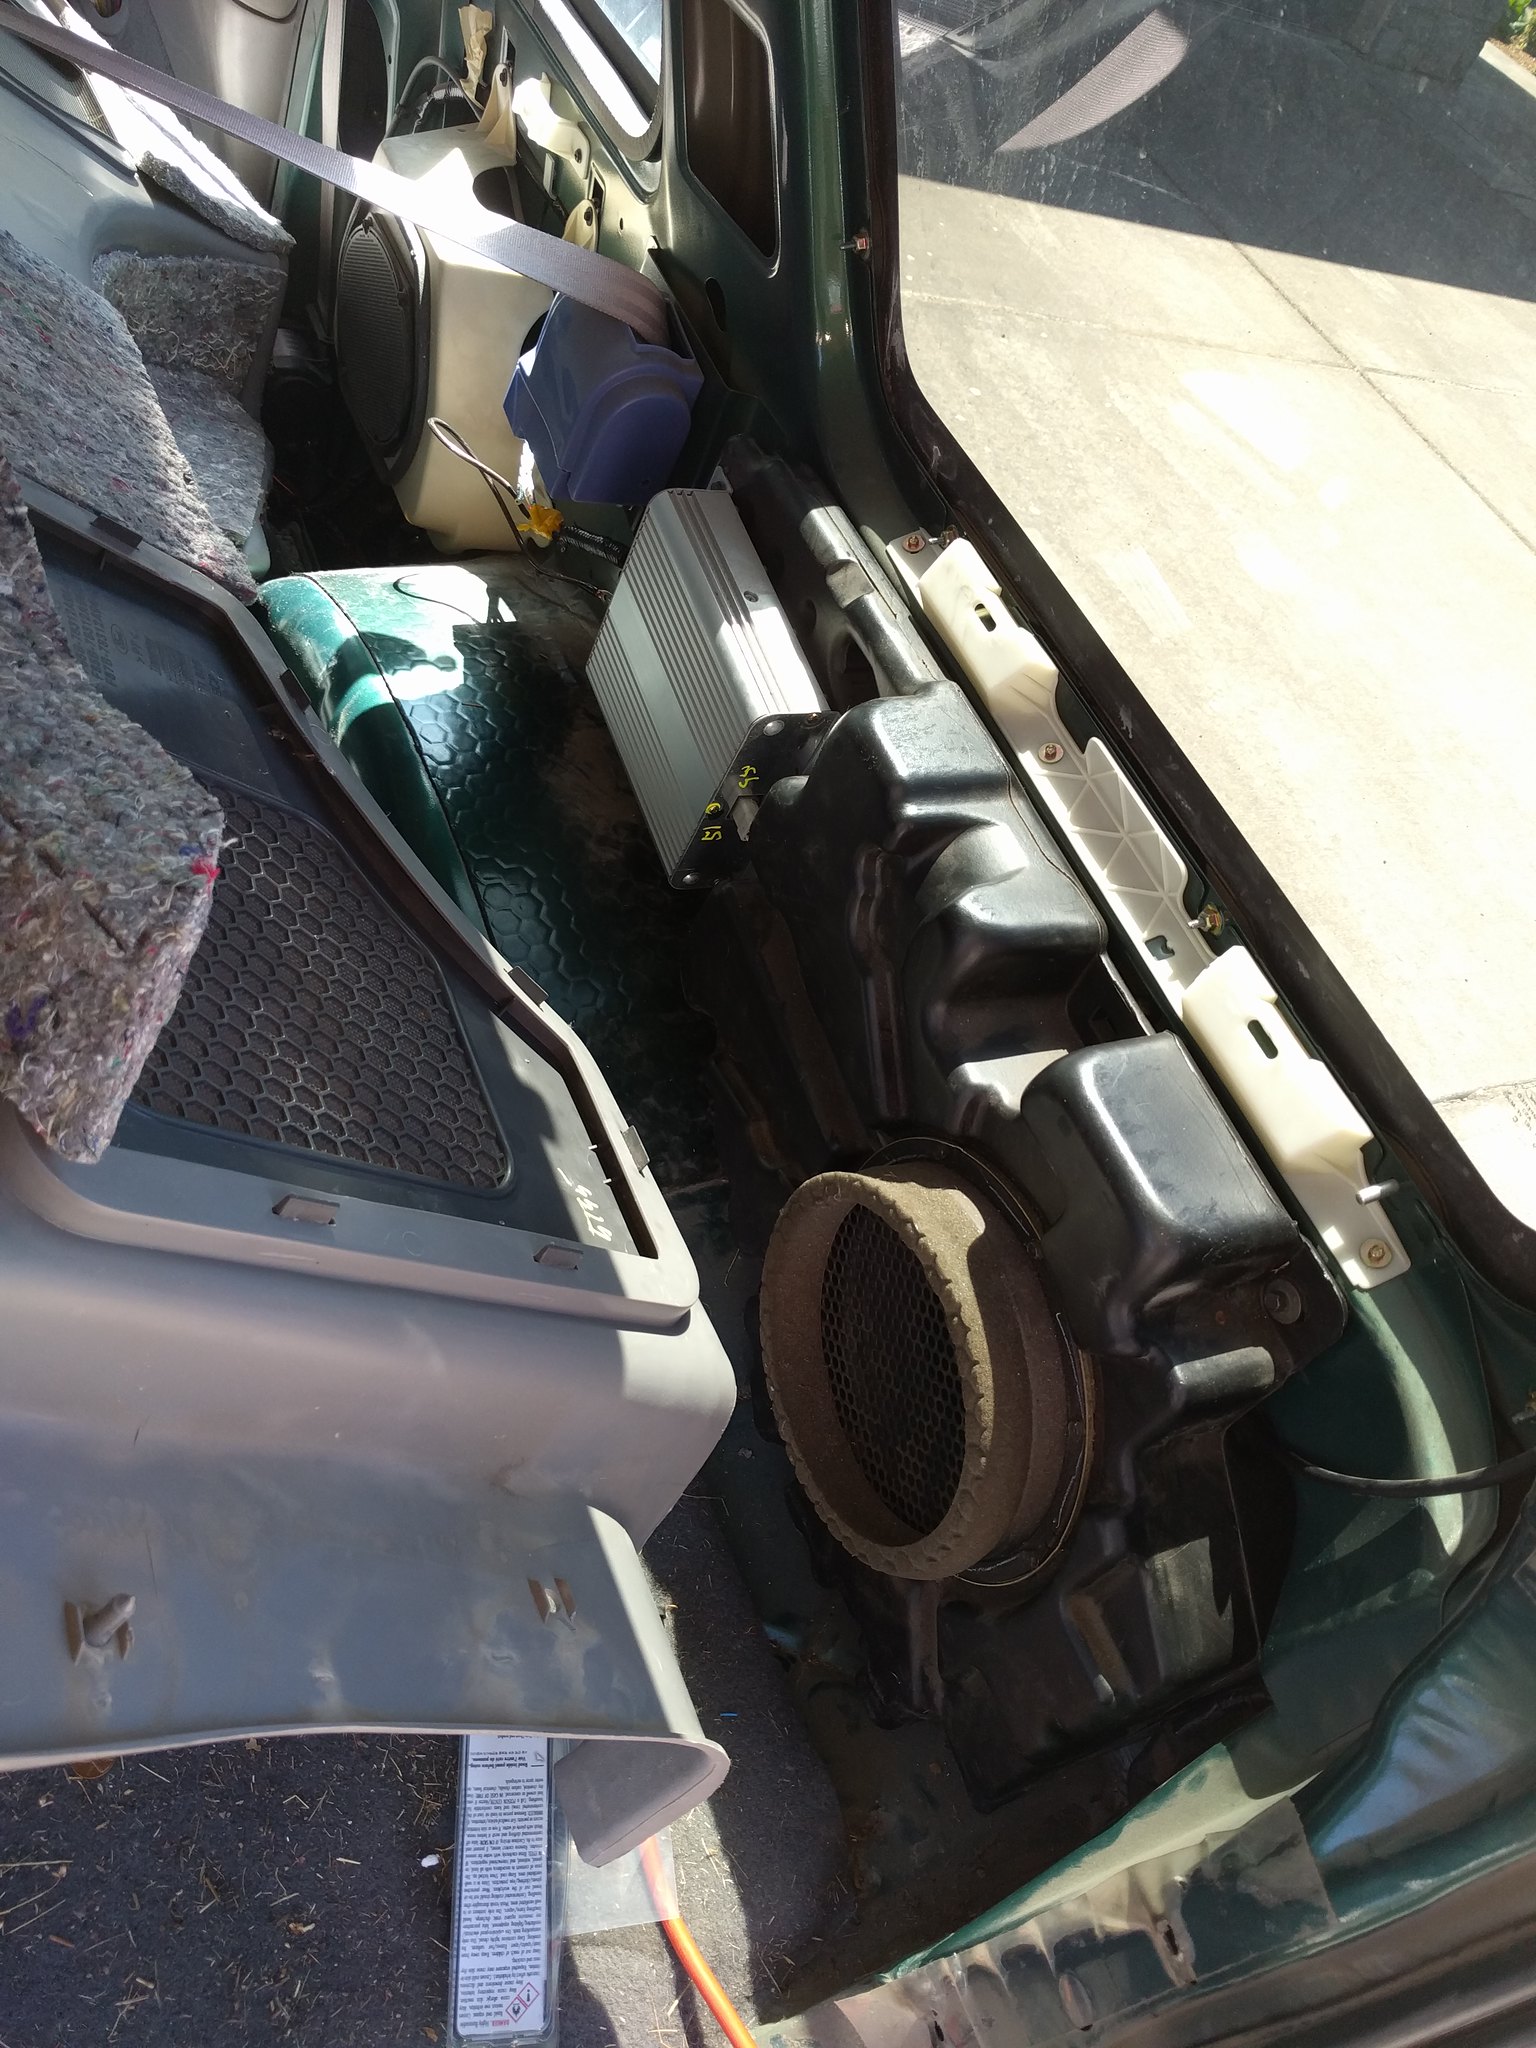
I need to replace all the speakers in my 2000 Explorer XLT that I recently bought. I was trying to remove this panel but I can't figure out how to remove it yet without breaking the clips. I was trying to see if there was a speaker behind it because it does look like a speaker panel. The speakers are blown out and don't make any noise so I can't test it by turning up the volume. Can someone please tell me what tool to use to remove it safely and tell me what it is if you know, that is it a speaker panel? Thank you!