Recently bought 2001 Exp Sport for my son, Gold. Grey and that's faded grey trim - tupperware all around. Not looking too strong. Saw some posts here that it was possible to remove the trim and paint with Krylon Fusion. So we plunged in.
Did some Mx work on the truck first and each time we had it up or were underneath it we put Liquid Wrench where ever we thought we'd be removing bolts to take off the trim and the running boards. Paid off later.
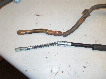
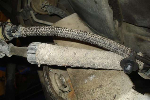
Two running boards were held up by 3 brackets, each bracket 3 13mm bolts, the metal tubes were held to the brackets by 6 10mm bolts. Minor bit of cosmetic rust on the running boards, we treated that with a rust dissolver and sanded. This was the first weekend and to be fair after a week without the running boards I sort of like the truck without them. We painted the metal tubes with rust-oleum flat black, relatively easy. We painted the plastic end caps with Krylon Fusion Satin; too glossy even in Satin next to the flat black tubes it was too shiny. We bought Krylon Camo Flat Black (same krylon fusion technology for plastic) for the end caps. Got all the paint at Wal-Mart as many had Krylon Fusion but not the black we needed nor the camo.
Next weekend we took off the rear bumper removing 4 bolts, needed a bit of cheater pipe for this, bumper came right off; twisted the bolt-assemblies a bit removing them but easy to straighten them out in a vice. Removed the plastic cover on the bumper by pinching each clip with some channel locks and applying the least bit of pressure with a LARGE flat head screwdriver from the other side. Got the cover off easily without damaging ONE of the clips.
Worked our way around the car removing the phillips head screws and the nylon fastners pulling as needed. Front bumper is a bit difficult, remove cowling under hood, 3 bolts underneath, two other bolts way up in each wheel well, must remove plastic wheel well cover first. Very difficult getting socket up in there to remove these bolts, a LONG extenstion would help, these were small, like 8 mm. Broke one off, long story, if it happens to you I can provide our solution. Just unlucky. In fact we broke 3 bolts off and ALL were from the passenger side, rust was heavier on this side and I attribute it to road-salt and slush gathering on that side due to the crown in the road.
Painting was cake, washed all the plastic really well with strong soap solution, then again with Castrol Super Clean degreaser, again strong. Rinsed, dried then started to paint, followed instructions, weather was perfect, warm and DRY so all went well in the painting. Let everything dry 24 hrs and then we started to put it back together. Only thing difficult was the front bumper b/c we broke the bolt inside the wheel well on the passenger side.


Did some Mx work on the truck first and each time we had it up or were underneath it we put Liquid Wrench where ever we thought we'd be removing bolts to take off the trim and the running boards. Paid off later.
Two running boards were held up by 3 brackets, each bracket 3 13mm bolts, the metal tubes were held to the brackets by 6 10mm bolts. Minor bit of cosmetic rust on the running boards, we treated that with a rust dissolver and sanded. This was the first weekend and to be fair after a week without the running boards I sort of like the truck without them. We painted the metal tubes with rust-oleum flat black, relatively easy. We painted the plastic end caps with Krylon Fusion Satin; too glossy even in Satin next to the flat black tubes it was too shiny. We bought Krylon Camo Flat Black (same krylon fusion technology for plastic) for the end caps. Got all the paint at Wal-Mart as many had Krylon Fusion but not the black we needed nor the camo.
Next weekend we took off the rear bumper removing 4 bolts, needed a bit of cheater pipe for this, bumper came right off; twisted the bolt-assemblies a bit removing them but easy to straighten them out in a vice. Removed the plastic cover on the bumper by pinching each clip with some channel locks and applying the least bit of pressure with a LARGE flat head screwdriver from the other side. Got the cover off easily without damaging ONE of the clips.
Worked our way around the car removing the phillips head screws and the nylon fastners pulling as needed. Front bumper is a bit difficult, remove cowling under hood, 3 bolts underneath, two other bolts way up in each wheel well, must remove plastic wheel well cover first. Very difficult getting socket up in there to remove these bolts, a LONG extenstion would help, these were small, like 8 mm. Broke one off, long story, if it happens to you I can provide our solution. Just unlucky. In fact we broke 3 bolts off and ALL were from the passenger side, rust was heavier on this side and I attribute it to road-salt and slush gathering on that side due to the crown in the road.
Painting was cake, washed all the plastic really well with strong soap solution, then again with Castrol Super Clean degreaser, again strong. Rinsed, dried then started to paint, followed instructions, weather was perfect, warm and DRY so all went well in the painting. Let everything dry 24 hrs and then we started to put it back together. Only thing difficult was the front bumper b/c we broke the bolt inside the wheel well on the passenger side.

")