iLoveMyExploder
Well-Known Member
- Joined
- October 11, 2015
- Messages
- 139
- Reaction score
- 4
- City, State
- Texas
- Year, Model & Trim Level
- 1993 Explorer XLT 4X4
Window motor bushings replacement- CHEAP SOLUTION!
also: motor runs, bushings intact- window still not rolling up? SOLUTION!
there are plenty of threads and youtube vids about how to remove your door panels and pull out window motors, and how to take apart the motors to replace the bushings... so i wont get into that. im going to tell you how i made my own window motor bushings instead of buying them (because they are expensive, and i am dirt 'Po)
i recently repaired the crumbled window motor bushings problem in my '93 exploder. i looked into the cost of buying new ones... they cost almost $20 for a set of three at autozone... that meant $80 to fix all 4 of my widow motors. even if i had that kind of money to blow- i wouldnt do it for a handful of little plastic cylinders. i looked into alternative options. all i could find was info about using nuts in place of bushings. but there were also warnings that this could result in instant permanant major damage to the window motors, should someone push that button for too long (rolling the window up or down beyond it's set limits, senselessly running the motor)
so i sat there and thought long and hard about how i would solve this problem without spending a fortune or risking serious damage to the motor mechanisms. then it came to me-- why not just make my own bushings?
since this is only text, it will be long-winded because I am not the best at explaining things and I want to try to make this easy to understand...
here is how i made my own window bushings for less than 5 bucks worth of materials- you probably already have all this around your house already .....you will need:
1- a complete socket set
2- duck tape (i used gorilla tape)
3- hot glue gun
4- hot glue sticks (i used the kind that dry fast, and remain flexible when dry)
5- utility razor knife
...using my socket set, i picked out a socket that seemed to have the same outer diameter as the original bushing (all the bushings were crumbled to nothing, so it was guess work- you will probably have to do this from trial and error to get them to the right size). if you are lucky and you have at least one of the bushings still intact, compare it against sockets until you find one that is the close to the same outer diameter.
once i had picked out the socket that seemed appropriate, i then tore off about 4 or 5 inches of the duct tape, then tore that piece in half lengthwise... also tore off one many 2 inch strips.
this is where explaining gets complicated... if you could see photos, it would make so much more sense- and be easier to understand.
i wrapped the tape around the socket-- but in a manner so that the tape did not stick TO the socket- so that the socket could simply slide out from inside the roll up of tape. let me try to explain that in other words... i wrapped the tape around the socket sticky side out (smooth side against the socket itself). while doing this wrapping of tape around the socket, do your best to make the edges line up with each other.
once the tape is stuck to itself TIGHTLY around the socket (wrap it around itself like this a couple good times), then reverse the direction you are rolling the tape, so that sitcky side is now sticking to sticky side of the tape... if you are understanding what i am trying to explain, then you have made a little duct tape cylinder- silver side exposed both inside and outside of what you are making.
make sure to make many wraps of additional tape around this construction.... so that it will retain its perfectly round shape. (the first 3 i made- i didnt put enough layers around the duct tape moulds, and they didnt turn out perfectly round- one of them actually turned out oval shaped- but it still worked in the end)
once you have sucessfully made a duct tape cylinder... BEFORE you pull the socket out of it, put one of those 2 inch scraps of tape on the one end of the cylinder... but slightly pull the socket out of the cylinder so that when you stick that tape on the end- the tape will not be sticking onto the end of the socket itself. once a scrap of tape is secured all around the base.... pull out the socket. if you do this right, it will make a cylinder shaped mould with one closed side, the other side open.
repeat this process two more times- so that you have a total of 3 moulds. i then put a strip of tape on the table, sticky side up... and stuck the molds onto that strip of tape- so that they would stand up on their own- open side up, and also be close together for easy filling.
then get your hot glue gun.... fill up the moulds as quickly as you can with the hot glue... in a manner that it will melt fast and pool up in the bottom of the mould and solidify into one solid peice, rather than dry all clumpy or not even fill your molds.... i stuck the nozzle directly inside the mould to make sure the hot glue would not have a chance to cool down before it made it to the bottom of the mould. its better to put too much hot glue in there than not enough. that way you end up with something more like a log rather than a tiny disc.... also that way you have something to hold onto while cutting to size later.
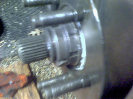
after you get them all filled up with hot glue.... give plenty of time to cool down. i guess common sense would be to make sure the old crumbled bushings are cleaned out of the inside of the motor.
take off the tape from around the hot glue you have squirted into the moulds- simply unravel the tape. you should end up with 3 hot glue logs. cut one end off of one of the logs so that it is flat (if it is not already flat). stick it flat side down into the gear wheel where the bushing will ultimately sit....
mark the log at the top of the gear wheel...cut the hot glue log where you marked it. if it is slightly shorter, thats ok. but you dont want them to be too short, or too long. cut it so that when your new bushing is sitting in place- it is not taller than the thickness of the wheel, since another part will sandwich them all in place. if the bushings are too long, the window motor will not re-assemble properly.
cut all 3 of your hot glue logs into the right size bushings. you might can get more than one bushing from each hot glue log you have made- if you managed to properly get enough hot glue into the mould. i suggest choosing from the best areas of the log to make a bushing from. if the bushing you cut is one whole solid piece, youre good to go. if your new bushing looks like the hot glue dried into a jigsaw puzzle- it may fall apart while in use. i wouldnt worry about wasting hot glue since its so cheap. make yourself a quality product LOL!
from here, just re-assemble the motor enough to sandwich the bushings in place. if you cannot get the top part of the mechanism
to easily slide into place with all 3 bushings installed, your bushings are too big. start all over... size down on the socket- to make a smaller mold. use trial and error until the top part of the window motor mechanism easily slides in place with the bushings where they belong.
assuming that gear/sprocket went on easily... using your hand- test and see if your bushings are a good enough size... grab ahold of that sprocket/gear and try and turn it use a good amount of hand force.... if it spins freely without much/any resistance, your bushings are too small- start all over, but go a size up with your sprocket- to make a bigger mold.
IF there is a little bit of back and forth slack with the movement when you do this test... thats ok. it will still work- it did for me. the first 3 bushings i made were not perfect... but by the time i got to that last window- i had perfected making these hot glue bushings- there was hardly no slack at all in the final one.
i chose to use the kind of hot glue that stays flexible like dense rubber- in hopes that if somebody runs that motor too much, the hot glue bushings will squish a bit and then spring back into shape.... so that the plastic threads inside the window motor mechanism would not bind up and strip out.
so anyway- i did this with all my window motors in the 4X4.... they all work now. i guess time will tell if bushings made of hot glue are equal to or perhaps better than the original OEM parts. ...either way- i am still not paying $80 for bushings!
on a side note: i once had a broken window motor (in a different vehicle)- i thought the bushings had gone bad, but when i opened up the window motor- the bushings were all intact.... it took me forever to figure out what the problem was. well.... i eventually figured it out.
its going to be hard to expain, but i will try....
like i was explaining earlier, doing that hand test with the top part of the mechanism that holds the bushings in place.... this part may seem like one solid piece of metal... but it is not. it is two peices. one peice holds the bushings in place, the other is basically the gear. the gear part slides into the bushing part.
the problem i had was this- whatever was holding those two peices togther... had gave out. a good way to test to see if you have this problem... would be to use 2 pairs of pliers... clench the bearing side with one pair... and the gear with the other. use light force to see if these two peices move independently from each other. if there is no movement, obviously youre good to go.
if there is movement....
my solution was this.... i forced the peices apart by tapping on the inner side of it with a screwdriver and small hammer until they had become t separate peices of metal. then i cleaned all the grease off both peices with dish soap, dried them.... and hot glued them back together the way they originally were. it worked ever since. it wasnt really that easy since the cold metal made the glue solidify really fast. a few heavy dabs at the top and around where the gear will be should do the trick.. trial and error i guess. JB weld would probably be a better fix than hot glue, but i was making do with what i had.
also: motor runs, bushings intact- window still not rolling up? SOLUTION!
there are plenty of threads and youtube vids about how to remove your door panels and pull out window motors, and how to take apart the motors to replace the bushings... so i wont get into that. im going to tell you how i made my own window motor bushings instead of buying them (because they are expensive, and i am dirt 'Po)
i recently repaired the crumbled window motor bushings problem in my '93 exploder. i looked into the cost of buying new ones... they cost almost $20 for a set of three at autozone... that meant $80 to fix all 4 of my widow motors. even if i had that kind of money to blow- i wouldnt do it for a handful of little plastic cylinders. i looked into alternative options. all i could find was info about using nuts in place of bushings. but there were also warnings that this could result in instant permanant major damage to the window motors, should someone push that button for too long (rolling the window up or down beyond it's set limits, senselessly running the motor)
so i sat there and thought long and hard about how i would solve this problem without spending a fortune or risking serious damage to the motor mechanisms. then it came to me-- why not just make my own bushings?
since this is only text, it will be long-winded because I am not the best at explaining things and I want to try to make this easy to understand...
here is how i made my own window bushings for less than 5 bucks worth of materials- you probably already have all this around your house already .....you will need:
1- a complete socket set
2- duck tape (i used gorilla tape)
3- hot glue gun
4- hot glue sticks (i used the kind that dry fast, and remain flexible when dry)
5- utility razor knife
...using my socket set, i picked out a socket that seemed to have the same outer diameter as the original bushing (all the bushings were crumbled to nothing, so it was guess work- you will probably have to do this from trial and error to get them to the right size). if you are lucky and you have at least one of the bushings still intact, compare it against sockets until you find one that is the close to the same outer diameter.
once i had picked out the socket that seemed appropriate, i then tore off about 4 or 5 inches of the duct tape, then tore that piece in half lengthwise... also tore off one many 2 inch strips.
this is where explaining gets complicated... if you could see photos, it would make so much more sense- and be easier to understand.
i wrapped the tape around the socket-- but in a manner so that the tape did not stick TO the socket- so that the socket could simply slide out from inside the roll up of tape. let me try to explain that in other words... i wrapped the tape around the socket sticky side out (smooth side against the socket itself). while doing this wrapping of tape around the socket, do your best to make the edges line up with each other.
once the tape is stuck to itself TIGHTLY around the socket (wrap it around itself like this a couple good times), then reverse the direction you are rolling the tape, so that sitcky side is now sticking to sticky side of the tape... if you are understanding what i am trying to explain, then you have made a little duct tape cylinder- silver side exposed both inside and outside of what you are making.
make sure to make many wraps of additional tape around this construction.... so that it will retain its perfectly round shape. (the first 3 i made- i didnt put enough layers around the duct tape moulds, and they didnt turn out perfectly round- one of them actually turned out oval shaped- but it still worked in the end)
once you have sucessfully made a duct tape cylinder... BEFORE you pull the socket out of it, put one of those 2 inch scraps of tape on the one end of the cylinder... but slightly pull the socket out of the cylinder so that when you stick that tape on the end- the tape will not be sticking onto the end of the socket itself. once a scrap of tape is secured all around the base.... pull out the socket. if you do this right, it will make a cylinder shaped mould with one closed side, the other side open.
repeat this process two more times- so that you have a total of 3 moulds. i then put a strip of tape on the table, sticky side up... and stuck the molds onto that strip of tape- so that they would stand up on their own- open side up, and also be close together for easy filling.
then get your hot glue gun.... fill up the moulds as quickly as you can with the hot glue... in a manner that it will melt fast and pool up in the bottom of the mould and solidify into one solid peice, rather than dry all clumpy or not even fill your molds.... i stuck the nozzle directly inside the mould to make sure the hot glue would not have a chance to cool down before it made it to the bottom of the mould. its better to put too much hot glue in there than not enough. that way you end up with something more like a log rather than a tiny disc.... also that way you have something to hold onto while cutting to size later.
after you get them all filled up with hot glue.... give plenty of time to cool down. i guess common sense would be to make sure the old crumbled bushings are cleaned out of the inside of the motor.
take off the tape from around the hot glue you have squirted into the moulds- simply unravel the tape. you should end up with 3 hot glue logs. cut one end off of one of the logs so that it is flat (if it is not already flat). stick it flat side down into the gear wheel where the bushing will ultimately sit....
mark the log at the top of the gear wheel...cut the hot glue log where you marked it. if it is slightly shorter, thats ok. but you dont want them to be too short, or too long. cut it so that when your new bushing is sitting in place- it is not taller than the thickness of the wheel, since another part will sandwich them all in place. if the bushings are too long, the window motor will not re-assemble properly.
cut all 3 of your hot glue logs into the right size bushings. you might can get more than one bushing from each hot glue log you have made- if you managed to properly get enough hot glue into the mould. i suggest choosing from the best areas of the log to make a bushing from. if the bushing you cut is one whole solid piece, youre good to go. if your new bushing looks like the hot glue dried into a jigsaw puzzle- it may fall apart while in use. i wouldnt worry about wasting hot glue since its so cheap. make yourself a quality product LOL!
from here, just re-assemble the motor enough to sandwich the bushings in place. if you cannot get the top part of the mechanism
to easily slide into place with all 3 bushings installed, your bushings are too big. start all over... size down on the socket- to make a smaller mold. use trial and error until the top part of the window motor mechanism easily slides in place with the bushings where they belong.
assuming that gear/sprocket went on easily... using your hand- test and see if your bushings are a good enough size... grab ahold of that sprocket/gear and try and turn it use a good amount of hand force.... if it spins freely without much/any resistance, your bushings are too small- start all over, but go a size up with your sprocket- to make a bigger mold.
IF there is a little bit of back and forth slack with the movement when you do this test... thats ok. it will still work- it did for me. the first 3 bushings i made were not perfect... but by the time i got to that last window- i had perfected making these hot glue bushings- there was hardly no slack at all in the final one.
i chose to use the kind of hot glue that stays flexible like dense rubber- in hopes that if somebody runs that motor too much, the hot glue bushings will squish a bit and then spring back into shape.... so that the plastic threads inside the window motor mechanism would not bind up and strip out.
so anyway- i did this with all my window motors in the 4X4.... they all work now. i guess time will tell if bushings made of hot glue are equal to or perhaps better than the original OEM parts. ...either way- i am still not paying $80 for bushings!
on a side note: i once had a broken window motor (in a different vehicle)- i thought the bushings had gone bad, but when i opened up the window motor- the bushings were all intact.... it took me forever to figure out what the problem was. well.... i eventually figured it out.
its going to be hard to expain, but i will try....
like i was explaining earlier, doing that hand test with the top part of the mechanism that holds the bushings in place.... this part may seem like one solid piece of metal... but it is not. it is two peices. one peice holds the bushings in place, the other is basically the gear. the gear part slides into the bushing part.
the problem i had was this- whatever was holding those two peices togther... had gave out. a good way to test to see if you have this problem... would be to use 2 pairs of pliers... clench the bearing side with one pair... and the gear with the other. use light force to see if these two peices move independently from each other. if there is no movement, obviously youre good to go.
if there is movement....
my solution was this.... i forced the peices apart by tapping on the inner side of it with a screwdriver and small hammer until they had become t separate peices of metal. then i cleaned all the grease off both peices with dish soap, dried them.... and hot glued them back together the way they originally were. it worked ever since. it wasnt really that easy since the cold metal made the glue solidify really fast. a few heavy dabs at the top and around where the gear will be should do the trick.. trial and error i guess. JB weld would probably be a better fix than hot glue, but i was making do with what i had.