Yostyexplorer94's 1994 Explorer Registry | Page 5 | Ford Explorer Forums - Serious Explorations

  • Register Today It's free!

Yostyexplorer94's 1994 Explorer Registry

20190726_175026-jpg.jpg

ua2019yost3.jpg
I got this explorer back in 2004 when I was 15 from my mom. It had a blown transmission that I had to get replaced. Since then I have modified it. The only bolts I haven't turned would be on the original motor.

This picture was taken when I spend most of my day washing and waxing it with McGuire's 3 step wax system.... boy did it shine!

35683024273_0c6cb30642_z.jpg


Stock sized BF Goodrich All Terrains & a brush guard from a 1998 - 2000 Ford Ranger

36445326156_37b7a383e5_z.jpg


3" body lift and a home built bumper

36491386555_3c459e5a46_z.jpg


New BF Goodrich 33"x10.5-r15's

36491385855_a643b06a79_z.jpg


Put bigger tires on it (35" Super Swampers LTB's)

36094552190_5459a57035_z.jpg


A broken front axle shaft resulted in a solid axle swap. Click here for the Solid Axle Swap build thread!
36445327456_3cc14c69d0_z.jpg


Changed my grill to a ranger one!

35656254604_dd60945125_z.jpg


37" tires, rock sliders, and a winch

20171126_122828.jpg


1994 Ford Explorer Specs
  • 1979 f150 Dana 44 Front Axle
  • 1989 F150 Ford 8.8 Rear Axle
  • Wheels & Tires
    • Dirty Life Canyon Race Matte Black
      • First torque 10 - 14 ft lbs
      • Final torque 18 - 24 ft lbs
    • Cooper STT Pro 37x12.50r17
      • 12oz Airsoft BBs each
  • 1991-1994 Ford Explorer Front Driveshaft (Front & Rear)
    • Front: explorer front lengthed. Double cardan (non greasable) centering ball spicer 10018440
    • Rear: adams driveshaft 1310 joints. Double cardan centering ball (greasable) spicer 10018465
  • Behemoth Drivetrain 1354 Doubler
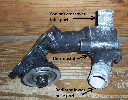
  • 1990 Ford Econoline E-150 Saginaw Power Steering Pump
    • Yost Offroad Bracket
    • 1990 Ford Econoline E-150 High Pressure Line
    • 1994 Ford Explorer Return Line
  • 3g Ford Alternator
    • Front Bearing 6303 RS
    • Rear Bearing 6000-2RS
  • Speedometer Cable – Ford Aerostar - Atp part # y-869 speedo cable
  • Steering Fix Bushing – JCRoffroad.com Part # PLYBSH
  • Ruff stuff bushings: DAY MO2153 1.5"od x 3/4"id
  • Tie Rod End Part # ES2233L, ES2234R, ES2234R, ES2027L
  • Body mounts
    • Rad support:
    • A pillar:
    • B pillar:
    • C pillar: energy susp. 9.4104G
    • Rear: energy susp. 9.4104G
  • Brakes
    • Front
      • 1979 f150 factory brake setup
      • Brake Caliper Hoses
        • 1979-1987 GM 3/4 Ton (Skyjacker Part #FBL17 with Skyjacker Part #38AB Square Banjo, Angled)
      • Frame to axle hose
        • 1980-1996 f150 rear hose (Skyjacker RBL80)
    • Rear
      • 1989 f150 factory brake setup
      • Frame to axle hose
        • 1980-1996 f150 rear hose (Skyjacker RBL80)
  • Parking Brake Part #’s
    • Intermediate Cable # 1994 explorer drivers side rear
    • Driver Side Cable # 1989 F150 drivers side rear
    • Passenger Side Cable # 1994 Jeep Grand Cherokee passenger rear
  • Old Man Emu by ARB CS042R
    • Front spring eye bushing RB-237
    • Rear spring eye bushing RB-131
  • U-bolt 8" X 3 1/4" X 10" Barnes 150 lb ft
  • Rear homemade below the frame mount shackle hanger
    • Bushing m02240
  • Shocks
    • Front Part #
      • A2060 – ADX 2.0 Adventure Series Remote Reservoir Aluminum Monotube Shock
      • Monroe 34687
        • Compressed 18"
        • Extended 31"
    • Rear Part #
      • Monroe 34672
        • Compressed 14.25"
        • Extended 23"
  • Manifold/Header bolt is 8mmX1.25 thread (Both Sides)
    • 75mm / Quantity: 8
    • 45mm / Quantity: 4
  • Y pipe to the manifold is 12mmx1.75 thread (Both Sides)
    • 50mm / Quantity: 4
  • M5OD Bellhousing Bolts
    • These are grade 10.9 bolts
      • top four bolts : 10-1.5x60mm
      • middle two bolts : 10-1.5x70mm
      • bottom two bolts: 10-1.5x75mm
  • Thermostat housing bolts
    • 6mm x 1.00
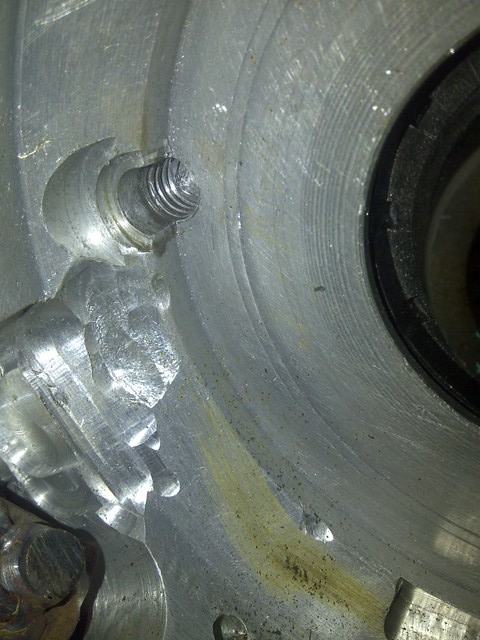
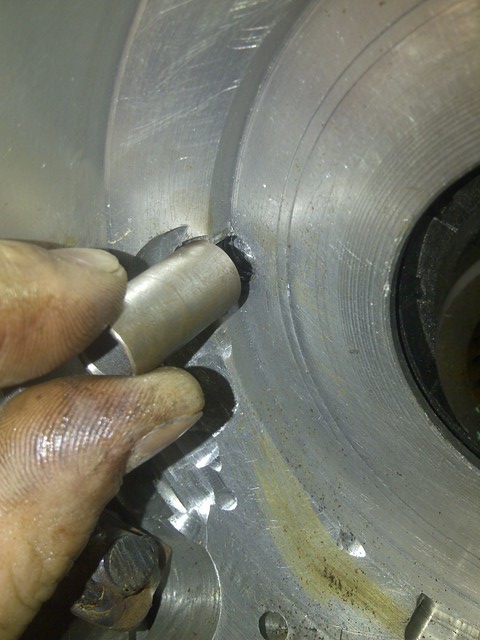
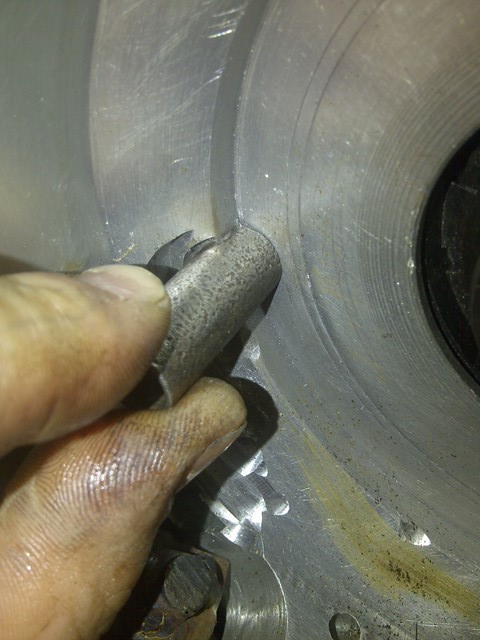
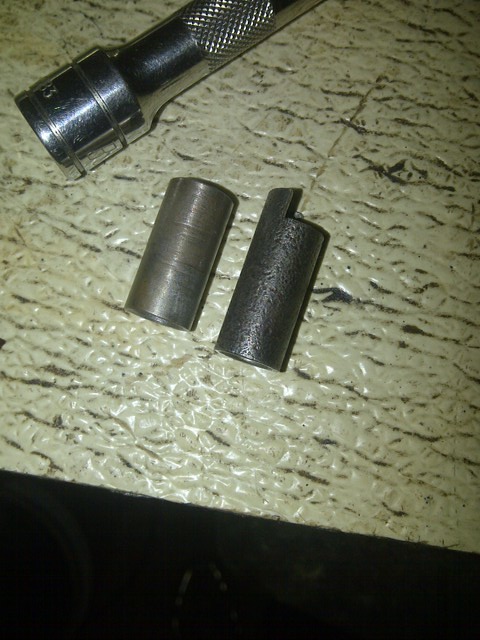
  • The part numbers for the metal plugs are Dana #219-3052 or Dorman #555-108 and as was mentioned you need three plugs to do the job.
  • 5-760 Joint full circle snap ring lot # 123050a item # dsh-30stpa
  • Winch rope retainer bolt
    • M6x1.0
    • Length 1.2mm
    • 4mm hex key head

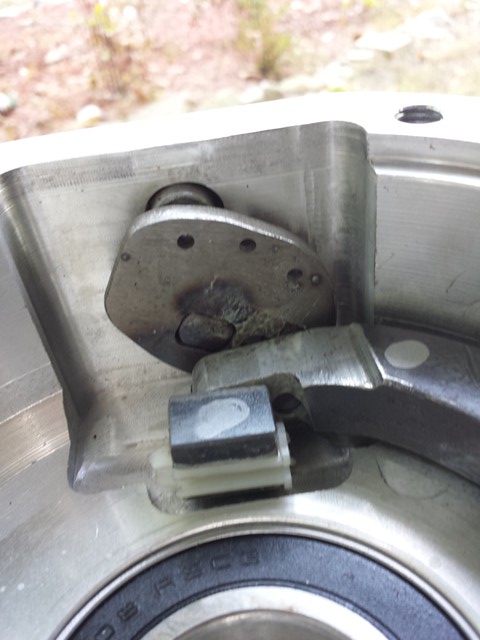
Factory explorer manual hub oring
  • Napa # 727-2153


Join the Elite Explorers for $20 each year.
Elite Explorer members see no advertisements, no banner ads, no double underlined links,.
Add an avatar, upload photo attachments, and more!
.


I received the strong box from behemoth fab on Wednesday. It would not shift into low range. It was very upsetting.

My dad and I troubleshot it and determined the sleeve that the shift rides on was shifting because it did not fully sit on the housing.

Here is the bolt hole.

36096872010_7b39a4a67f_z.jpg


Here is the sleeve in the position where it bolts. The sleeve would shift the fork over when it was tightened.
36096871320_1a972b9c66_z.jpg


Here is my fix.
36096870880_04a25cf402_z.jpg


Comparison; Behemoth Drivetrains sleeve on the left, Mine on the right

36096872680_524ac58922_z.jpg


A little extra needed clearance on the fork.
36096873260_ccf5118dd2_z.jpg


Other pictures:


I guess now I will put it in and see what happens when torque is applied to it.


Join the Elite Explorers for $20 each year.
Elite Explorer members see no advertisements, no banner ads, no double underlined links,.
Add an avatar, upload photo attachments, and more!
.


36096869470_49a1ebfd6e_z.jpg

I used an empty 1354 case as my mockup transfer case and figured out if I cut the mounts for the dampener off, it fits real nice without modifying my radius arm cross member. I was originally going to use the dampener mounts to make a transfer case frame mount with a Dom bushing but I had all kinds of clearance problems. Behemoth DT sent me a mounting kit for the strongbox with a Dom bushing that will work quite nicely so I will use that instead. I decided to cut the mounts off of the good transfer case so no turning back now.

36447687086_8588818989_z.jpg


The doubler is really hard to shift into high. really easy to shift to neutral. somewhat hard to shift into low (easier than high). Jacob from behemoth fab told me to shift it while the vehicle is rolling, which is about the only way to get high to engage and even that takes forever to accomplish. :thumbdwn:


I tore the strong box out to see why it is still not shifting right. When I pulled the drain plug, the magnet on the plug was full of fine metal shavings... SWEET!

The disk is rubbing the shift fork still. It rubbed itself through.

36447684016_d60cb0a501_z.jpg


35658815014_b86b238fd3_z.jpg


So I clearance it. Can't have metal on metal rubbing like that.

36447683506_ee659ed884_z.jpg


The result is nothing is really rubbing now and still hard to shift.

The slide on the fork is quite a bit smaller than a factory fork. This is my binding problem.

36447684576_5d4bb32c14_z.jpg


36447685436_cc69d2fc30_z.jpg


Two and a half months and i am still waiting on a replacement strong box.
Talked to jacob on the phone. He said he is going to make me a new strongbox and it will take 3 weeks.


Behemoth Strong Box Pictures

36097551670_74e8825a4f_z.jpg


36494547585_684d24da2c_z.jpg


35686067173_44ff048422_z.jpg


36097550200_007082c58a_z.jpg


35686065773_b3fd1f4784_z.jpg


36097549230_303537c71b_z.jpg


35686064163_12df72f1dd_z.jpg


Old Strong Box on the left. New one on the right. 1" length difference.

36097547930_efaca4663a_z.jpg


35686062843_1b8647c4f6_z.jpg


35686060163_ea418273f2_z.jpg


Here is the clearance between my radius arm crossmember and the transfer case. The plan is to clearance the floor board and clock the transfer case up to clear the crossmember.


So far the doubler is working great. I have to extend the front driveshaft yet so i can test it turning all 4 tires.


At another standstill with the doubler. I developed a bad leak coming from the rear of the doubler. Tore it out and the bearing was out of the housing 1/2". It never had the snap ring installed... Sent jacob a message and he is shipping me a snap ring. The doubler should be good when i get a snap ring in there.

Meanwhile i trimmed my radius arm crossmember to make installing the transfer case much easier. I also removed the wires for the abs speed sensor at the transfer case.

Update: I got the snap ring and the doubler is back together. Now I got to install it under the explorer.


Atp part # y-869 speedo cable is the longer speedometer cable aerostar part #
I used this because with the doubler the stock one is too short.


Join the Elite Explorers for $20 each year.
Elite Explorer members see no advertisements, no banner ads, no double underlined links,.
Add an avatar, upload photo attachments, and more!
.


36357772881_b00463bc5a_z.jpg


35686597853_fd03320e9a_z.jpg


35686933993_a746bbdd04_b.jpg


I thought I was gonna cause a traffic accident. My buddy's house is a long a busy road and the amount of people that got distracted by this was funny to watch!


Back
Top