HiImBrian
Explorer Addict
- Joined
- September 4, 2009
- Messages
- 1,426
- Reaction score
- 7
- City, State
- St. Petersburg, Florida
- Year, Model & Trim Level
- 2003 Explorer Eddie Bauer
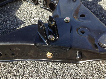
Dignan said:Welded some bolts to the center discs to keep them from spinning. Worked quite well. The only other problem I ran into was that my bolts didn't match what everyone else used. B, C, D, E were all the same size and I used 120mm on all of them. The 130s worked but I couldn't reuse any original bolts except A and one of those was bent so I had to replace it. Other than that, lift went ok and its done. I have an odd problem though, since the lift when I stop at a red light my idle will drop a couple hundred rpms then jump up a few hundred then die. Did I pull something loose?
This happened to me at the post office yesterday.... I just wrote it off as my ex being temperamental....
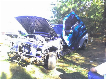
Time to crawl back under the hood....
")